
【大阪 / 横浜】インフラ / サーバーサイドエンジニア募集中!

【導入実績 500社以上】AWS 構築・運用保守・監視サービス

【CentOS 後継】AlmaLinux OS サーバー構築・移行サービス

【WordPress 専用】クラウドサーバー『ウェブスピード』

【格安】Webサイト セキュリティ自動診断「クイックスキャナー」

【予約システム開発】EDISONE カスタマイズ開発サービス
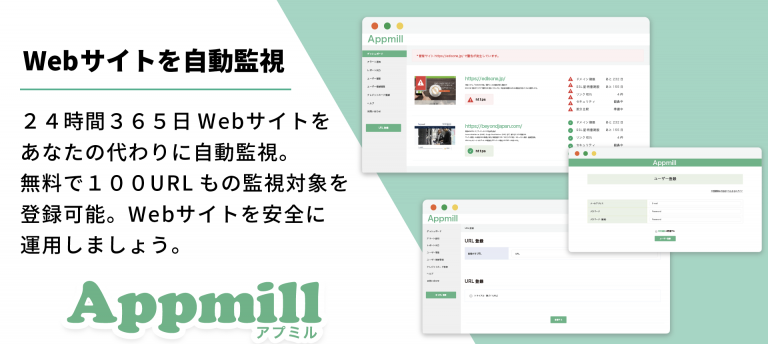
【100URLの登録が0円】Webサイト監視サービス『Appmill』

【200ヶ国以上に対応】グローバル eSIM「ビヨンドSIM」

【中国への旅行・出張・駐在なら】中国SIMサービス「チョコSIM」

【グローバル専用サービス】北米・中国でも、ビヨンドのMSP

【YouTube】ビヨンド公式チャンネル「びよまるチャンネル」
AlmaLinux 9 に Oracle Cloud Agent を無理やり入れる

目次
どうも、株式会社ビヨンドの北田です。
今回は Oracle Cloud Agent を AlmaLinux 9 にインストールする方法について解説します。
※ 今回の記事の方法は、公式に推奨されていないインストール方法ですので、一切の責任を負いかねます。
また、記事作成現在(2024/05/01)の状況とはドキュメント情報等が違う可能性があることを予めご了承ください。
経緯
ビヨンドでは現在新卒向けに、各クラウドで環境構築をする研修を進めています。
その中でCentOS の後継である、AlmaLinux 9 で作成したインスタンスの監視を行うために、Oracle Cloud Agent をインストールしようとしたのですが…
No match for argument: oracle-cloud-agent
とエラーが出てしまい、公式ドキュメントを見るとどうやらAlmaLinux9はサポートの対象外のイメージだったようです…
Oracle Cloud Agent:Oracle Cloud Agentは、現在のプラットフォーム・イメージおよび現在のプラットフォーム・イメージに基づくカスタム・イメージでサポートされています。Oracle Cloud Agent は、デフォルトで現在のプラットフォーム・イメージにインストールされます。
古いプラットフォーム・イメージを使用している場合は、Oracle Cloud Agent ソフトウェアを手動でインストールする必要があります。2018年11月15日より後の日付のイメージを選択します。(Ubuntuの場合は、2019年2月28日よりも後であることが必要です)
その他のイメージに Oracle Cloud Agent を手動で正常にインストールできる可能性がありますが、これは他のオペレーティング・システムではテストされておらず、動作は保証されません。
〇 引用:https://docs.oracle.com/ja-jp/iaas/Content/Compute/Tasks/manage-plugins.htm#manage-plugins
ドキュメント内にも書いてくださっていますが、その他のイメージでも Oracle Cloud Agent をインストールできる可能性はあるが、テストはされていないので動作は保証出来ません とのこと。
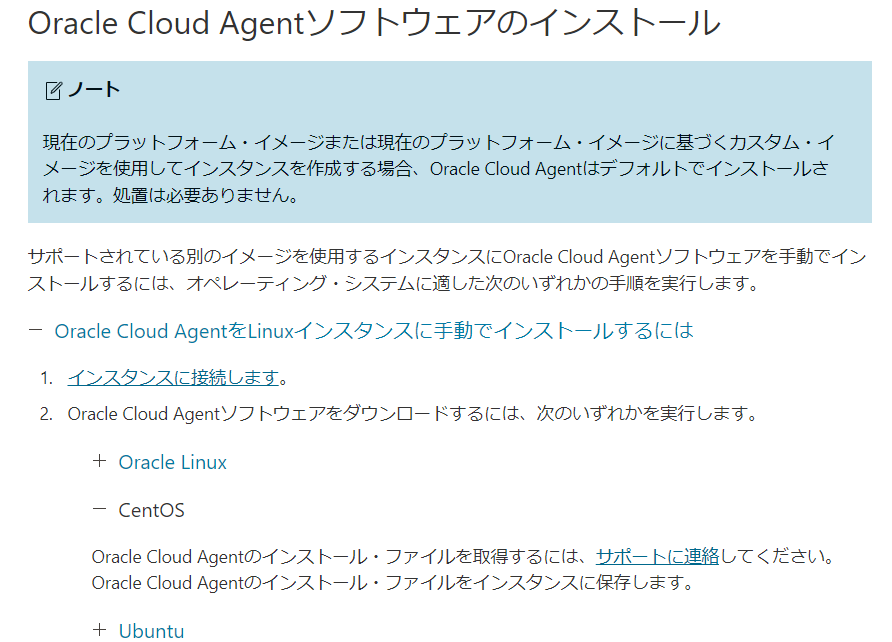
また、公式ドキュメントをもう少し探ってみると、「Oracle Cloud Agent インストール・ファイルを入手するには、サポートに連絡してください。」という風に記述されています。
とはいえ、今回はどうしてもインストールをしたいので、無理やりインストールしてみることに。
そもそも Oracle Cloud Agent とは…?
Oracle Cloud Agent は、Oracle Cloud Infrastructure(OCI)にてコンピュート・インスタンスで実行されているプラグインを管理する軽量プロセスです。
プラグインは、パフォーマンス・メトリックを収集し、OS更新をインストールし、その他のインスタンス管理タスクを実行します。
インスタンスでプラグインを使用するには、Oracle Cloud Agent ソフトウェアをインスタンスにインストールし、プラグインを有効にして、それぞれのプラグインを実行する必要があります。特定のプラグインを使用する前に、追加の構成タスクを実行することが必要な場合があります。
今回は「コンピュート・インスタンスのモニタリング」を行いたいため、前提条件を確認した上で実施してください。
手順
1. リポジトリを入れる
まずはインストール前の確認をします。
# sudo dnf info oracle-cloud-agent
Last metadata expiration check: 0:18:11 ago on Wed May 1 05:36:04 2024.
Error: No matching Packages to list
リポジトリもないためNo matching Packages to listと出てしまいますね。
リポジトリの情報は /etc/yum.repo.d 以下のファイルで指定しているので、ここに直接ファイルを配置していきます。
# sudo vi /etc/yum.repos.d/oci-included-ol9.repo
[ol9_oci_included]
name=Oracle Linux $releasever OCI Included Packages ($basearch)
baseurl=https://yum-phx.oracle.com/repo/OracleLinux/OL9/oci/included/$basearch/
gpgcheck=1
priority=1
enabled=1
記述する内容はこんな感じです。
今回のベースURLは Oracle Linux 9 のパッケージを参照しています。
また、priority(優先度)は環境に応じて変えてあげてくださいね。
GPGキーに関しては対応ディストリビューションではないため /etc/pki/rpm-gpg/ 配下にないので、直接インポートしてあげます。
# sudo rpm --import https://yum.oracle.com/RPM-GPG-KEY-oracle-ol9
インポートが出来たらOKです。
2. 必要なモジュールのインストール
Agent のインストールを行う前に、「osmsplugin」というプラグインの読み込みを行うために必要な、librepo というモジュールがないと、以下のようなエラーが表示されます。
Failed loading plugin "osmsplugin": No module named 'librepo'
なので以下コマンドでモジュールをインストールしていきます。
# sudo dnf install python3-librepo
Failed loading plugin "osmsplugin": No module named 'librepo'
Last metadata expiration check: 0:53:43 ago on Wed May 1 07:24:35 2024.
Dependencies resolved.
=============================================================================================================================================================================================================================================
Package Architecture Version Repository Size
=============================================================================================================================================================================================================================================
Installing:
python3-librepo x86_64 1.14.5-1.el9 baseos 49 k

Transaction Summary
=============================================================================================================================================================================================================================================
Install 1 Package

Total download size: 49 k
Installed size: 183 k
Is this ok [y/N]: y
Downloading Packages:
python3-librepo-1.14.5-1.el9.x86_64.rpm 1.9 MB/s | 49 kB 00:00
---------------------------------------------------------------------------------------------------------------------------------------------------------------------------------------------------------------------------------------------
Total 57 kB/s | 49 kB 00:00
Running transaction check
Transaction check succeeded.
Running transaction test
Transaction test succeeded.
Running transaction
Preparing : 1/1
Installing : python3-librepo-1.14.5-1.el9.x86_64 1/1
Running scriptlet: python3-librepo-1.14.5-1.el9.x86_64 1/1
Verifying : python3-librepo-1.14.5-1.el9.x86_64 1/1

Installed:
python3-librepo-1.14.5-1.el9.x86_64

Complete!
モジュールをインストールできたら Oracle Cloud Agent を入れていきます。
3. Oracle Cloud Agent のインストール
# sudo dnf install oracle-cloud-agent
Last metadata expiration check: 0:02:16 ago on Wed May 1 07:24:35 2024.
Dependencies resolved.
=============================================================================================================================================================================================================================================
Package Architecture Version Repository Size
=============================================================================================================================================================================================================================================
Installing:
oracle-cloud-agent x86_64 1.40.0-11632.el9 ol9_oci_included 127 M</pre>
Transaction Summary
=============================================================================================================================================================================================================================================
Install 1 Package

Total download size: 127 M
Installed size: 360 M
Is this ok [y/N]: y
Downloading Packages:
oracle-cloud-agent-1.40.0-11632.el9.x86_64.rpm 15 MB/s | 127 MB 00:08
---------------------------------------------------------------------------------------------------------------------------------------------------------------------------------------------------------------------------------------------
Total 15 MB/s | 127 MB 00:08
Running transaction check
Transaction check succeeded.
Running transaction test
Transaction test succeeded.
Running transaction
Preparing : 1/1
Running scriptlet: oracle-cloud-agent-1.40.0-11632.el9.x86_64 1/1
Installing : oracle-cloud-agent-1.40.0-11632.el9.x86_64 1/1
Running scriptlet: oracle-cloud-agent-1.40.0-11632.el9.x86_64 1/1
Changing ownership of agent.yml* files to oracle-cloud-agent:oracle-cloud-agent
Changing ownership of /var/log/oracle-cloud-agent/updater.log to oracle-cloud-agent-updater:adm
Setting capabilities on bastions plugin
2024/05/01 07:53:02 Capability set on filePath: /usr/libexec/oracle-cloud-agent/plugins/bastions = [1 0 0 10 11 0 0 0 0 0 0 0 0 0 0 0 0 0 0 0]
2024/05/01 07:53:02 Capability set on filePath: 20 = [1 0 0 10 11 0 0 0 0 0 0 0 0 0 0 0 0 0 0 0]
2024/05/01 07:53:02 Capability set properly : [1 0 0 10 11 0 0 0 0 0 0 0 0 0 0 0 0 0 0 0]
Changing ownership of /var/lib/ocarun/db/runcommand.db to ocarun:oracle-cloud-agent
post install: starting services

Verifying : oracle-cloud-agent-1.40.0-11632.el9.x86_64 1/1

Installed:
oracle-cloud-agent-1.40.0-11632.el9.x86_64

Complete!
4. インストール後確認
インストールができたらそれぞれ確認をしていきます。
まずはインストールが適切にできているか確認。
# sudo dnf list installed | grep "oracle-cloud-agent"
oracle-cloud-agent.x86_64 1.40.0-11632.el9 @ol9_oci_included
配置したリポジトリからインストールされていればOKです。
続いてプログラムの起動確認をします。
# sudo systemctl status oracle-cloud-agent.service
● oracle-cloud-agent.service - Oracle Cloud Infrastructure agent for management and monitoring
Loaded: loaded (/etc/systemd/system/oracle-cloud-agent.service; enabled; preset: disabled)
Active: active (running) since Wed 2024-05-01 08:12:01 UTC; 28min ago
Docs: https://docs.cloud.oracle.com/iaas/
Main PID: 4071 (agent)
Tasks: 25 (limit: 48708)
Memory: 38.8M
CPU: 1.948s
CGroup: /oca.slice/oracle-cloud-agent.service
tq4071 /usr/libexec/oracle-cloud-agent/agent
tq4081 /usr/libexec/oracle-cloud-agent/plugins/gomon/gomon
mq4118 /usr/libexec/oracle-cloud-agent/plugins/oci-wlp/oci-wlp
running になっていれば起動しています。
最後にコンソールから値が取れているか確認してみましょう。
■ インストール前
■ インストール後

しっかりと値が取れていますね!
以上、AlmaLinux 9 に無理やり Oracle Cloud Agent を入れる方法でした。
とはいえ公式がサポートしてくれるのも時間の問題だと思いますので、参考程度にしていただければ幸いです!
 44
44 
【2024.6.30 CentOS サポート終了】CentOS サーバー移行ソリューション

【2025.6.30 Amazon Linux 2 サポート終了】Amazon Linux サーバー移行ソリューション

【大阪 / 横浜】インフラエンジニア・サーバーサイドエンジニア 積極採用中!
この記事をかいた人
About the author
