Try out the AWS Application Load Balancer
2016.09.20
 0
0 
My name is Sashihara and I am an infrastructure engineer
I'll try out AWS's application load balancer, which was released last month.
AWS | Elastic Load Balancing | Application Load Balancer
The main difference from ELB is the addition of L7 distribution functionality.
It appears to support path-based routing.
Furthermore, the addition of path-based routing has also led to the creation of a new group called a target group.
Unfortunately, it doesn't seem to support domain-level distribution.
Other features include support for HTTP/2 and various other additions.
Try Application Load Balancer
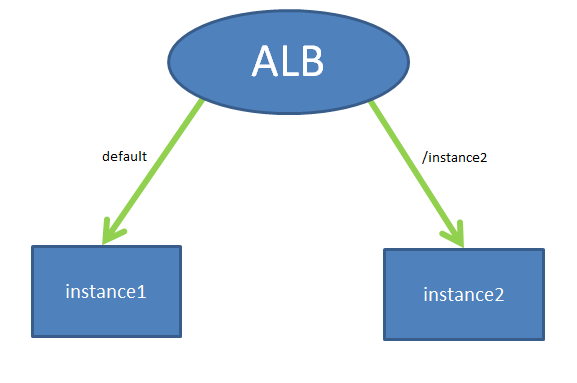
For now, we'll prepare two EC2 instances and place an ALB (Application Load Balancer) above them.
For normal access, we'll refer to instance1, and when an access is made via the path "/instance2", we'll access instance2.
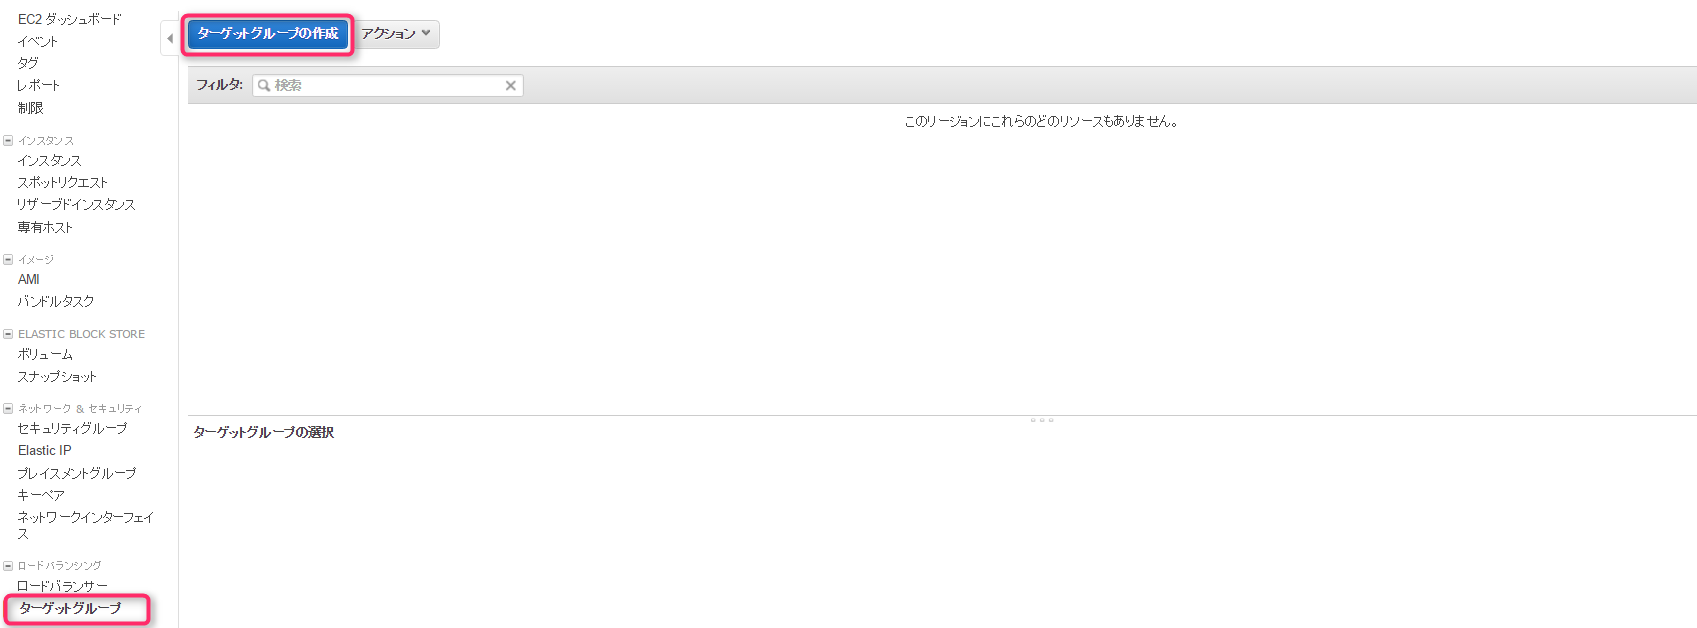
Creating a Target Group
First, create the target group as explained above
A target group, as the name suggests, is a group used to specify targets.
Since there are target groups in the EC2 dashboard, simply proceed to "Create target group".
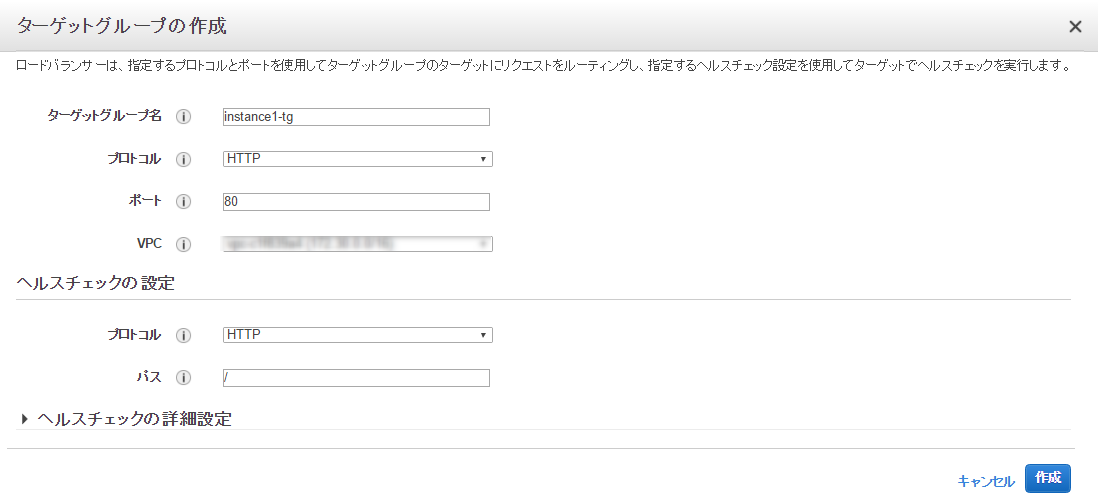
First, we create "instance1-tg" for default access.
Since we'll only be using HTTP this time, we basically leave it as is.
Simply click "Create" and the target group will be created
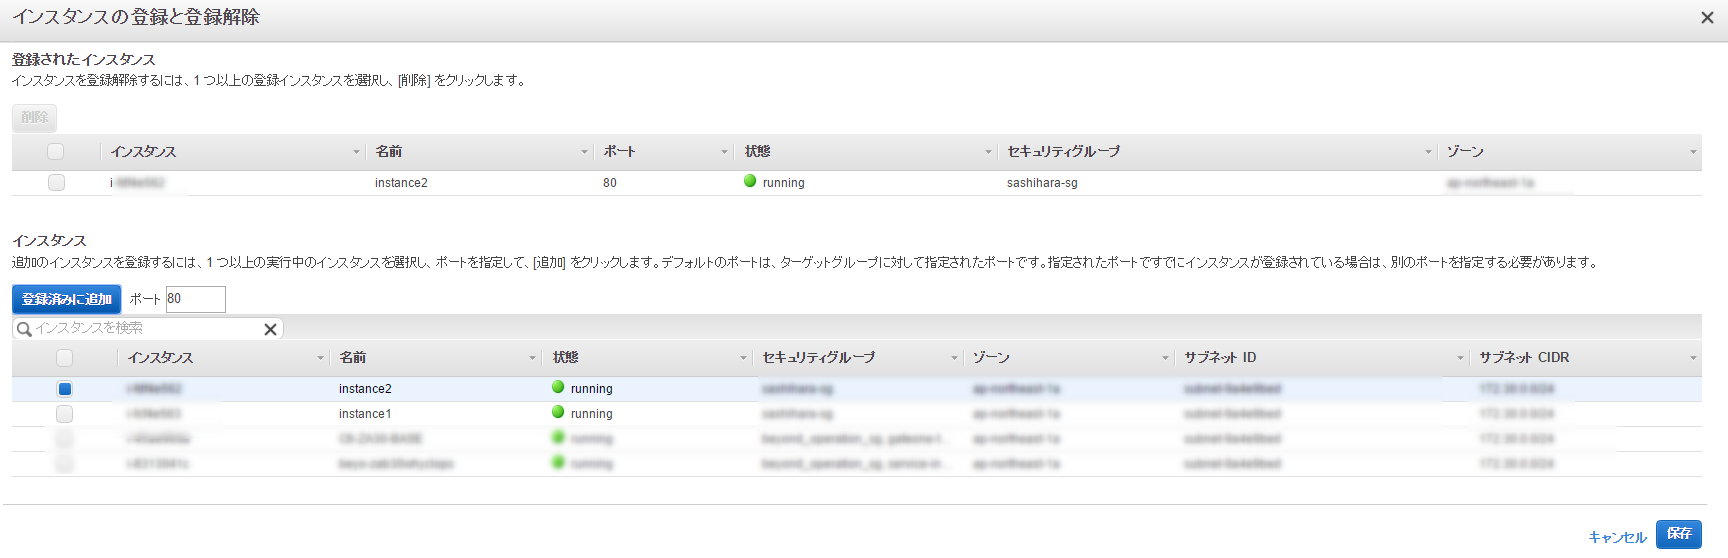
If you leave it as it is, the instances in the target group will not be specified, so you will need to register them
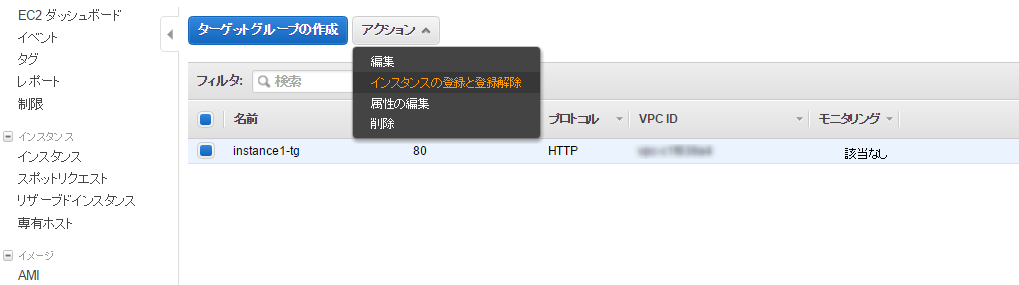
Select instance1 and add it to the registered list

Next, we'll create a target group in the same way as before to connect to the other instance when access is made via "/instance2"
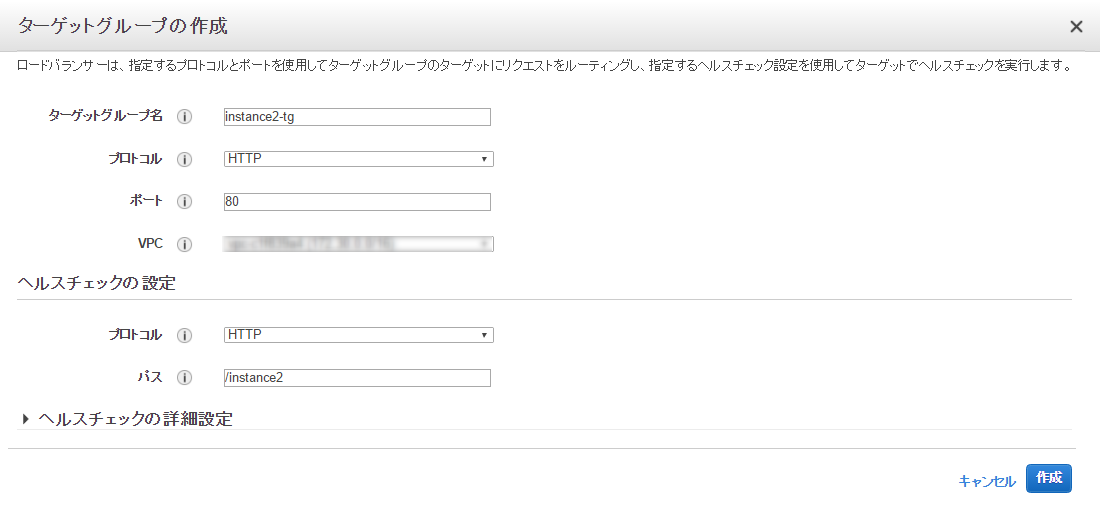
Register instance2 to the target group
This completes the creation of the target group
Next, create an ALB
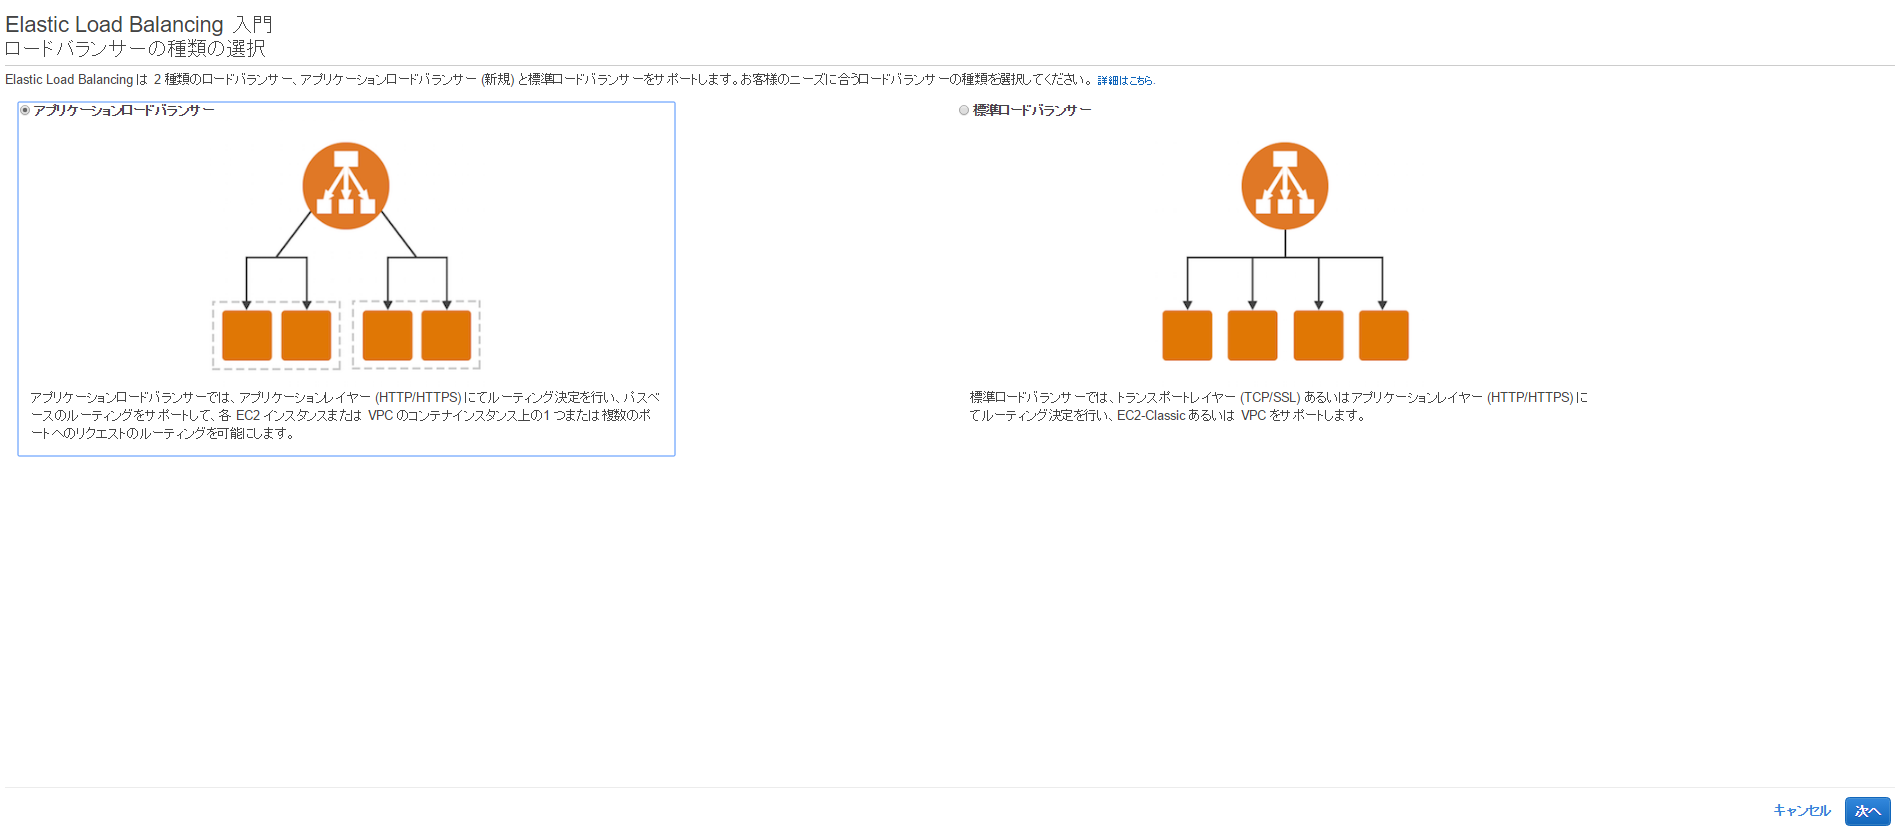
Creating an ALB
When you click Create Load Balancer, you can choose between ALB or ELB
Since we will be using ALB this time, select "Application Load Balancer"
Set the name to "application-LB" and select "HTTP" as the protocol.
Select the VPC and subnet to use.
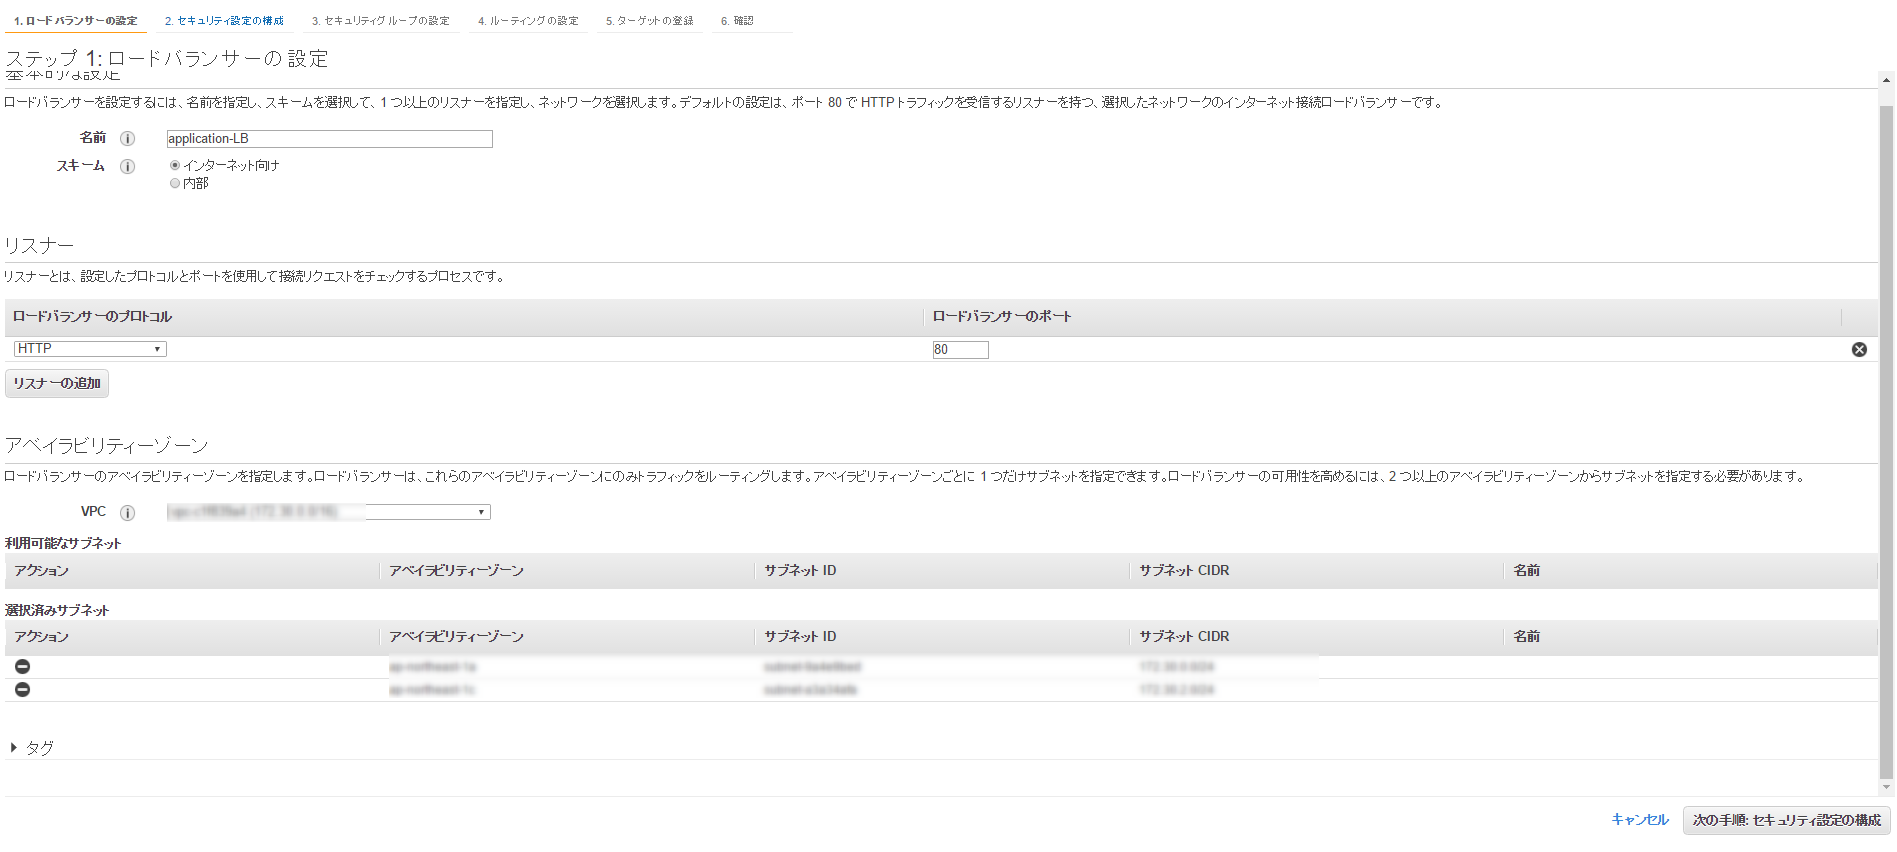
If you proceed from here, you'll see a warning that you should use HTTPS, but we
won't be using HTTPS this time, so we'll ignore it.
Next, we will configure the security group.
This time, we will select the security group for web access that we prepared in advance.

Next, we will register the target group we just created.
Set instance1-tg for default access and proceed.

Verify the information for instance1 and create an application load balancer
Balancer created!

However, if you leave it as it is, instance2-tg will not be set up, so you will need to set it up
After selecting the balancer, click Add Rule
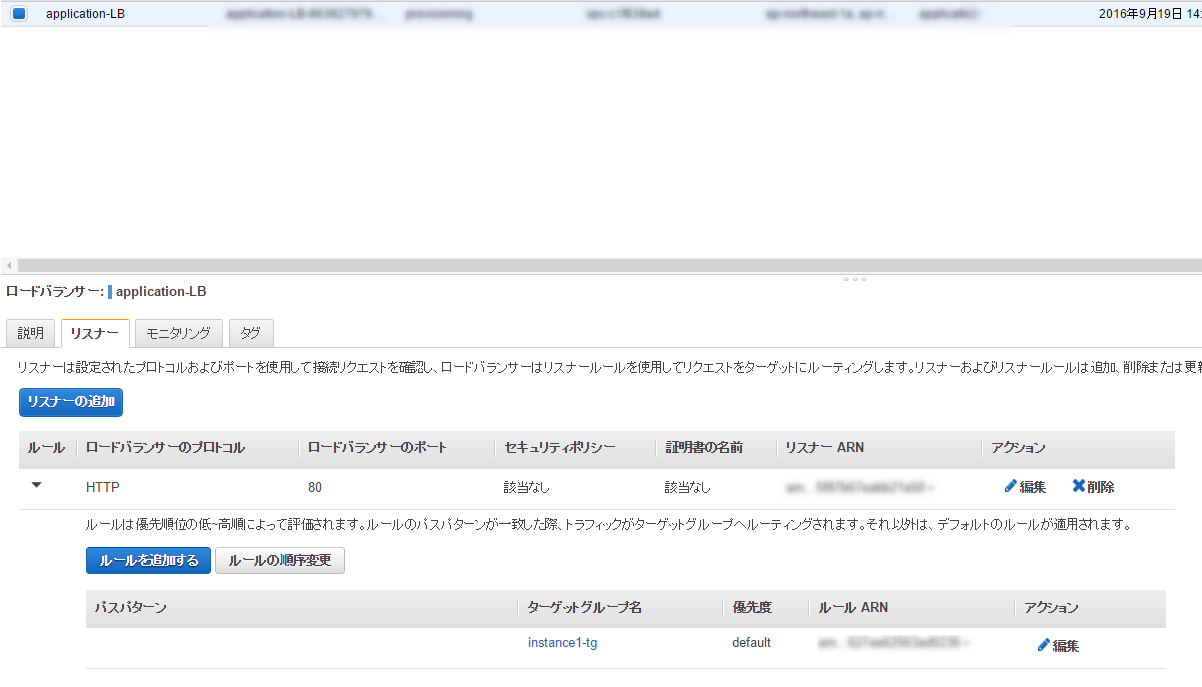
Then, enter "/instance2" as the path pattern, select instance2-tg as the target group, and click "Save."
The setup is now complete
I'll try accessing it for now
If no path is specified, instance1 will be accessed

If you then specify the path "/instance2", instance2 will be accessed

It's distributed on a path-based basis
Previously, only L4 distribution was possible, but now a load balancer capable of L7 distribution has finally been released.
I think various features will be added in the future, so it should be usable in a variety of situations.
00 The person who wrote this article
About the author


