[Tips for architectural photography explained] I took some photos after moving my office

table of contents
- 1 Introducing the Beyond Osaka office with photos!
- 2 Photographer explains! Tips for architectural photography that anyone can follow
- 2.1 What makes a good building? Deciding the direction of the shoot
- 2.2 Tips for Architectural Photography: 1. Shoot with a wide angle
- 2.3 Architectural photography tip #2: Shoot straight
- 2.4 Architectural photography tip #2: Don't include unnecessary things
- 2.5 Architectural photography tip #4: How to look at the light
- 2.6 [Extra Edition] Involving people in creating a story
- 3 summary
Hello. I'm Goto, an in-house photographer specializing in portrait, food, and architectural photography.
(※Member of the Web Services Division)
Our company, Beyond, moved to a new office in late April 2021
Press release regarding Osaka office relocation has been published
In fact, we were also involved in an office relocation project, and we were able to design the new office with attention to detail in every detail, from the cafe space (which becomes a bar at night!) to the offices and various booths
With the desire to let many people see the office in its "best condition," I put my skills as a photographer to use and was in charge of architectural photography of the new office.
My career as a photographer is listed here
An in-house photo studio? A story of how employees created a benefit program
Now, I'll show you photos of the Osaka office that I took, room by room, so
please take a look!
In the second half, I'll explain some tips and tricks for architectural photography . These can be practiced even with a smartphone , so I hope you'll find them helpful!
Introducing the Beyond Osaka office with photos!
Below are some photos I took of the Osaka office!
Reception and entrance
Let's startthe reception and entrance.
The impression given to the reception and entrance, which are essentially the face of the office, is very important, isn't it?
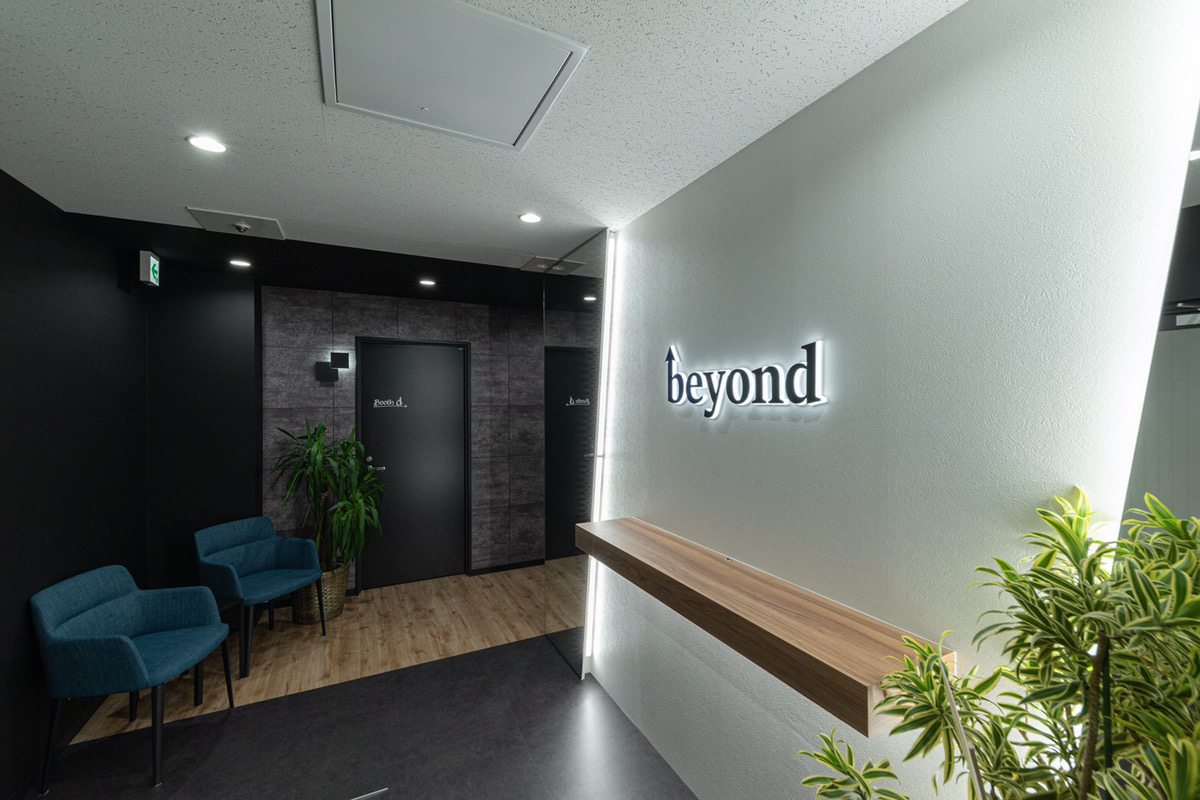
Now, this is the reception and entrance area of Beyond's Osaka office.
It has a very IT company-like atmosphere. The space is predominantly black, with large mirrors creating a sense of depth, and the company logo and chairs express the corporate colors.
Common area/cafe (bar) space
Next is the common area, which is designed as a space for employees to take breaks and to greet guests when they wake up
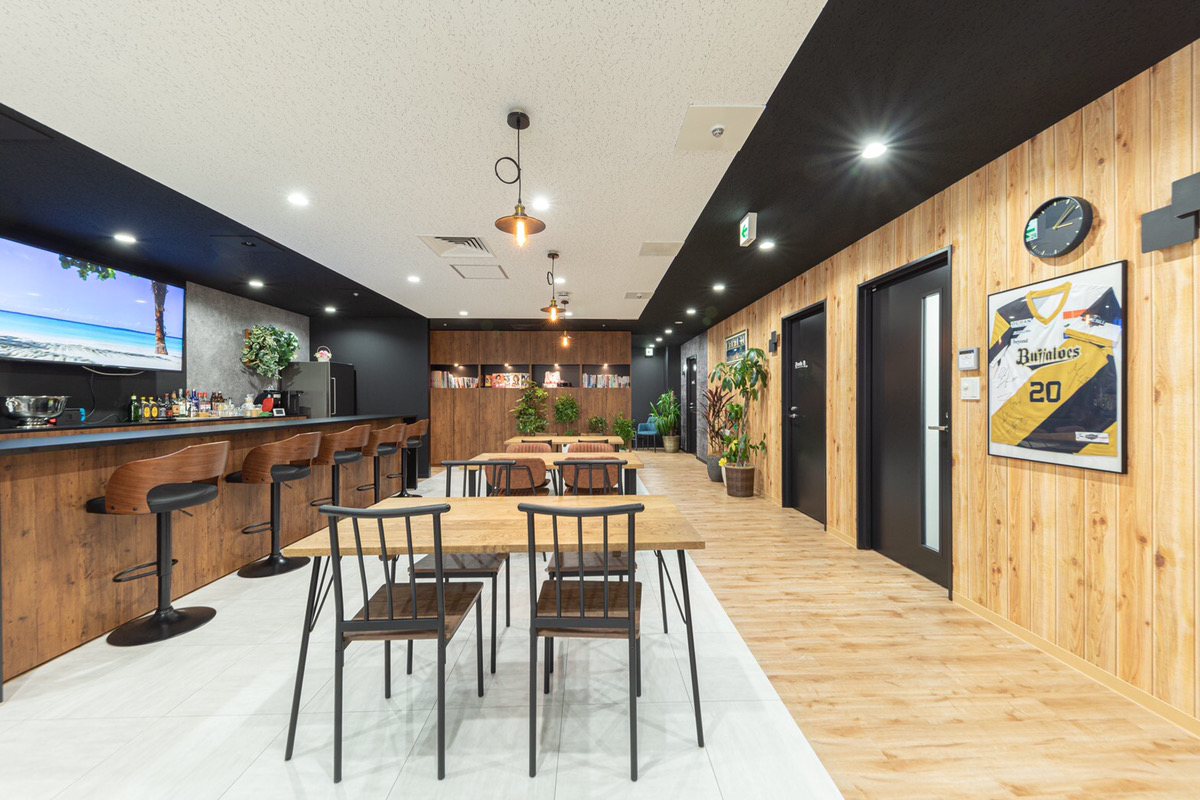
It's a space where you might find yourself wondering, "What even *is* an office anymore ?"
It operates as a cafe during the day and as a bar after 7pm, allowing employees, partners and customers to enjoy time together
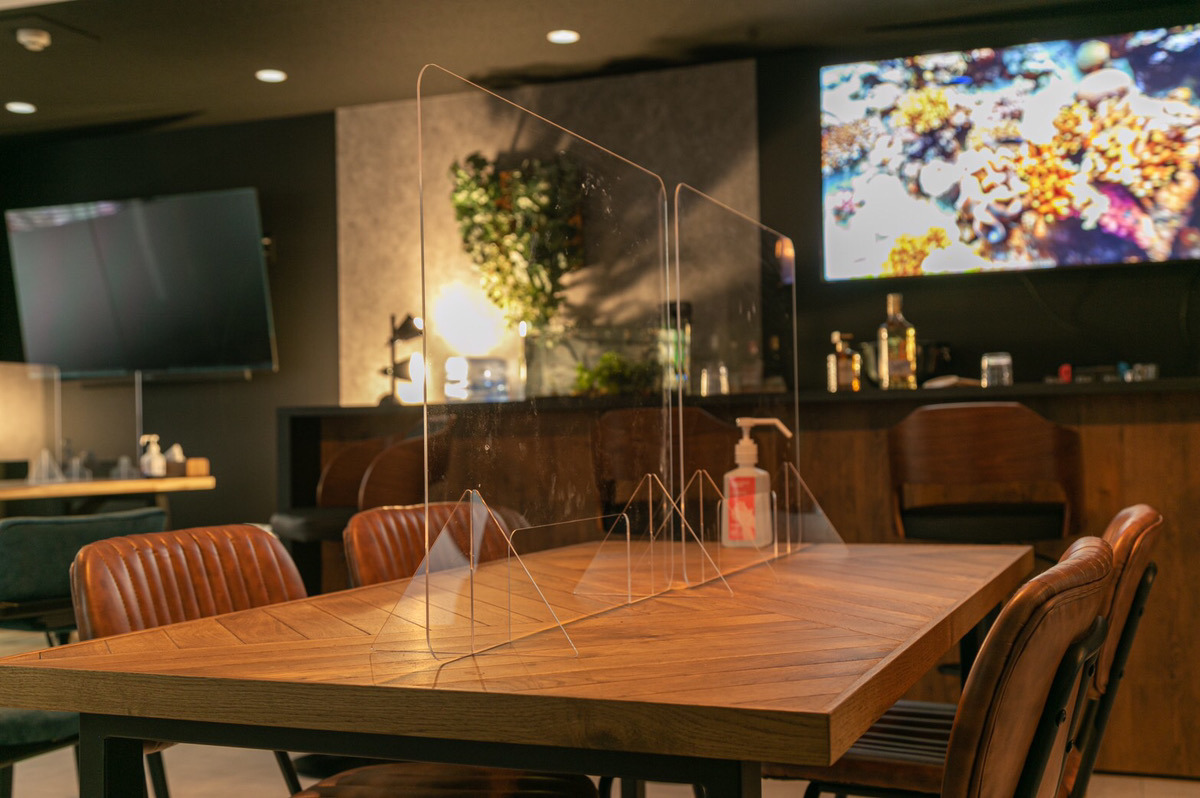
Please note that partitions have been installed between seats as a measure against COVID-19
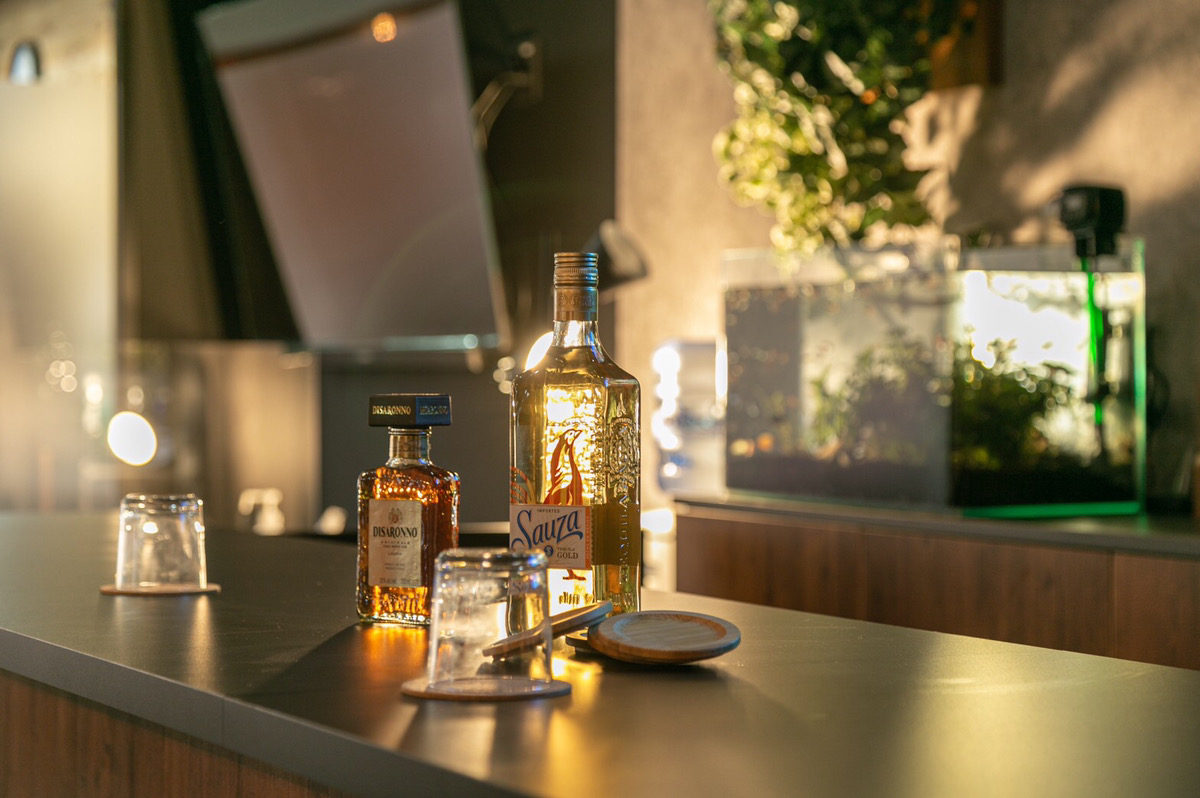
And here is the bar counter
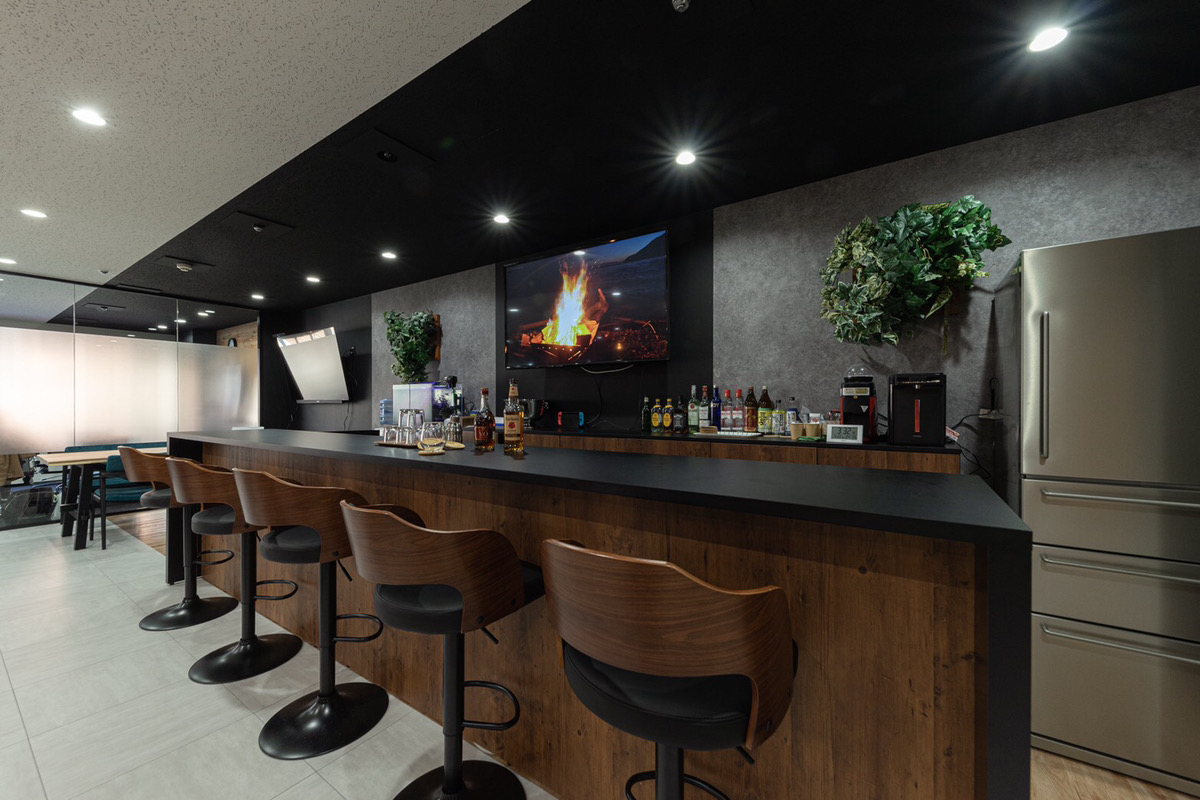
As you can see, there is alcohol behind the counter!
At Beyond, employees who finish work after 7 PM can enjoy a drink here.
Incidentally, at Beyond, we have employees who are good at making drinks working as in-house bartenders as a side job.


Drinking alcohol from a Beyond Glass is delicious.(Company loyalty)
Now, based on the information so far, you might be wondering, "How is this an office...?" So, next, I'll introduce the workspaces, various booths, and so on.
office
Our officea free-address system(no fixed seating for each member), so we can work in a different location every day.
It's a nice change of pace and quite enjoyable.
Due to security reasons, we cannot show you everything, but this window space is particularly popular
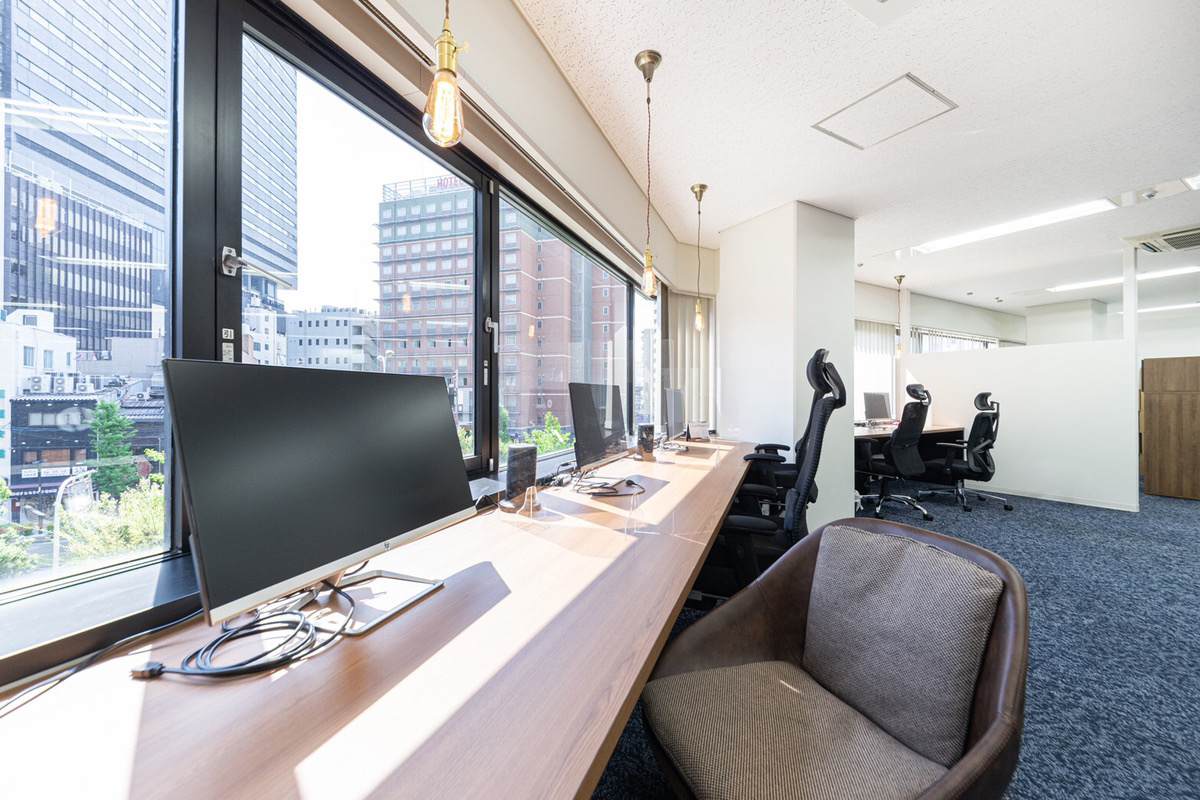
The open feeling is wonderful. The monitors installed make it comfortable to work
Other features include different chairs at each seat, standing desks , and "concentration booths" that block out outside views while working
Small conference room "booth y"
There are two meeting rooms available to suit different needs
This is the small meeting room commonly known as "booth y" . Incidentally, the meeting rooms and other booths within the company are named "booth be", "booth y", "booth o", "booth n", and "booth d" . In other words, our company name, Beyond, is used as the room name.
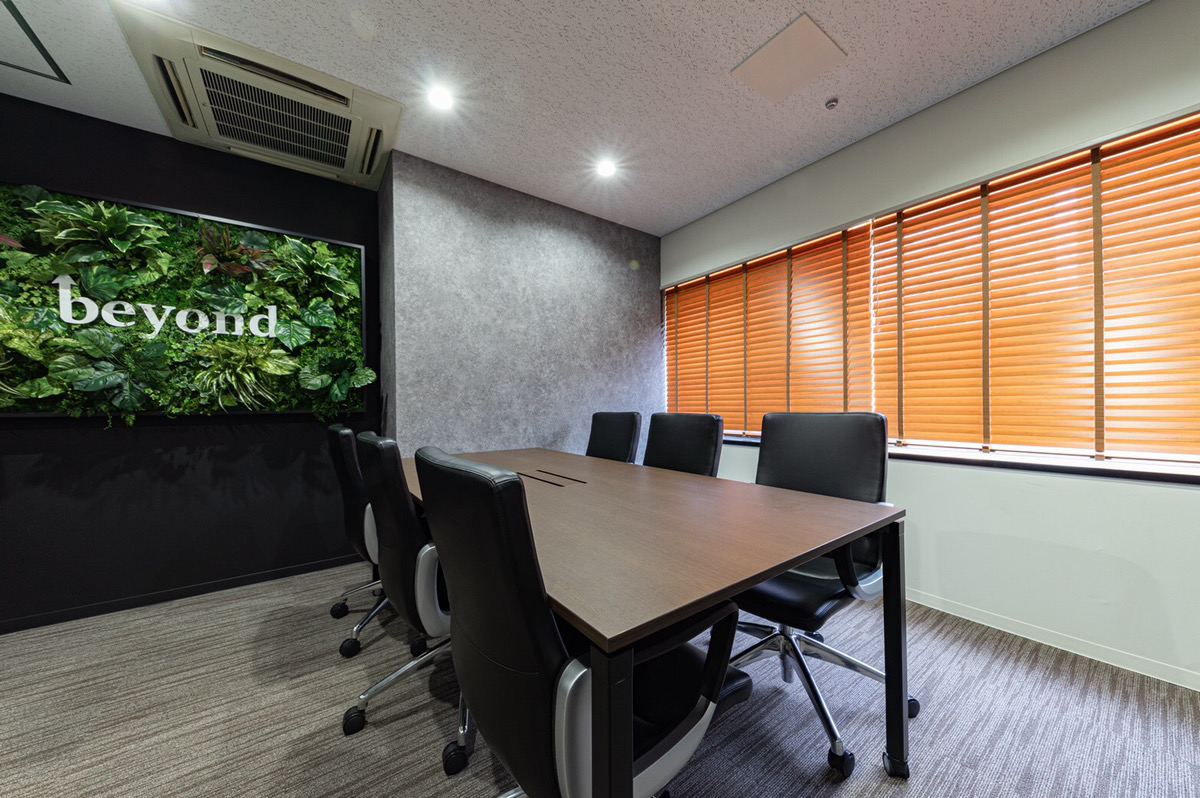
I personally love the wall board with the company logo that's covered in overgrown grass.
This is what it looks like when photographed by itself.

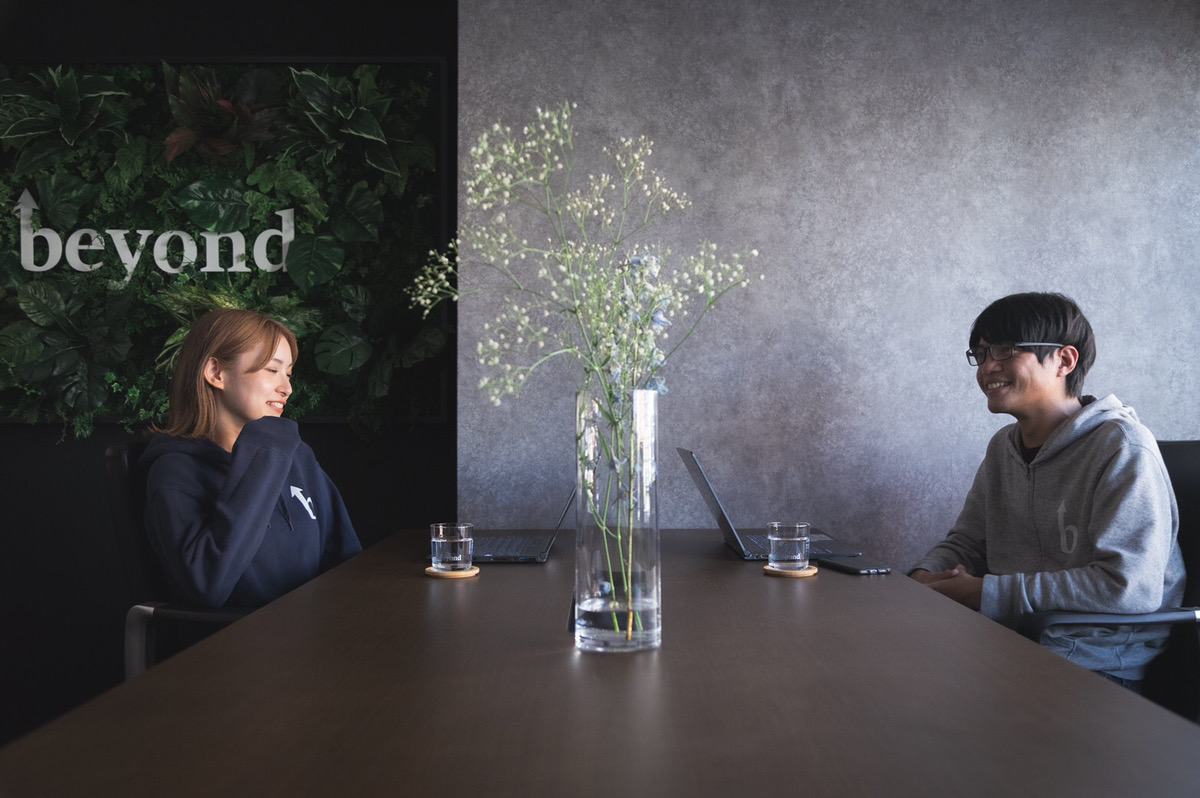
You can also take a photo like this by placing a vase of flowers in front of the lens

Booth Y is designed to be used not only for meetings but also as a location for filming video content such as YouTube videos
For example, a photo could look something like this:
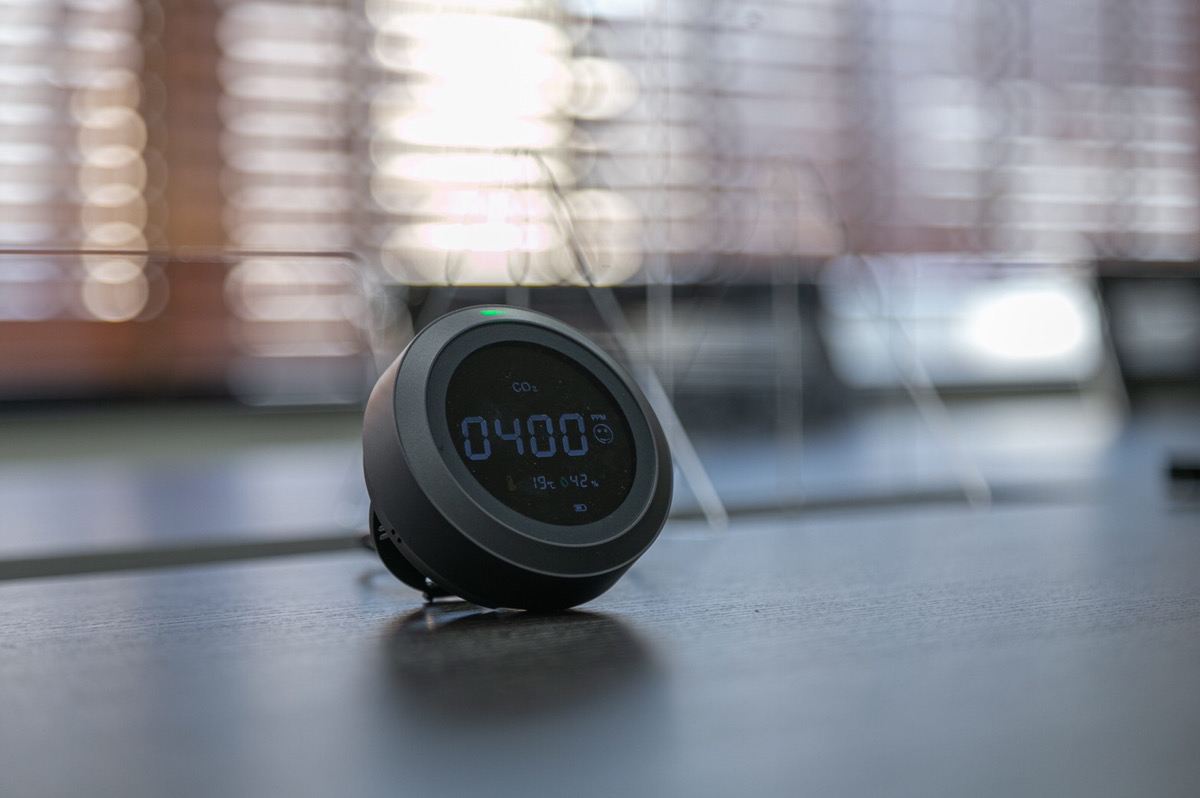
Incidentally, CO2 sensors are installed in the conference room to detect whether the room is in a "three Cs" state (closed spaces, crowded places, and close-contact settings)
Large conference room "booth be"
Next, here is the main conference room, "booth be"
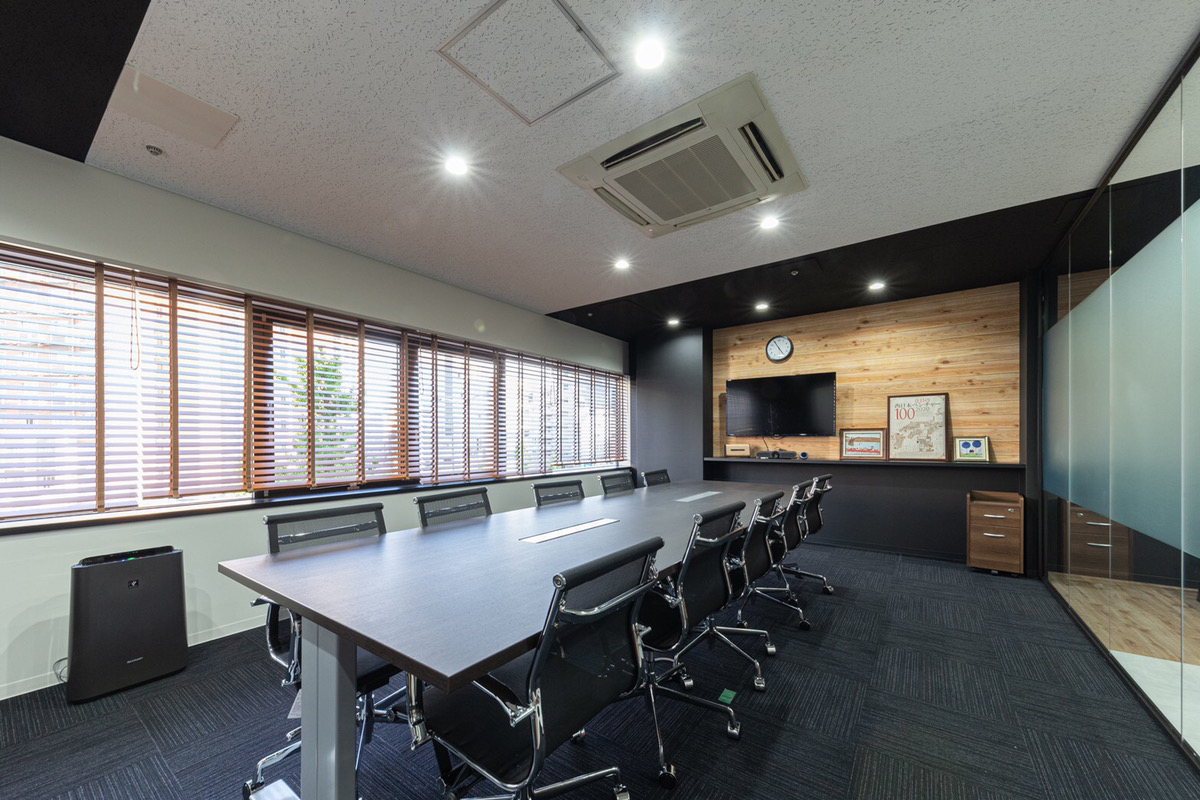
These rooms are used for large-scale meetings or client consultations where you want to avoid crowding. Both meeting rooms have windows , so ventilation is possible at all times.
Also, the sense of openness is wonderful
Individual booths "booth o," "booth n," and "booth d" for online meetings and siestas
Due to the surge in online meetings, three individual booths have been set up. These booths are perfect for online meetings , and since the chairs recline, you can also take a siesta break here
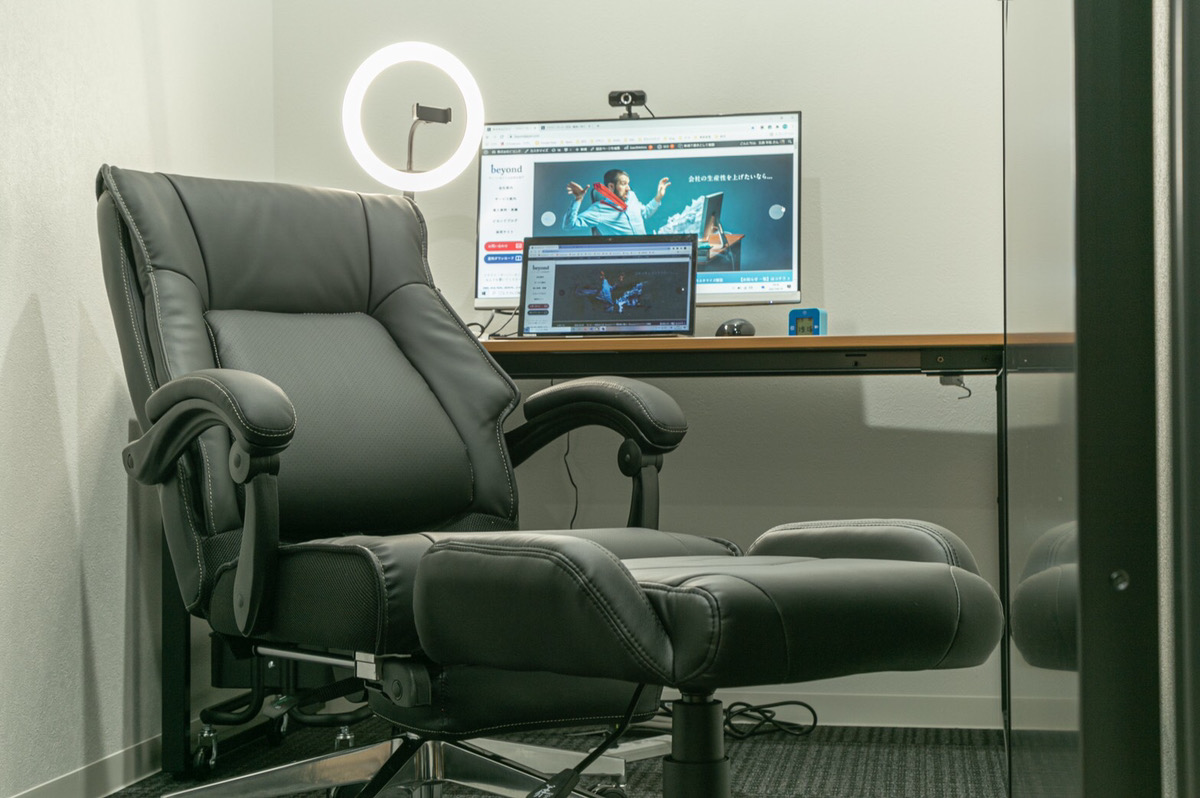
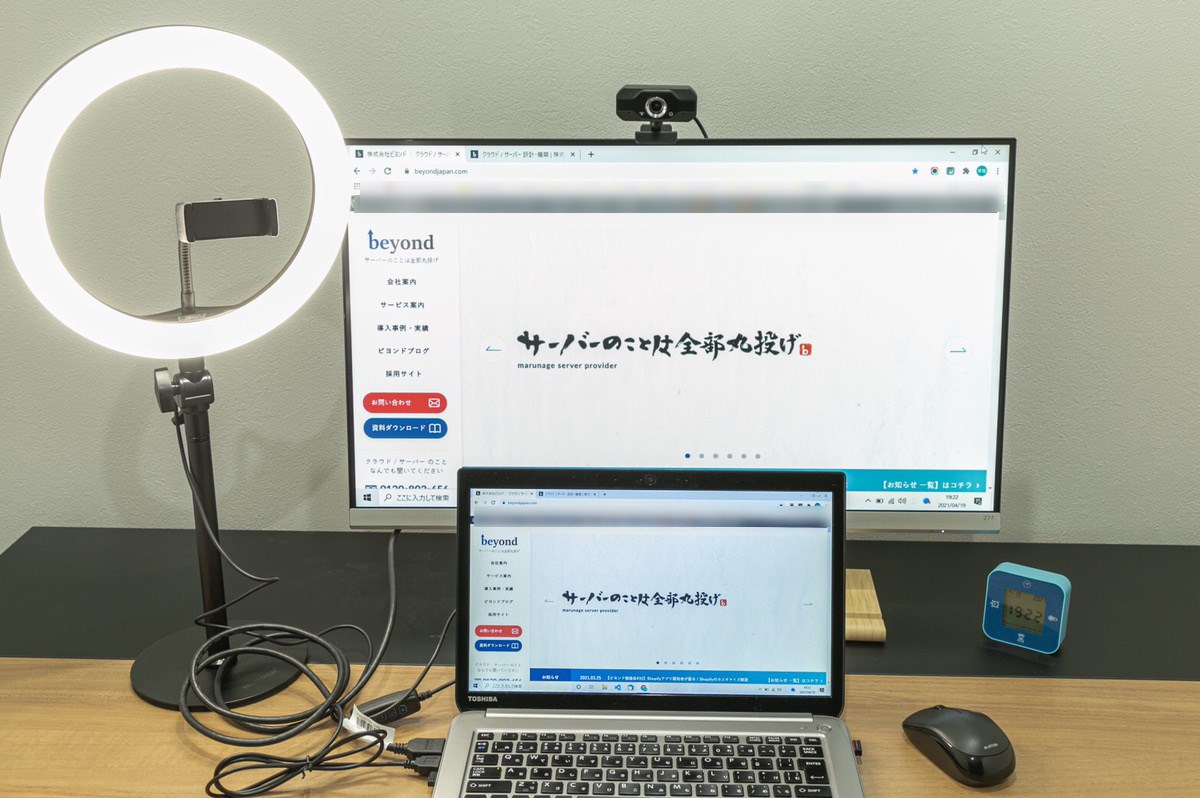
The desk is equipped with a webcam and a ring light
So what do you think of Beyond's new office?
Now, let me briefly share some architectural photography know-how that I've acquired through actually working on photography projects
Photographer explains! Tips for architectural photography that anyone can follow
Camera skills certainly don't come easily, but this time I'll introduce a few points that, if you pay attention to them, can make a big difference in the quality of your photos!
Before introducing the actual points of architectural photography, let's first summarize what kind of photos are ideal for architectural photography
What makes a good building? Deciding the direction of the shoot
First, what is a good building?
While there may be some case-by-case aspects, in most cases, the following would broadly define a "good building."
Definition of a good building (interior)
- It is spacious and has an open feel
- The room is well lit (there is plenty of natural light coming in through the windows)
- Clean, uncluttered and sophisticated
Therefore,essential to capture these conditions as much as possible in photographs.
In this way, if you clearly define what kind of photos you should take or want to take before you start taking pictures , you'll be less likely to get lost.
For more information on how to think about and practice taking the photos you want, please refer to the article below
[With examples] Photographer explains tips for taking beautiful photos with a smartphone
Below, we will introduce specific photography techniques that actually bring out the charm of buildings
The key points are as follows:
Important points for architectural photography
- Shooting with a wide angle
- Shoot straight
- Don't take pictures of unnecessary things
- How to see the light
- [Extra Edition] Involving people in creating a story
I will briefly explain each step
Tips for Architectural Photography: 1. Shoot with a wide angle
To create an open feeling in a room, it is important to make the room appear as spacious as possible
That's where wide-angle lenses come in handy .
I usethe SIGMA 12-24mm F4 DG HSM | Art .
When shooting with a single-lens reflex camera, these wide-angle lenses are the best option
If you don't have a wide-angle lens, try to shoot with the widest angle possible
Also, many recentsmartphones support wide-angle photography, which is very convenient.
Architectural photography tip #2: Shoot straight
Here is the next point
You might think, "Well, that's obvious," but it's actually surprisingly more complex than that..
In this context, "straight" can refer to both perpendicular and parallel lines
If you don't do this properly, you're likely to end up with distorted images, especially when shooting wide-angle shots
Photographs taken in a distorted state appear unnatural to the human eyeand are therefore undesirable.
For this issue, the best solutions are to "turn on the camera's grid display" and, if possible, "use a tripod."
It's very difficult to suddenly take a photo that's both vertical and parallel, but try to be as careful as possible
Architectural photography tip #2: Don't include unnecessary things
This is a particularly important point that is often overlooked
For example, even in an office, there are sometimes items that have to be placed in a room because they prioritize functionality for daily life, such as trash cans
These kinds of things are often overlooked in everyday life, but when captured in a photograph, they instantlydisrupt the overall aesthetic.
Therefore, it is important to move any unnecessary objects to a location where they will not be visible before taking the photo
In this regard, unless you gain experience through trial and error, you are likely to overlook something
Based on my own experience, I would like to introduce some points that you should be careful of, so please refer to the following points first
Check before you take a photo! A list of unnecessary things you shouldn't photograph
- Make sure the cords and wires are not cluttered
- Avoid placing remote controls, tissues, etc. on the desk as much as possible
- If there are trash cans or other items on the floor, move them
- If someone gets in the frame, ask them to move only while you are taking the picture
- Make sure to smooth out any wrinkles that are easily noticeable, such as futons, beforehand
- Wipe off fingerprints on shiny desks and glass windows beforehand
Conversely,the space feels too bare and lacking something, you can add some color to the scene by placing a vase or other decorative items.
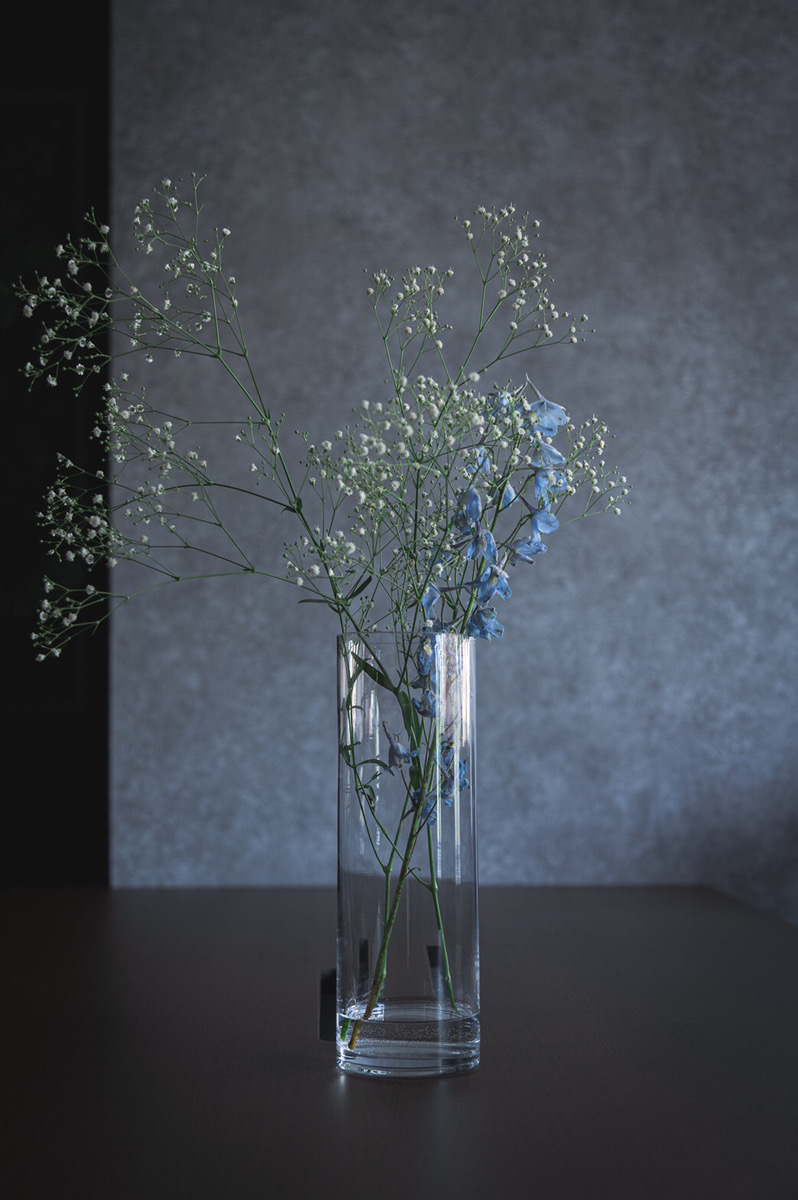
Here is an example of a photo taken with a vase placed inside
Architectural photography tip #4: How to look at the light
If the room is dim and dark, it's hard to convey the room's charm
Therefore, during the daytime,opening the curtains to let in some lightand take photos in an environment where there is sufficient light in the room.
Furthermore, even without natural light,indirect lighting, it's easier to take attractive photos.
For example, the photo below shows indirect lighting shining on the drinks to create an ambiance
To use light to your advantage when taking photos, check the following points and try them out
Things to check to make light your ally
- During the day, open the curtains to let in lots of natural light (if it's too bright, soften it with lace curtains)
- Basically, all the lights in the room are on (adjust as needed if there are too many)
- Indirect lighting creates a sharp contrast
[Extra Edition] Involving people in creating a story
Architectural photography is generally done without anyone in the photo, but sometimes it is better to have people in the photo to better convey the appeal and functionality of the space
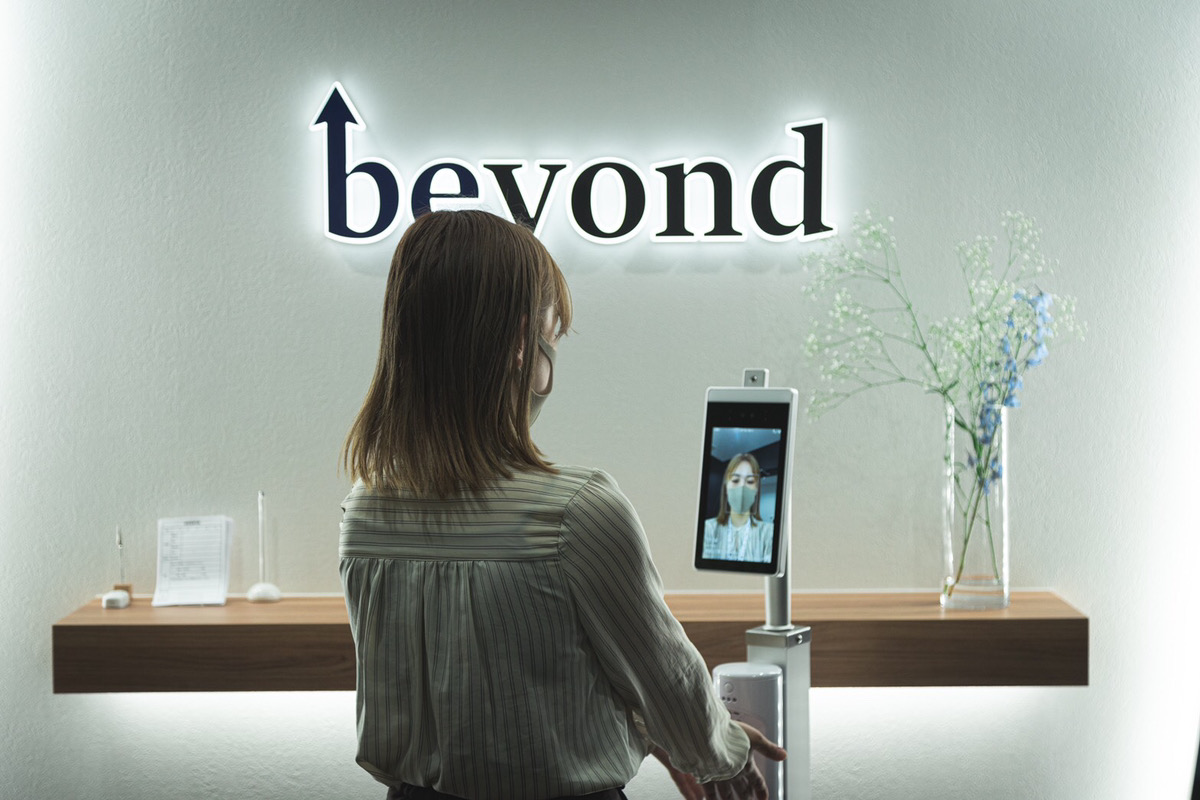
For example, the entrance to our new office is equipped with a non-contact thermometer and dispenser, but even if you take a photo of it without any staff,
At first glance, you might think, "What is this stick with a tablet attached to it...?"
Therefore, by having Ms. Fujisawa from public relations pose as if she were actually using the stick, we were able to create a photo that immediately makes the function of the somewhat unclear stick clear
summary
So, that's it for the photos I took of our Osaka office and some tips for architectural photography!
My photos are available on Instagram (@gotoh_2682) , so please feel free to check them out if you're interested
Thank you for reading to the end
 55
55 The person who wrote this article
About the author


