[eSIM] APN Settings Explained ~ Android Edition ~

table of contents
We previously wrote an article about APN settings for the iOS version, but this time we will explain how to set up APN for the Android version
For APN setting procedures for iOS, please see the article below
○ [eSIM] APN Settings Explained ~ iOS Edition ~
*Please note that this article is based on the Google Pixel 7a OS being Android 15
What is APN?
Let me introduce APN again
This APN (Access Point Network) is a function like a "relay point" that is necessary when connecting a smartphone to the Internet
Each telecommunications carrier has its own APN, so smartphone users must connect to the Internet via this APN
However, if a smartphone user is unable to access the APN of the carrier with which they have signed up, the smartphone will be unable to connect to the Internet.
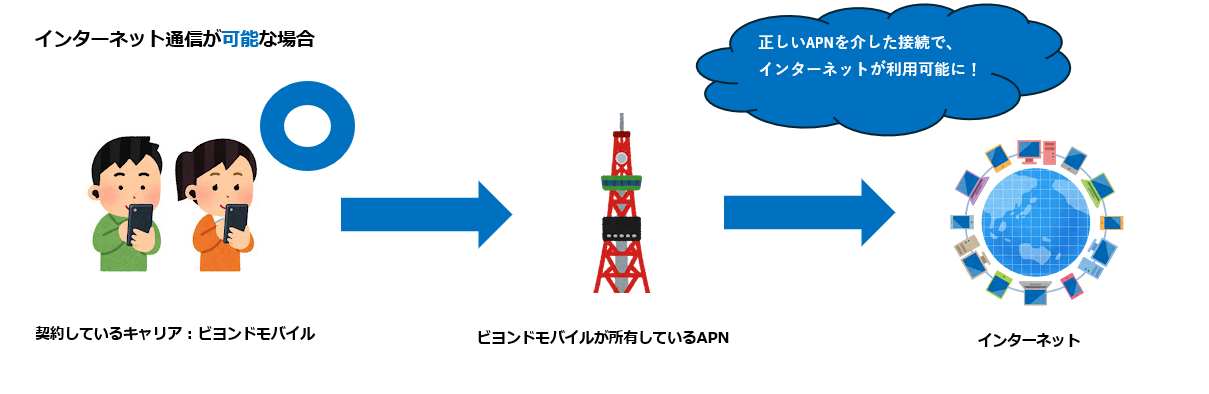

If your smartphone's carrier is not a so-called low-cost SIM company, but a major carrier such as docomo, au, or SoftBank, the majority of carriers will automatically set the APN (Auto-APN), so smartphone users don't need to worry about the APN
However, if you are using the services of a low-cost smartphone/SIM provider that is an MVNO, you will need to perform the "user's own APN settings" operation, correctly set the APN name specified by your carrier, and connect to the correct relay point for Internet communication
in rare cases, it may be necessary to manually adjust the APN settings depending on the smartphone user's device version and dependencies with the carrier in the overseas destination .
*If there are no problems or you have no special purpose, please be careful the APN settings on your smartphone unnecessarily
Overview of the work flow
The procedure for manually setting up the APN is the same as for iOS, and can be broadly divided into the following two steps
- Check the current settings
- Enter the correct APN value
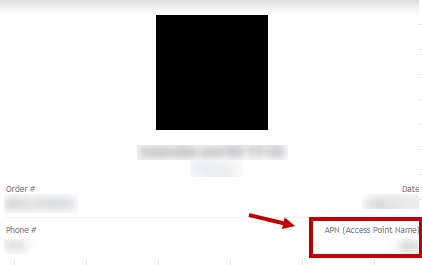
For the APN value, please refer to the sample "QR code link email" below
Check the current settings
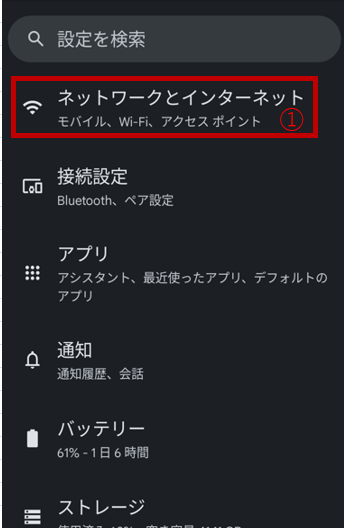
Open the Settings screen and tap ① "Network and Internet."
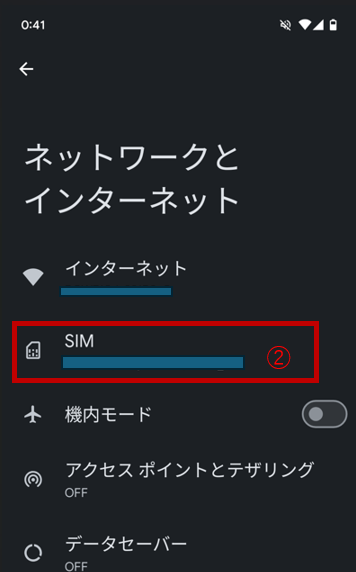
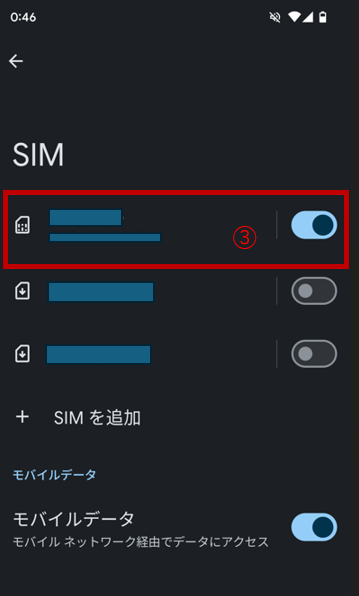
Please proceed to the "SIM" page (2)
③Select the “SIM” you want to check
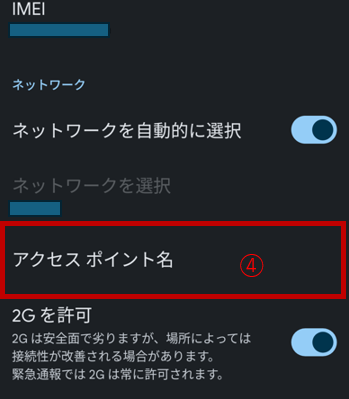
Go to the screen for the target "SIM" and tap "Access Point Name" (④) at the bottom of the page
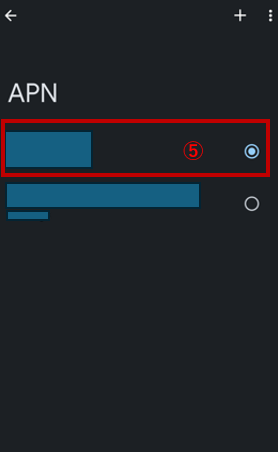
⑤ Tap the “APN” you want to check
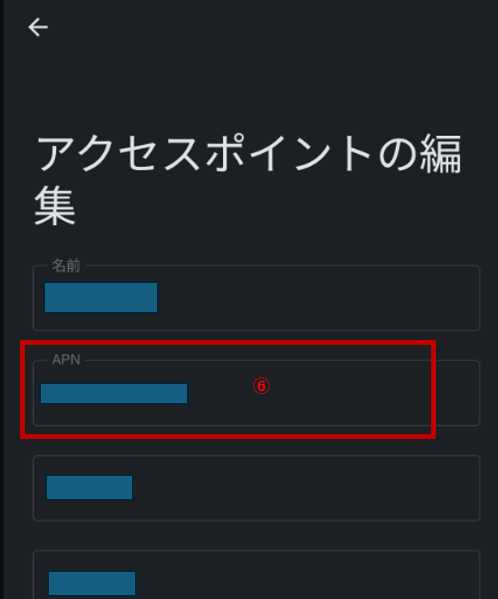
The value listed in ⑥ the APN value.
Now you can confirm it
Enter the correct APN value
Next, let's actually enter the correct APN value
Open the settings screen again and tap "Network and Internet" on screen ①
Next, go to the "SIM" page (②)
As shown in ③, select the “SIM” you want to edit
Go to the screen for the SIM in question and tap ④ "Access Point Name" at the bottom of the page
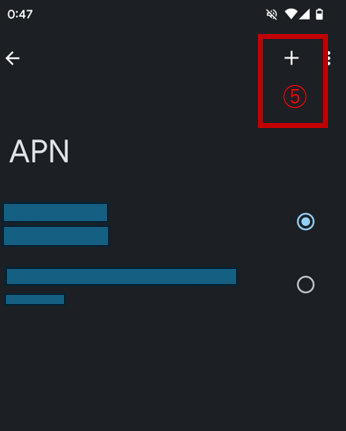
As shown in ⑤, tap the “+” in the upper right corner to add the APN
Enter the correct "APN name" and "user name" in the ⑥ field, confirm that there are no problems, and tap "Save" in ⑦
Everything else can be left as default
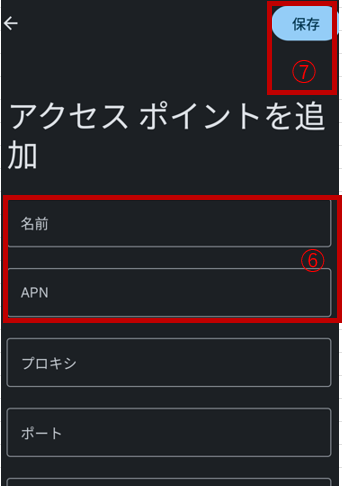
After saving, you will be redirected to the same screen as in ⑤
Select the APN you just added, restart your device, and you're done
summary
While reading this article, you may have gotten a general idea of what APN settings are
Generally, you won't need to manually configure the APN as described in this article. After installing the eSIM, the APN settings should be completed automatically on your smartphone, or you can simply follow the official instructions from your carrier to set it up
However, in rare cases, irregular issues may occur, such as not being able to connect to the internet even though you've set up your eSIM correctly. We hope this article will help you stay calm and set up your eSIM correctly even in such situations
 33
33 The person who wrote this article
About the author


