[eSIM] Setup Method ~ iOS ~

Have you heard of "eSIM (Embedded SIM)"?
Most people probably use their smartphones with a physical SIM card inserted, but in Japan, eSIM is still relatively unfamiliar, and the honest impression is that it's still "not very clear."
I myself have only recently started using eSIMs, and before I experienced their convenience, I had a vague idea that they were "difficult."
In this blog post, in order to dispel those negative perceptions and let you know about the convenience of eSIMs, I will explain "Setting up an eSIM after purchase."
If, for any reason, you are unable to connect to the network after completing the setup described in this article,please refer to the article below to check your APN settings.
[eSIM] APN Settings Explained ~ iOS Edition ~
*Please note that this article is based on iOS 17.5.1 for iPhone 15
Overview of the work flow
After purchasing an eSIM, there are two main setup steps to follow:
- Installing an eSIM
- Roaming Settings
As a prerequisite, please ensure that the eSIM you purchased is compatible with your iPhone. We recommend that youthe following steps: ① Install the eSIM 1-2 days before actually using it, and ② Configure roaming settings upon arrival at your destination.
Let's get started right away
① Install eSIM
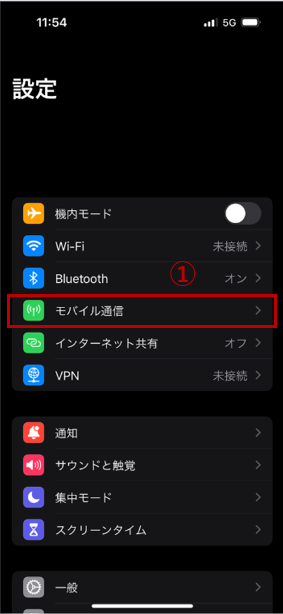
First, tap ① "Settings" > "Mobile Data"
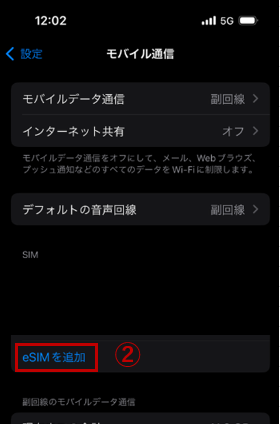
② Tap "Add eSIM"
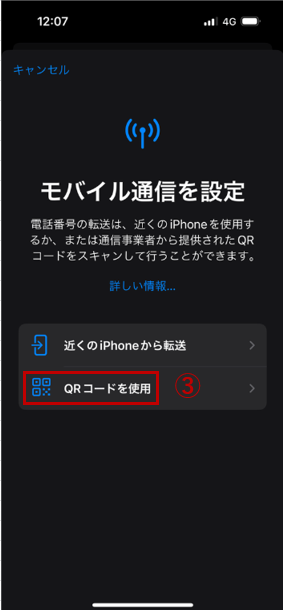
③ Tap "Use QR code" and scan the eSIM QR code
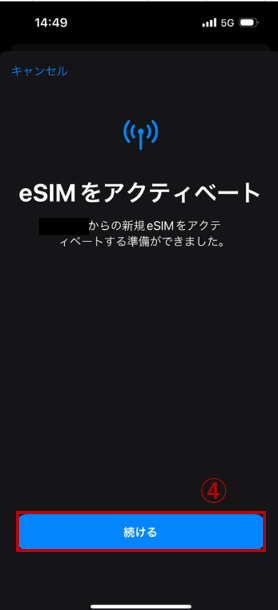
Once the scan is complete, click "Continue" in ④ and your eSIM installation (activation) is complete!
What did you think?
It's easier than you might think, and I think it's very convenient that you can just scan a QR code
With physical SIM cards, you might often find it inconvenient, such as losing the SIM card itself when it's time to replace it , or not having the necessary pins to remove the card slot
However, with eSIM, as long as you're connected to the network, you can start setting it up by simply scanning the QR code with your device, so it's easy!
Now that you've added the eSIM, you can't use it yet. To start using it, you'll need to configure the roaming settings (explained in the next section) and prepare to use the network at your destination
② Roaming settings
Once again, tap ① "Settings" > "Mobile Data"
② Tap the eSIM you just added
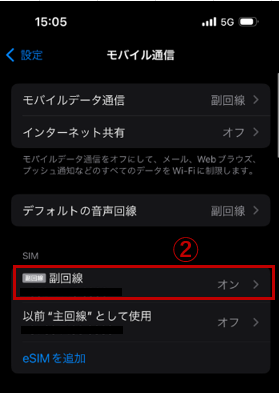
Turn on "Turn on this line" in ③ and "Data roaming" in ④ to complete the setup
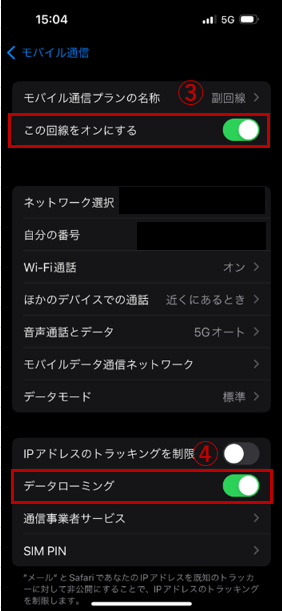
This completes all the settings for the eSIM
As explained at the beginning, this roaming setting is "a setting to use the network provided by the local telecommunications carrier at your destination," sobe sure to perform it after arriving in your overseas destination.
summary
One of the major advantages of eSIM is that it is less hassle than a physical SIM
The QR code will be sent to you via email, so there is no need to wait for delivery to your home. Once your overseas stay is over, you can simply delete the eSIM, so you can start using it anywhere with ease
Also, depending on the eSIM service and plan, if you run out of data while traveling abroad, you may be able to add more data for an additional fee
 55
55 The person who wrote this article
About the author


