I created an Ansible Playbook to build a three-tier network configuration on AWS
Hello.
I'm Shimeji from the SS team.
I previously wrote an article about building a two-tier network with Ansible, but in actual projects, it's common to build a three-tier network environment.
So, I created a playbook to build a three-tier network on AWS with Ansible.
*The actual environment we'll build is below:

Directory structure
The directory structure of the playbook is as follows:
. ├── README.md ├── ansible.cfg ├── hosts ├── roles │ └── aws_vpc │ ├── tasks │ │ └── main.yml │ └── vars │ └── main.yml └── vpc_create.yml
Playbook
Yes, it's a playbook.
It's basically the same as the two-tier playbook, but it adds new features to create a NATGATEWAY and a route table for the DMZ subnet.
--- # tasks file for aws_vpc - name: create_vpc ec2_vpc_net: name: "{{ vpc_name }}" cidr_block: "{{ vpc_cidr }}" region: "{{ region }}" profile: "{{ profile }}" dns_hostnames: yes dns_support: yes register: vpc_info # PUBLIC_SUBNET creation - name: create_public_subnet ec2_vpc_subnet: vpc_id: "{{ vpc_info.vpc.id }}" cidr: "{{ item.pub_subnet_cidr }}" az: "{{ item.subnet_az }}" region: "{{ region }}" resource_tags: { "Name":"{{ item.pub_subnet_name }}" } profile: "{{ profile }}" register: pubsub_info with_items: - "{{ pub_subnet }}" # Create DMZ_SUBNET - name: create_dmz_subnet ec2_vpc_subnet: vpc_id: "{{ vpc_info.vpc.id }}" cidr: "{{ item.dmz_subnet_cidr }}" az: "{{ item.subnet_az }}" region: "{{ region }}" resource_tags: { "Name":"{{ item.dmz_subnet_name }}" } profile: "{{ profile }}" register: pubsub_info with_items: - "{{ dmz_subnet }}" # PRIVATE_SUBNET creation - name: create_private_subnet ec2_vpc_subnet: vpc_id: "{{ vpc_info.vpc.id }}" cidr: "{{ item.pri_subnet_cidr }}" az: "{{ item.subnet_az }}" region: "{{ region }}" resource_tags: { "Name":"{{ item.pri_subnet_name }}" } profile: "{{ profile }}" register: prisub_info with_items: - "{{ pri_subnet }}" # Create IGW - name: create_igw ec2_vpc_igw: vpc_id: "{{ vpc_info.vpc.id }}" region: "{{ region }}" tags: { "Name":"{{ igw_name }}" } profile: "{{ profile }}" register: igw_info # Create ROUTETABLE (IGW) - name: create_route_table ec2_vpc_route_table: vpc_id: "{{ vpc_info.vpc.id }}" subnets: "{{ atache_igw_subnet }}" routes: - dest: 0.0.0.0/0 gateway_id: "{{ igw_info.gateway_id }}" region: "{{ region }}" profile: "{{ profile }}" resource_tags: { "Name":"{{ rttable_pub_name }}" } # Get SUBNETID to place NGW - name: get_subnet_id shell: aws ec2 describe-subnets --region {{ region }} --profile {{ profile }} --output text | grep -B 1 {{ ngw_subnet_name }} | awk 'NR==1 {print $12}' register: ngw_subnet_id #- name: show # debug: # msg: "{{ ngw_subnet_id.stdout }}" # Create NGW - name: create_ngw ec2_vpc_nat_gateway: subnet_id: "{{ ngw_subnet_id.stdout }}" region: "{{ region }}" profile: "{{ profile }}" wait: yes register: ngw_info #- name: show # debug: # msg: "{{ ngw_info.nat_gateway_id }}" # Wait until NGW is created #- name: wait_for_ngw # pause: # minutes: 5 # Create ROUTETABLE (NGW) - name: create_route_table2 ec2_vpc_route_table: vpc_id: "{{ vpc_info.vpc.id }}" subnets: "{{ atache_ngw_subnet }}" routes: - dest: 0.0.0.0/0 gateway_id: "{{ ngw_info.nat_gateway_id }}" region: "{{ region }}" profile: "{{ profile }}" resource_tags: { "Name":"{{ rttable_dmz_name }}" }
The DMZ subnet ID is obtained by formatting the results of the awscli command.
This is then used to create the NATGATEWAY.
It also takes a while for the NATGATEWAY to be created, so the "pause" module is used to temporarily stop the process.
*Addendum:
Someone pointed out on Twitter that "ec2_vpc_nat_gateway" has an option called "wait"!
Thank you!
Defining variables
--- # vars file for aws_vpc # REGION region: "ap-northeast-1" # PROFILE profile: "default" # VPC vpc_name: "shimeji-3layer-vpc" vpc_cidr: "10.10.0.0/16" # IGW igw_name: "shimeji-3layer-igw" # NGW ngw_name: "shimeji-3layer-ngw" # Subnet name where NGW will be created ngw_subnet_name: "shimeji-3layer-public-subnet-a" # ROUTETABLE(PUBLIC) rttable_pub_name: "shimeji-3layer-pub-rt" # ROUTETABLE(DMZ) rttable_dmz_name: "shimeji-3layer-dmz-rt" # PUBLIC_SUBNET pub_subnet: - { pub_subnet_cidr: "10.10.10.0/24" ,subnet_az: "ap-northeast-1a" ,pub_subnet_name: "shimeji-3layer-public-subnet-a" } - { pub_subnet_cidr: "10.10.20.0/24" ,subnet_az: "ap-northeast-1c" ,pub_subnet_name: "shimeji-3layer-public-subnet-c" } # DMZ_SUBNET dmz_subnet: - { dmz_subnet_cidr: "10.10.30.0/24" ,subnet_az: "ap-northeast-1a" ,dmz_subnet_name: "shimeji-3layer-dmz-subnet-a" } - { dmz_subnet_cidr: "10.10.40.0/24" ,subnet_az: "ap-northeast-1c" ,dmz_subnet_name: "shimeji-3layer-dmz-subnet-c" } # PRIVATE_SUBNET pri_subnet: - { pri_subnet_cidr: "10.10.50.0/24" ,subnet_az: "ap-northeast-1a" ,pri_subnet_name: "shimeji-3layer-private-subnet-a" } - { pri_subnet_cidr: "10.10.60.0/24" ,subnet_az: "ap-northeast-1c" ,pri_subnet_name: "shimeji-3layer-private-subnet-c" } # Subnet associated with IGW atache_igw_subnet: - "10.10.10.0/24" - "10.10.20.0/24" # Subnet to associate with NGW atache_ngw_subnet: - "10.10.30.0/24" - "10.10.40.0/24"
This time, we will prefix each resource with "shimeji-3layer"
execution
Let's actually try it out
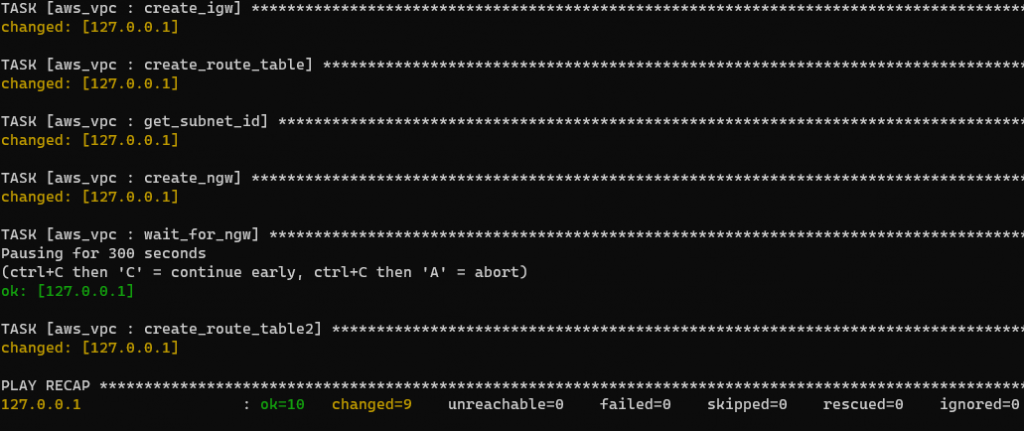
root@BYD-NPC-023:/opt/playbook/aws-vpc-3layer# ansible-playbook -i hosts vpc_create.yml PLAY [create vpc subnet igw routetable] ********************************************************************************************************************************************************************************* TASK [aws_vpc : create_vpc] ***************************************************************************************************************************************************** changed: [127.0.0.1] TASK [aws_vpc : create_public_subnet] *************************************************************************************************************************************************************************** changed: [127.0.0.1] => (item={u'pub_subnet_name': u'shimeji-3layer-public-subnet-a', u'subnet_az': u'ap-northeast-1a', u'pub_subnet_cidr': u'10.10.10.0/24'}) changed: [127.0.0.1] => (item={u'pub_subnet_name': u'shimeji-3layer-public-subnet-c', u'subnet_az': u'ap-northeast-1c', u'pub_subnet_cidr': u'10.10.20.0/24'}) TASK [aws_vpc : create_dmz_subnet] ***************************************************************************************************************************************************************** changed: [127.0.0.1] => (item={u'dmz_subnet_cidr': u'10.10.30.0/24', u'dmz_subnet_name': u'shimeji-3layer-dmz-subnet-a', u'subnet_az': u'ap-northeast-1a'}) changed: [127.0.0.1] => (item={u'dmz_subnet_cidr': u'10.10.40.0/24', u'dmz_subnet_name': u'shimeji-3layer-dmz-subnet-c', u'subnet_az': u'ap-northeast-1c'}) TASK [aws_vpc : create_private_subnet] **************************************************************************************************************************************************************** changed: [127.0.0.1] => (item={u'pri_subnet_cidr': u'10.10.50.0/24', u'pri_subnet_name': u'shimeji-3layer-private-subnet-a', u'subnet_az': u'ap-northeast-1a'}) changed: [127.0.0.1] => (item={u'pri_subnet_cidr': u'10.10.60.0/24', u'pri_subnet_name': u'shimeji-3layer-private-subnet-c', u'subnet_az': u'ap-northeast-1c'}) TASK [aws_vpc : create_igw] ************************************************************************************************************************************************ changed: [127.0.0.1] TASK [aws_vpc : create_route_table] ***************************************************************************************************************************************************** changed: [127.0.0.1] TASK [aws_vpc : get_subnet_id] ****************************************************************************************************************************************************************** changed: [127.0.0.1] TASK [aws_vpc : create_ngw] **************************************************************************************************************************************************************** changed: [127.0.0.1] TASK [aws_vpc : wait_for_ngw] **************************************************************************************************************************************************************** Pausing for 300 seconds (ctrl+C then 'C' = continue early, ctrl+C then 'A' = abort) ok: [127.0.0.1] TASK [aws_vpc : create_route_table2] ********************************************************************************************************************************************************** changed: [127.0.0.1] PLAY RECAP ***************************************************************************************************************************************************** 127.0.0.1 : ok=10 changed=9 unreachable=0 failed=0 skipped=0 rescued=0 ignored=0
Yep, it was a success!
Conclusion
You can build an AWS network by clicking away from the management screen, but it takes time and there is a risk of human error.
Using Ansible saves time and reduces mistakes!
↓By the way, here is the second floor
 00
00 The person who wrote this article
About the author


