Forcing Oracle Cloud Agent into AlmaLinux 9

table of contents
Hello, this is Kitada from Beyond Inc.
This time, I'll explain how to install the Oracle Cloud Agent on AlmaLinux 9.
*Please note that the installation method described in this article is not officially recommended, and we cannot accept any responsibility for its results.
Also, please be aware that the documentation and other information may differ from the current situation as of May 1, 2024.
background
At Beyond, we are currently conducting training for new graduates on setting up environments on various cloud platforms. As part of this training , we attempted to install the Oracle Cloud Agent to monitor instances created with AlmaLinux 9, the successor to CentOS , but..
No match for argument: oracle-cloud-agent
I got an error message, and when I looked at the official documentation, it seemed like AlmaLinux9 was not supported..
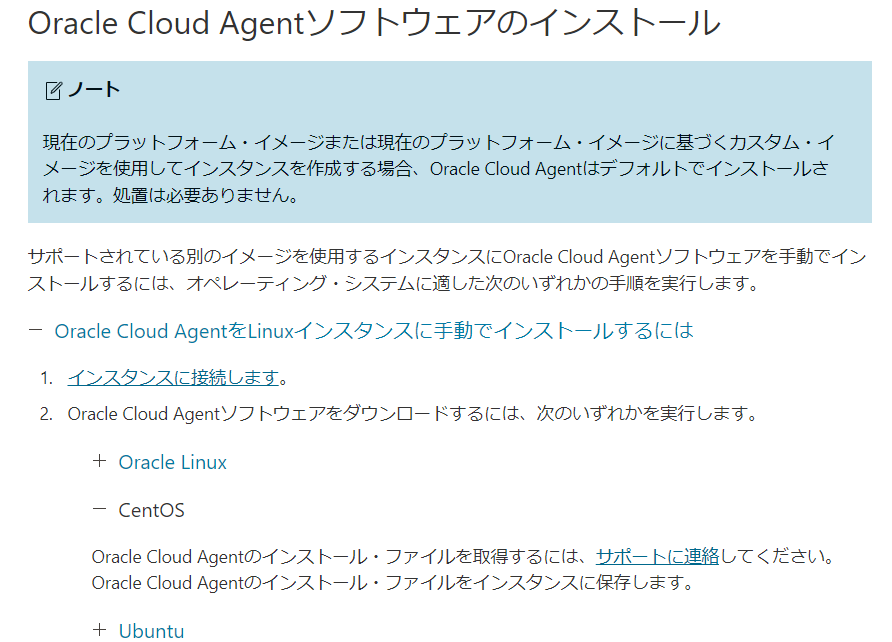
Oracle Cloud Agent: The Oracle Cloud Agent is supported in the current platform image and custom images based on the current platform image . By default, the Oracle Cloud Agent is installed in the current platform image.
If you are using an older platform image,Oracle Cloud Agent software. Select an image dated after November 15, 2018. (For Ubuntu, it must be dated after February 28, 2019.)
While it may be possible to manually install the Oracle Cloud Agent on other images , this has not been tested on other operating systems and its operation cannot be guaranteed
〇 Citation:https://docs.oracle.com/ja-jp/iaas/Content/Compute/Tasks/manage-plugins.htm#manage-plugins
As stated in the documentation,it may be possible to install the Oracle Cloud Agent on other images, butthis has not been tested, so its operation cannot be guaranteed .
Furthermore, after digging a bit deeper into the official documentation, I found that it states , "To obtain the Oracle Cloud Agent installation files, please contact support." However, since I really want to install it this time, I'm going to try to force the installation.
First of all, what is Oracle Cloud Agent?
The Oracle Cloud Agent is a lightweight process that manages plugins running on compute instances in Oracle Cloud Infrastructure (OCI).
Plugins collect performance metrics, install OS updates, and perform other instance management tasks.
To use plugins on an instance,Oracle Cloud Agent software on the instance, enable the plugins, and run each plugin. Additional configuration tasks may be required before using certain plugins.
This time, we will be performing "Compute Instance Monitoring," so please check the prerequisites before proceeding
procedure
1. Add a repository
First, check before installation
# sudo dnf info oracle-cloud-agent Last metadata expiration check: 0:18:11 ago on Wed May 1 05:36:04 2024. Error: No matching Packages to list
Since there is no repository, it will say "No matching Packages to list."
The repository information is specified in the files under /etc/yum.repo.d, so we will place the files directly there
# sudo vi /etc/yum.repos.d/oci-included-ol9.repo
[ol9_oci_included] name=Oracle Linux $releasever OCI Included Packages ($basearch) baseurl=https://yum-phx.oracle.com/repo/OracleLinux/OL9/oci/included/$basearch/ gpgcheck=1 priority=1 enabled=1
The content to be described is as follows.
The base URL this time refers to an Oracle Linux 9 package.
Also, please change the priority according to your environment.
As for the GPG key, since it is not a supported distribution, it is not located under /etc/pki/rpm-gpg/, so we will import it directly.
# sudo rpm --import https://yum.oracle.com/RPM-GPG-KEY-oracle-ol9
Reference:https://linux.oracle.com/security/gpg/
If you can import it, it's OK
2. Installing required modules
If the librepo module required to load the "osmsplugin" plugin is missing before installing the Agent, the following error will be displayed
Failed loading plugin "osmsplugin": No module named 'librepo'
So, install the module with the following command:
# sudo dnf install python3-librepo
Failed loading plugin "osmsplugin": No module named 'librepo' Last metadata expiration check: 0:53:43 ago on Wed May 1 07:24:35 2024. Dependencies resolved. ============================================================ ============================================================ ============================================================ ============================================================ Package Architecture Version Repository Size ============================================================ ============================================================ ============================================================ ============================================================ Installing: python3-librepo x86_64 1.14.5-1.el9 baseos 49k Transaction Summary ============================================================ ============================================================ ============================================================ ============================================================ Install 1 Package Total download size: 49 k Installed size: 183 k Is this ok [y/N]: y Downloading Packages: python3-librepo-1.14.5-1.el9.x86_64.rpm 1.9 MB/s | 49 kB 00:00 ---------------------------------------------------------------------------------------------------------------------------------------------------------------------------------------------------------------- Total 57 kB/s | 49 kB 00:00 Running transaction check Transaction check succeeded. Running transaction test Transaction test succeeded. Running transaction Preparing : 1/1 Installing : python3-librepo-1.14.5-1.el9.x86_64 1/1 Running scriptlet: python3-librepo-1.14.5-1.el9.x86_64 1/1 Verifying : python3-librepo-1.14.5-1.el9.x86_64 1/1 Installed: python3-librepo-1.14.5-1.el9.x86_64 Complete!
Once the module is installed, install the Oracle Cloud Agent
3. Installing the Oracle Cloud Agent
# sudo dnf install oracle-cloud-agent
Last metadata expiration check: 0:02:16 ago on Wed May 1 07:24:35 2024. Dependencies resolved. ============================================================ ============================================================ ============================================================ ============================================================ Package Architecture Version Repository Size ============================================================ ============================================================ ============================================================ ============================================================ Installing: oracle-cloud-agent x86_64 1.40.0-11632.el9 ol9_oci_included 127 M</pre> Transaction Summary ============================================================ ============================================================ ============================================================ ============================================================ Install 1 Package Total download size: 127 M Installed size: 360 M Is this ok [y/N]: y Downloading Packages: oracle-cloud-agent-1.40.0-11632.el9.x86_64.rpm 15 MB/s | 127 MB 00:08 ---------------------------------------------------------------------------------------------------------------------------------------------------------------------------------------------------------------- Total 15 MB/s | 127 MB 00:08 Running transaction check Transaction check succeeded. Running transaction test Transaction test succeeded. Running transaction Preparing : 1/1 Running scriptlet: oracle-cloud-agent-1.40.0-11632.el9.x86_64 1/1 Installing : oracle-cloud-agent-1.40.0-11632.el9.x86_64 1/1 Running scriptlet: oracle-cloud-agent-1.40.0-11632.el9.x86_64 1/1 Changing ownership of agent.yml* files to oracle-cloud-agent:oracle-cloud-agent Changing ownership of /var/log/oracle-cloud-agent/updater.log to oracle-cloud-agent-updater:adm Setting capabilities on bastions plugin 2024/05/01 07:53:02 Capability set on filePath: /usr/libexec/oracle-cloud-agent/plugins/bastions = [1 0 0 10 11 0 0 0 0 0 0 0 0 0 0 0 0 0 0 0] 2024/05/01 07:53:02 Capability set on filePath: 20 = [1 0 0 10 11 0 0 0 0 0 0 0 0 0 0 0 0 0 0 0] 2024/05/01 07:53:02 Capability set properly : [1 0 0 10 11 0 0 0 0 0 0 0 0 0 0 0 0 0 0 0] Changing ownership of /var/lib/ocarun/db/runcommand.db to ocarun:oracle-cloud-agent post install: starting services Verifying : oracle-cloud-agent-1.40.0-11632.el9.x86_64 1/1 Installed: oracle-cloud-agent-1.40.0-11632.el9.x86_64 Complete!
4. Check after installation
Once the installation is complete, we will check each step.
First, let's check if the installation was done correctly.
# sudo dnf list installed | grep "oracle-cloud-agent"
oracle-cloud-agent.x86_64 1.40.0-11632.el9 @ol9_oci_included
If it's installed from the repository you placed it in, then it's OK.
Next, we'll check if the program starts up.
# sudo systemctl status oracle-cloud-agent.service
● oracle-cloud-agent.service - Oracle Cloud Infrastructure agent for management and monitoring Loaded: loaded (/etc/systemd/system/oracle-cloud-agent.service; enabled; preset: disabled) Active: active (running) since Wed 2024-05-01 08:12:01 UTC; 28min ago Docs: https://docs.cloud.oracle.com/iaas/ Main PID: 4071 (agent) Tasks: 25 (limit: 48708) Memory: 38.8M CPU: 1.948s CGroup: /oca.slice/oracle-cloud-agent.service tq4071 /usr/libexec/oracle-cloud-agent/agent tq4081 /usr/libexec/oracle-cloud-agent/plugins/gomon/gomon mq4118 /usr/libexec/oracle-cloud-agent/plugins/oci-wlp/oci-wlp
If it says running then it's running
Finally, let's check if we can get the value from the console
■ Before installation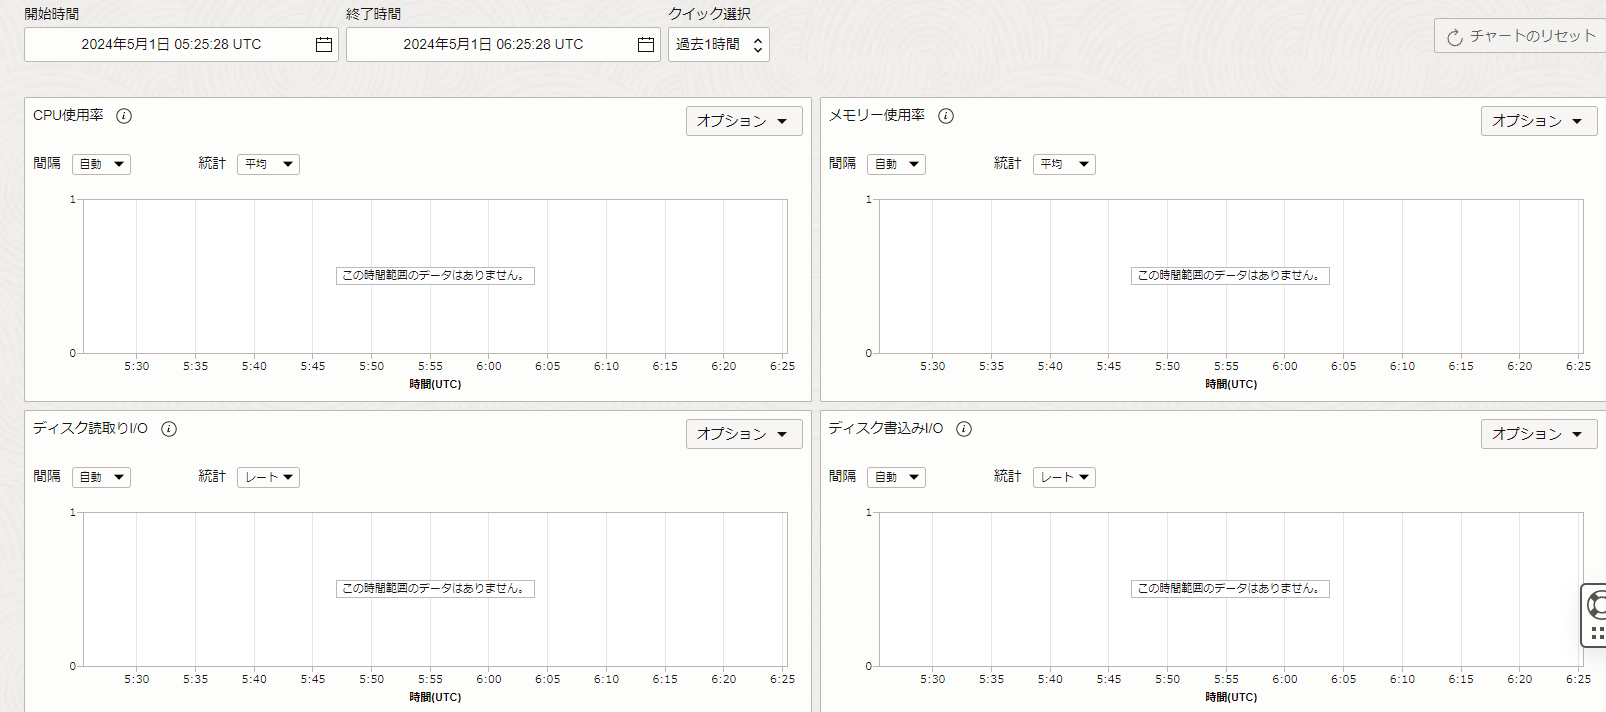
■ After installation

The values are being obtained correctly!
That concludes our guide on how to force-install the Oracle Cloud Agent on AlmaLinux 9.
However, I think it's only a matter of time before official support is provided, so please use this as a reference only!
 66
66 The person who wrote this article
About the author


