
Leave the content distribution to us! Try the J-Stream CDN
Hello.
This is Lee from the Systems Solutions Department.
This time, we'll introduce "J-Stream CDNext," a CDN service for the domestic market.
It's a content delivery network
from J-Stream, which provides a dynamic content distribution platform for videos, commercials, and more
Various options such as virtual paths, custom SSL certificates, and access restrictions are available with simple operations.
What is a CDN?
For readers wondering what a CDN is, let me explain a bit
A CDN is a highly distributed server platform optimized for delivering content such as web applications and streaming media.
A CDN directly responds to end-user requests for web content, enabling fast and secure media delivery by distributing its infrastructure across numerous physical network locations.Source: https://www.akamai.com/jp/ja/cdn/what-is-a-cdn.jsp
To put it more simply, it acts as an intermediary server
between the content server and the end user (or client)
As the number of end users and requests increases, traffic increases and response delays naturally occur.
With a CDN, you can reduce the burden on the content server caused by those requests!
Getting started with CDN (from applying for an account to completing simple setup)
For readers who are interested, let's take a quick look at J-Stream's CDNext!
Apply for an account
First, I must confess that it will take some time for your account to be issued, so please be patient.
Now, let's proceed with the account application process from the contact page
On the page above, check the box for "I would like a CDNext free trial" in the "Inquiry Details" section and
fill in the required fields in the green box.
Finally, after reviewing the "J-Stream CDNext Free Trial Terms of Use,"
check the checkbox if you agree and click the "Contact Us" button.
The application process takes approximately one business day. Please note that applications submitted on Friday will be processed the following week.
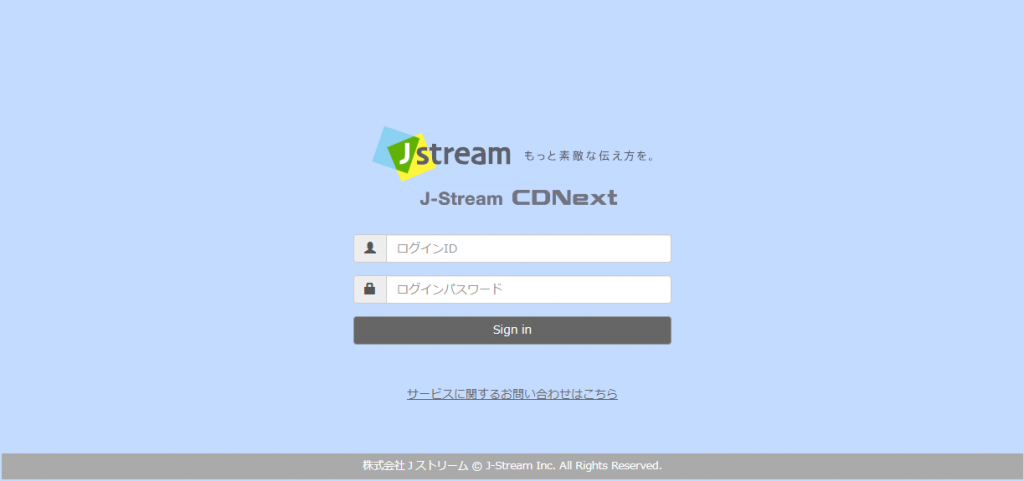
Log in to the CDN management screen
Once your application is accepted, your account information will be sent to the email address you entered in the inquiry form.
immediately the management screen page, you will find that an account with your own unique contract number has been created.
Now the preparations are complete!
Create a CDN host
To experience the power of a CDN, there are three steps to set it up as a minimum:
1. Configure the content server (also known as the origin server)
TOP menu screen > CDN host list screen > Click "Add CDN host"
> Click "Origin" in the "Basic Information" section of the new host OXOX.
Finally, click "Add Origin List" from the Origin List list and
change the items in the Origin List editing section as follows.
Example of entry
- Origin List Name: Enter any name
- Protocol: HTTP
- IP Address/FQDN: The IP or FQDN of your origin server
- Port: 80
- Weight: Optional (Leave blank and set to 0 by default)
2. Configuring a CDN host
that we've created a list of content we want to cache on the CDN,
let's change the new host OXOX to our preferred one and add the detailed settings.
TOP menu screen > CDN host list screen
> Click "Settings" in the "Basic Information" section of the new host OXOX.
From the "Basic" tab, change the new host OXOX to any hostname you like, and the name displayed in the CDN host list will change.
From the "Origin" tab, add the settings as shown below.
Example of entry
- Origin server type: Customer origin
- Fetch Protocol: HTTP
- Select origin list: The name of the origin list created in step 1
- Host header: The IP or FQDN you entered in the origin list in step 1
To apply the settings, return to the CDN host list and click the checkbox to the left of the hostname. Then
click the "Apply CDN Settings" button in the upper right corner of the same screen.
The settings will then be completed in about 1 minute.
3. DNS Server Settings
TOP menu screen > CDN host list screen
> Click "Settings" from the "Basic Information" item, which now has a more user-friendly name.
From the "FQDN" tab, note down the FQDN displayed in the "CNAME Information" field.
Enter this into the CNAME setting on your DNS server, and the simple setup is complete.
Check it from your browser
Connect to your content server (blog, personal website, etc.) from your web browser and
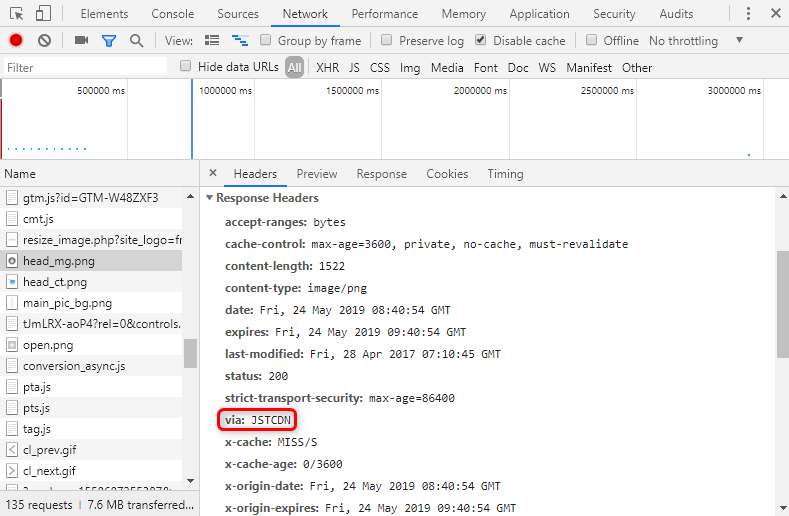
open the developer mode provided by your browser. In Chrome, you can do this by pressing the F12 key.
Clicking on the image file displayed in the "Name" column of the "Network" menu
will output the header information (labeled "Headers") on the right.
If it is cached on J-Stream's CDN, the "via" field in the "Response Headers" column will display JSTCDN
I apologize to users of other browsers, as I am a Chrome user, but
I believe other browsers also have some kind of developer mode, so please check them out yourselves.
summary
A Content Delivery Network (CDN) is a service that directly responds to end-user requests for web content, enabling fast and secure content delivery.
J-Stream's CDNext offers a 30-day trial period per account.
If you wish to continue using the service, please contact us through the management screen page!
Thank you so much for watching this far.
That's all!




The person who wrote this article
About the author