Creating a Da○saba○bar (First Issue)
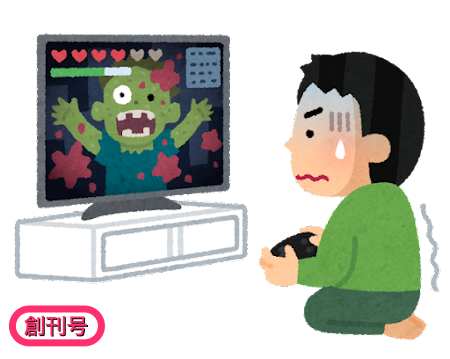
table of contents
"Weekly Da○saba○ber Creation" is now available!
We decided to start it abruptly in the style of Di○gos○ini.
It's been a while.
This is Matsuyama from the System Development Department.
When I'm browsing Facebook or reading manga on my smartphone,
I often see ads for "Da○saba○bar." I
don't dislike those kinds of chaotic games, so
I decided to give it a try to see what kind of feel I could create.
By the way, I've never played anything other than the trial version, so
there may be some major differences from the original game, but please forgive me.
Rough requirements
As always, let's clarify the requirements.
① There is a 2D field (a grid-like type)
② You can move your character (player) up, down, left, and right by touching the screen
③ There are multiple weapons and levels
④ Enemies will naturally spawn and move towards the player
⑤ There is a collision detection for the player, enemy, and weapon
⑥ When you defeat an enemy, experience points are displayed, and by collecting them you can get new weapons or level up your weapons
That's about it for now.
I'll think about the details as I create each part.
I'll leave the small production elements like time measurement and sound effects as future tasks (while giving the impression that they might not be done).
Project Creation
I haven't used Unity in a while, so I'll install the latest version.
2022.3.18f1 seems to be the latest LTS version, so I'll install that.
Unity Hub is convenient.
I'll name the project "BeBeSurvivor" and create it as a 2D app.
resource
I searched the Asset Store for the resources (sprites) I needed to create it. I
found exactly what I needed while browsing the free 2D assets.
◾️ Undead Survival Asset Pack
This includes all the necessary materials, such as players, enemies, and weapons.
It even works, so I could finish everything with this, but
I'm grateful to be able to use only the sprites.

◾️Lowpoly Textures PackThis
is an image pack to cover the field.
It is also included in the Undead Survivor Asset Pack, but let's try using this one as well.

Import these two using Package Manager
Paving the field
There are a lot of materials in the Lowpoly Texture Pack, so I'll just choose the ones I think I'll use.
They were a little big, so I'll adjust the scale.
It looks like this.

This can be made into a Prefab and then spread over an appropriate area using a script
.

And the script looks like this:
// Generate a field ranging from (-50, -50, 0.5) to (50, 50, 0.5) (5 x 5 grid) Vector2 pos = new Vector2(-50, 50); float size = 5f; int cnt = 20; for(int x = 0; x <= cnt; x++) { for(int y = 0; y <= cnt; y++) { // If x and y are 0 and cnt, generate field[1], otherwise generate field[0] int idx = (x == 0 || x == cnt || y == 0 || y == cnt) ? 1 : 0; // Generate field[2] for the center grid if(x == cnt / 2 && y == cnt / 2) { idx = 2; } // Generate GameObject obj = Instantiate(field[idx], new Vector3(pos.x + (x * size), pos.y - (y * size), 0.5f), Quaternion.identity); obj.transform.parent = parent.transform; } }
I'll try placing different images only on the outer periphery and in the center.
This time I'll just use a finite field, but I think infinite scrolling would be better.
(However, I think this code is pretty sloppy...)
Player
The survivor asset pack contains some good materials, so I will use them

There are also animation patterns, so create animations for waiting, moving, and death and
set them to the Animator.

This is what it looks like when moved (standby motion)

Movement (Input System)
Move the player character.
The center of the screen is the origin and the character moves in the direction you tap.
While I was away from Unity for a while, the Input System was released.
Import this from the Package Manager as well.
I tried it briefly, but I couldn't get the information from the Input Action properly.
I'll skip the Action for now and go ahead with the old-fashioned script control implementation.
(I'll try tinkering with the Input Action again when I have time.)
var mouse = Mouse.current; if(mouse.press.ReadValue() == 1) // press state { if(holdTime > 0.0f) // wait { holdTime -= Time.deltaTime; if(holdTime < 0.0f) holdTime = 0.0f; } else // move { Vector2 pos = mouse.position.ReadValue(); } } else // release state { holdTime = HoldTime; }
Operation information can be obtained with Mouse.current.
The tap state can be obtained with mouse.press.ReadValue(), which returns 1 if the touch is on and 0 if the touch is off.
After a certain period of time has passed, the touch coordinates are obtained with mouse.position.ReadValue() and
the movement direction (vector) is calculated. It looks something like this.

Since the coordinates of the two points are known, we can simply calculate the vector by subtraction.
Since the length is irrelevant, we normalize it with normalized.
Vector2 vec = (pos - center).normalized;
If you set this to the player's coordinates (localPosition), the character will move.
Like this. (Wait ↔ Move)

While you're there, extract only the X component of the direction of movement and change the character's orientation (rotate 180° on the y axis)
Camera Tracking
In this state, the character will go outside the camera, so we will make the camera follow the character so that the character always remains in the center of the screen. All you need to
do is match the localPosition of the MainCamera's Transform with the character's coordinates.

The code looks like this. Note that the z coordinate is fixed to the camera
// Follow the camera Vector3 pos = playerController.GetPosition(); pos.z = -1.0f; mainCamera.gameObject.transform.localPosition = pos;
After implementation it looks like this:

enemy
now, I'll just place some scarecrows as enemies.
I'll use the survivor asset pack, which has some good materials. (Thanks)

There are also animation patterns, so create animations for movement and death and
set them to the Animator.

For now, I'll leave it like this

Collision Detection
We will perform collision detection
using Collider2D, which is provided as standard in Unity.
First, preparations.
Add a Circle Collider 2D to both the player and enemy.
Check IsTrigger.

Also, add a Rigidbody 2D to the player (not necessary for enemies).
Since physics calculations are not required this time, set the Body Type to Kinematic.

Get the hit detection in the script.
Add the following functions to the player and enemy code. (Trigger type)
private void OnTriggerEnter2D(Collider2D collision) { // Called the moment the collider hits // Damage occurs if it hits an Enemy if (collision.tag == "Enemy") { Debug.Log("Player Hit : " + collision.name); } } private void OnTriggerStay2D(Collider2D collision) { // Called continuously while the collider is in contact } private void OnTriggerExit2D(Collider2D collision) { // Called when the collider leaves }
We will use the tag to determine what object was hit.
The Player tag is registered by default, so add the Enemy and Weapon tags. Set
the Tag for each object.

If you run it so that it outputs a log when it comes into contact, it will look like this

That's all for this month
That's all for now.
I think I've implemented the basic mechanisms.
Unity has a wide range of functions, so it's relatively easy to implement.
In the next issue
I would like to implement weapons (3 types x 3 levels)
I plan to upload the Unity project to GitHub later.
Please wait a little while.
I will update this article once it is uploaded.
I uploaded the Unity project to GitHub
I hope this is helpful in some way
BeBe Survivor
Well, that's all for today.
*Although I wrote "weekly" at the beginning, the next issue is scheduled to be posted in March.
 1313
1313 The person who wrote this article
About the author


