Securely deliver static sites using CloudFront and S3
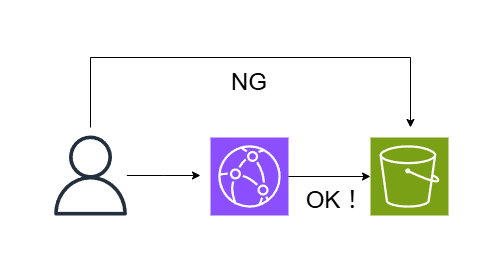
table of contents
Hello.
This is Lin from the Systems Solutions Department.
I'm now in my third year as an infrastructure engineer, and while I was surfing the internet thinking, "I don't know much about S3, so maybe I should learn more about it ('ω')," I came across this article
▼ I tried serving a static site using AWS S3
Although the article states, "Next, I would like to write about how to distribute in conjunction with Cloudfront," there were no articles about it, so I thought I would take this opportunity to write about it in relay format, after about nine years
Overall flow
Create an S3 bucket
↓
Upload HTML files to the bucket
↓
Create a CloudFront distribution
↓
Try accessing the S3 bucket's policy settings below.
Try it out
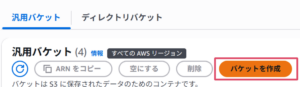
Creating an S3 bucket
① After going to the S3 console, click "Create Bucket"
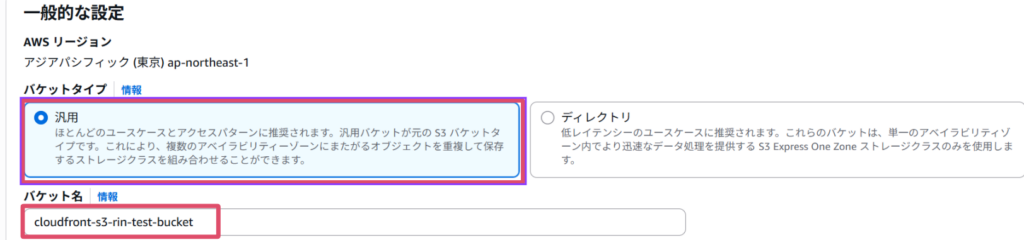
② Specify "General Purpose" as the bucket type and enter a bucket name.
*The bucket name must be unique worldwide.
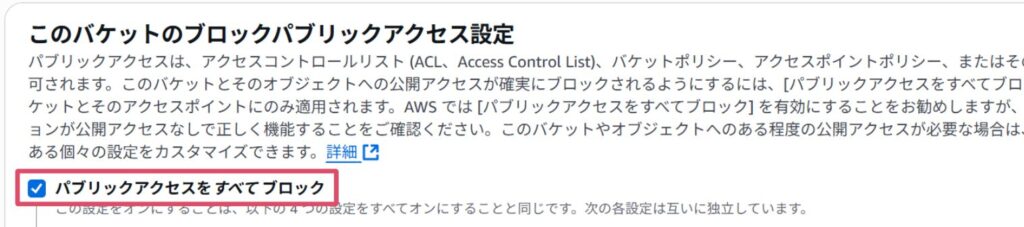
③ The other settings can be left at their defaults, but please make sure that the public access setting is set to "Block all public access".
*This is because we want to be able to deliver files from the S3 bucket only via CloudFront.
③ Once you have confirmed, click “Create Bucket”
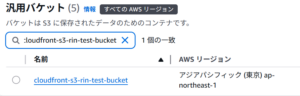
It was created!
④ Upload the file
Click on the bucket name on the bucket list screen > Upload
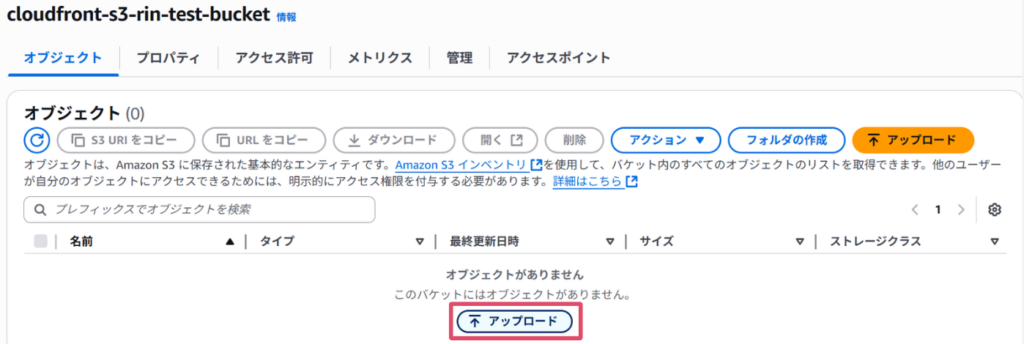
Upload the static file you want to display.
In this case, I uploaded this HTML file (index.html). (Created by ChatGPT)
<!DOCTYPE html> <html lang="ja"> <head> <meta charset="UTF-8"> <meta name="viewport" content="width=device-width, initial-scale=1.0"> <title>Thank you</title> <img src="data:image/gif;base64,R0lGODlhAQABAIAAAAAAAP///yH5BAEAAAAALAAAAAABAAEAAAIBRAA7" data-wp-preserve="%3Cstyle%3E%0A%20%20%20%20%20%20%20%20body%20%7B%0A%20%20%20%20%20%20%2 0%20%20%20%20%20font-family%3A%20Arial%2C%20sans-serif%3B%0A%20%20%20%20%20%20%20%20%20%2 0%20%20background-color%3A%20%23f0f0f0%3B%0A%20%20%20%20%20%20%20%20%20%20%20%20color%3A% 20%23333%3B%0A%20%20%20%20%20%20%20%20%20%20%20%20text-align%3A%20center%3B%0A%20%20%20%20 %20%20%20%20%20%20%20%20padding%3A%2050px%3B%0A%20%20%20%20%20%20%20%20%7D%0A%20%20%20%20 %20%20%20%20h1%20%7B%0A%20%20%20%20%20%20%20%20%20%20%20%20font-size%3A%202.5em%3B%0A%20% 20%20%20%20%20%20%20%7D%0A%20%20%20%20%20%20%20%20p%20%7B%0A%20%20%20%20%20%20%20%20%20%2 0%20%20font-size%3A%201.2em%3B%0A%20%20%20%20%20%20%20%20%7D%0A%20%20%20%20%3C%2Fstyle%3E" data-mce-resize="false" data-mce-placeholder="1" class="mce-object" width="20" height="20" alt="&lt;style&gt;" title="&lt;style&gt;" /> </head> <body> <h1>Thank you for reading this article! </h1> <p>I hope you learned how to securely serve static sites using CloudFront and S3. </p> </body> </html>
CloudFront configuration
Now that we have set up the files we want to distribute, we will proceed to configure CloudFront
Go to CloudFront > Create Distribution
| Setting items | value |
| Distribution options | Single website or app |
| Origin domain | The S3 bucket you created |
| name | Optional |
| Origin Access | Origin access control settings (recommended) |
If you select "Origin access control settings (recommended)" for Origin Access, you will then create a new OAC ( Origin Access Control)
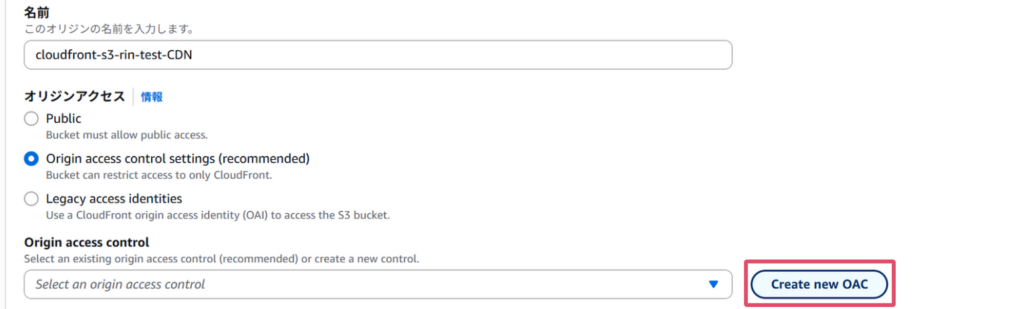
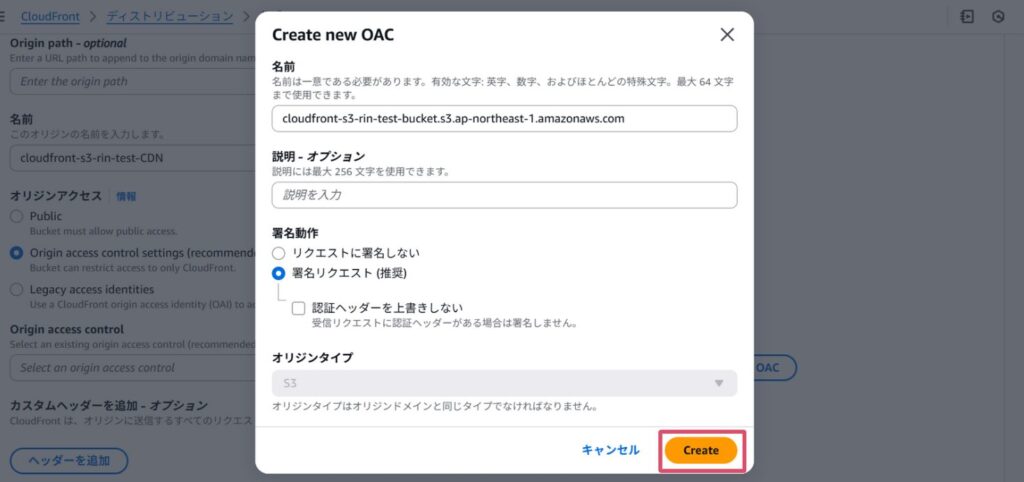
Once the OAC is created,it will automatically be added to the Origin Access Control.
The other settings are OK by default, so click Create Distribution
If you can create a distribution like this, you're good to go!
By the way, what is OAC (Origin Access Control)?
This policy controls access from CloudFront to an S3 bucket. It
allows the S3 bucket to recognize requests from CloudFront and block access from other sources.
OAC was introduced in 2022 as the successor to OAI (Origin Access Identity).
OAC offers more detailed policy configuration than OAI and supports features not supported by OAI, including:
• Amazon S3 server-side encryption using AWS KMS (SSE-KMS)
• Dynamic requests to Amazon S3 (PUT and DELETE)
S3 bucket policy settings
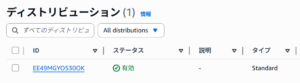
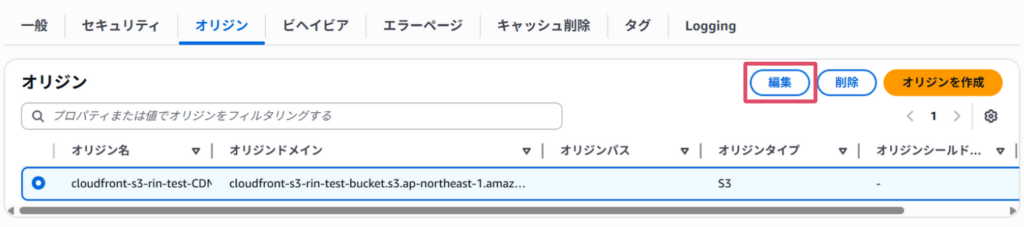
CloudFront > Distributions > Click on the distribution you created > Click on the Origin tab
Press "Edit" for the selected origin
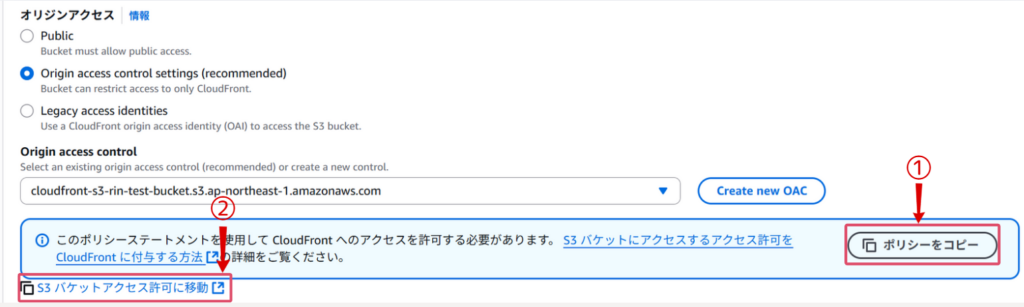
Go to Origin Access, copy the policy shown in the image, then navigate to S3 Bucket Permissions
Once you are redirected to the S3 bucket screen, select the Permissions tab and edit the bucket policy
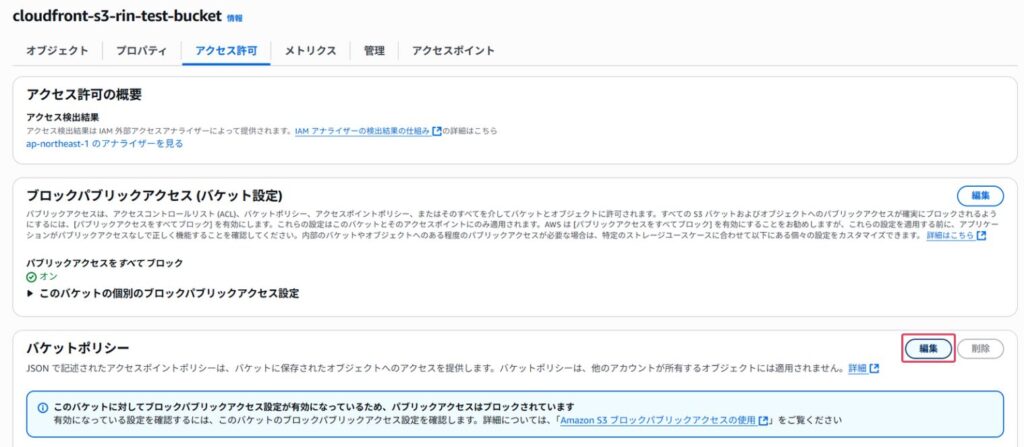
Paste the policy you copied earlier and save your changes
The copied policy will look like this:
{ "Version": "2008-10-17", "Id": "PolicyForCloudFrontPrivateContent", "Statement": [ { "Sid": "AllowCloudFrontServicePrincipal", "Effect": "Allow", "Principal": { "Service": "cloudfront.amazonaws.com" }, "Action": "s3:GetObject", "Resource": "arn:aws:s3:::cloudfront-s3-rin-test-bucket/*", "Condition": { "StringEquals": { "AWS:SourceArn": "arn:aws:cloudfront::xxxxxxxxxx:distribution/EE49MGYO530OK" } } } ] }
What each policy means (excerpt of key points)
| Principal | The CloudFront service is specified. This means that only CloudFront can access the objects in the S3 bucket. |
| Action | "s3:GetObject" indicates permission to get an object |
| Resource | Specifies all objects in the bucket |
| Condition | It allows requests only from a specific CloudFront distribution |
Once you get this far, you're ready to go!
Try accessing it
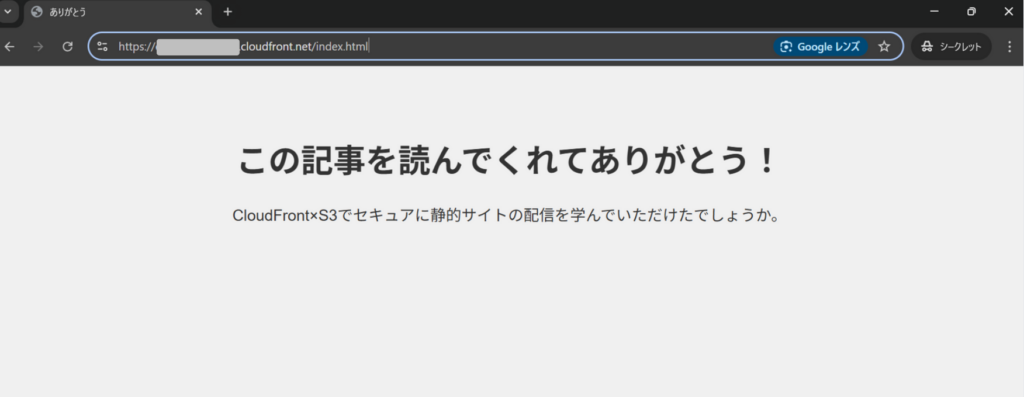
This time, we are not linking our own domain, so we will access the distribution domain directly
You can find your distribution domain name in the General section of your distribution
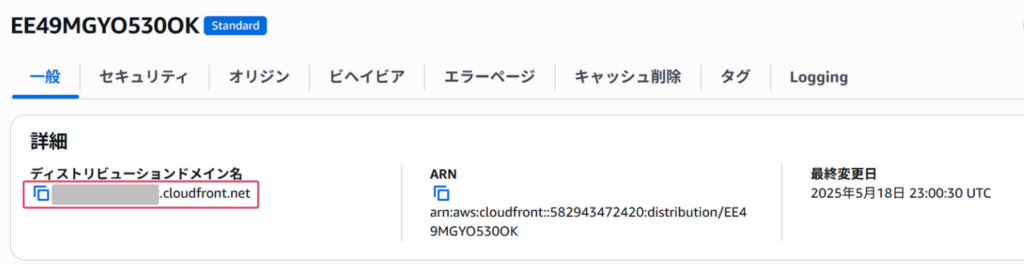
The uploaded HTML file was successfully displayed!
I also want to confirm that S3 is not publicly accessible, so I will try accessing the S3 URL
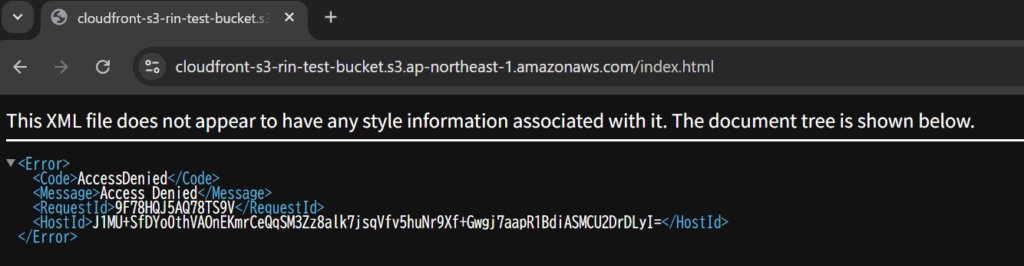
As expected, Access Denied!
 22
22 The person who wrote this article
About the author


