How to create your own testing environment using the command line tool Vagrant
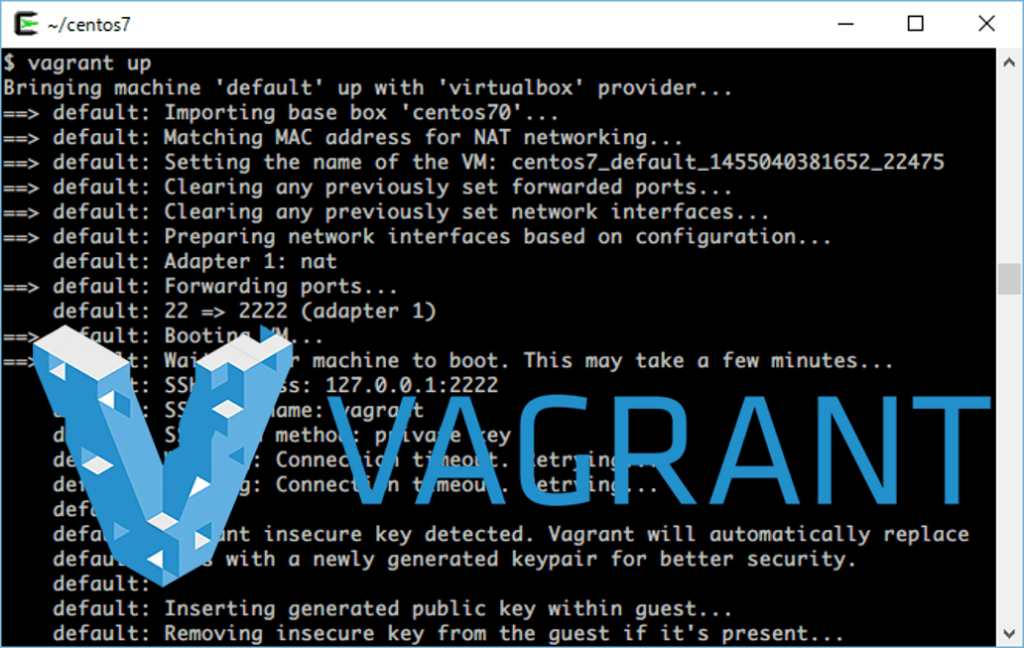
table of contents
My name is Ito and I am an infrastructure engineer
It's common sense not to casually touch a customer's environment.
Ideally, you should prepare a similar test environment and conduct testing there, but
messing with the production environment without permission and causing problems is unacceptable for an infrastructure engineer! Right?
The tool I'm introducing today, " Vagrant ," makes it easy to set up virtual testing environments, which can be a hassle to prepare manually !
What is Vagrant?
Vagrant is a command line tool that specializes in efficiently creating and operating virtual machine (VM) environments and works in conjunction with various virtualization software such as VirtualBox, VMware, and AWS (EC2)
This time we will install Vagrant using VirtualBox
procedure
Let's install Vagrant
Installing VirtualBox
Vagrant requires software called VirtualBox, which can run a virtual OS on an OS
VirtualBox can be downloaded from the following website:
Downloads – Oracle VM VirtualBox
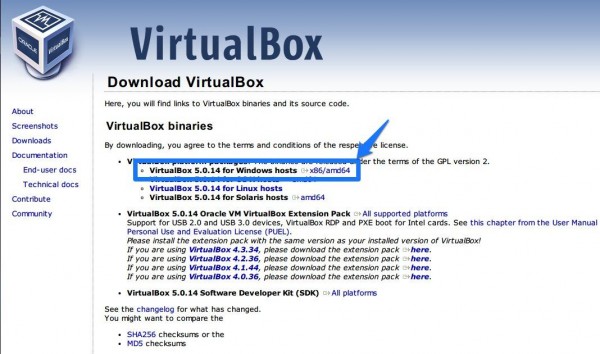
Following the installer instructions should be fine.
If you're unsure about the installation process, please refer to the following website:
Installing VirtualBox on Windows | VirtualBox Mania
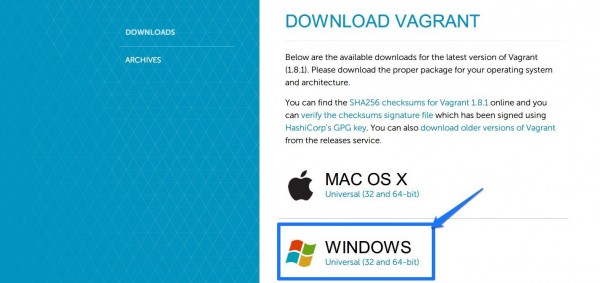
Installing Vagrant
Next, we'll install Vagrant.
Download it from the following site:
Download - Vagrant by HashiCorp
Similar to VirtualBox, if you're unsure about the installation procedure, please refer to the following website:
How to install Vagrant on Windows | WEB ARCH LABO
After installation, try entering the following command in the command prompt.
The Vagrant version should be displayed.
C:Userstest>vagrant --version Vagrant 1.7.4
Try setting up a virtual environment
Let's actually use Vagrant to set up a virtual environment.
Vagrant downloads a disk image called a "box" and
creates a virtual environment from the box file according to the configuration file.
The box file can be obtained from the following sources:
Official:Discover Vagrant Boxes | Atlas by HashiCorp
Unofficial:A list of base boxes for Vagrant - Vagrantbox.es
In practice, you will probably use the unofficial vagrantbox.es more often.
By the way, you can also create your own box file
First, download the box file
vagrant box add <box name> <box URL>
It will look something like this. Download the centos7 box file named centos70
$ vagrant box add centos70 https://github.com/tommy-muehle/puppet-vagrant-boxes/releases/download/1.1.0/centos-7.0-x86_64.box ==> box: Box file was not detected as metadata. Adding it directly... ==> box: Adding box 'centos70' (v0) for provider: box: Downloading: https://github.com/tommy-muehle/puppet-vagrant-boxes/releases/download/1.1.0/centos-7.0-x86_64.box box: ==> box: Successfully added box 'centos70' (v0) for 'virtualbox'!
Check if the box is downloaded
$ vagrant box list centos70 (virtualbox, 0)
You can confirm that a box named "centos70" has been downloaded
Next, we create a definition file based on the box.
This definition file will then be used to launch the virtual server.
$ vagrant init centos70 A `Vagrantfile` has been placed in this directory. You are now ready to `vagrant up` your first virtual environment! Please read the comments in the Vagrantfile as well as documentation on `vagrantup.com` for more information on using Vagrant.
A definition file called "Vagrantfile" will be created in the current directory.
By configuring this definition file, you can set up various settings and start up a virtual server.
Now, let's finally start the virtual server.
It will start up by reading the settings in the Vagrantfile.
$ vagrant up Bringing machine 'default' up with 'virtualbox' provider... ==> default: Importing base box 'centos70'... ==> default: Matching MAC address for NAT networking... ==> default: Setting the name of the VM: centos7_default_1455040381652_22475 ==> default: Clearing any previously set forwarded ports... ==> default: Clearing any previously set network interfaces... ==> default: Preparing network interfaces based on configuration... default: Adapter 1: nat ==> default: Forwarding ports... default: 22 => 2222 (adapter 1) ==> default: Booting VM... ==> default: Waiting for machine to boot. This may take a few minutes... default: SSH address: 127.0.0.1:2222 default: SSH username: vagrant default: SSH auth method: private key default: Warning: Connection timeout. Retrying... default: Warning: Connection timeout. Retrying... default: default: Vagrant insecure key detected. Vagrant will automatically replace default: this with a newly generated keypair for better security. default: default: Inserting generated public key within guest... default: Removing insecure key from the guest if it's present... default: Key inserted! Disconnecting and reconnecting using new SSH key... ==> default: Machine booted and ready! ==> default: Checking for guest additions in VM... ==> default: Mounting shared folders... default: /vagrant => D:/system/cygwin64/home/itou/centos7
Let's try connecting
$ vagrant ssh Last login: Sat May 30 12:27:44 2015 from 10.0.2.2 Welcome to your Vagrant-built virtual machine. [vagrant@localhost ~]$
Done!
In addition to the commands mentioned above, the following are some commonly used commands:
#Stop Vagrant vagrant halt #Reload Vagrantfile (restart) vagrant reload #Destroy Vagrant (discard the created virtual server) vagrant destroy #Check Vagrant status vagrant status
summary
That's a simple way to set up a testing environment using Vagrant!
The only time-consuming part is downloading the box file.
I believe your company has default settings for its servers.
You can create a virtual environment with those settings already applied and save it as a box file,
eliminating the need to perform the same operations for each test environment.
Furthermore, using Vagrantfile
makes it easy to configure port forwarding, set up private IP addresses, and launch multiple virtual environments.
If you can master these features, you should be able to easily build complex environments.
We hope you will use Vagrant to enjoy building a great testing environment!
If you want to talk to a cloud professional
Since our founding, Beyond has used the technical capabilities we have cultivated as a multi-cloud integrator and managed service provider (MSP) to design, build, and migrate systems using a variety of cloud/server platforms, including AWS, GCP, Azure, and Oracle Cloud
We provide a custom-made cloud/server environment optimized for our customers based on the specifications and functions of the systems and applications they require, so if you are interested in the cloud, please feel free to contact us
● Cloud/Server design and construction
● Cloud/Server migration
● Cloud/Server operation, maintenance, and monitoring (24 hours a day, 365 days a year)
 11
11 The person who wrote this article
About the author


