How to install a certificate from ACM on ELB
2017.07.21
 0
0 
table of contents
My name is Nakagawa and I work in the System Solutions Department.
I recently had some trouble successfully installing a certificate on an AWS ELB using the usual procedure. My
usual procedure involves inputting the certificate file into the target ELB's listener and saving it.
This time, however, an error message appeared during installation, preventing smooth registration.
After registering the certificate through ACM, I was able to install it by editing the listener, so I'll explain the steps.
What is ACM?
AWS Certificate Manager stands for AWS Certificate Manager.
You can apply for certificates (free of charge) that can be used with AWS services, and register existing certificates. It
also automatically renews issued certificates.
For more details, the official website .
Steps for installation
As a prerequisite, we will assume that an ELB that distributes access to HTTPS has already been created.
The procedure is as follows:
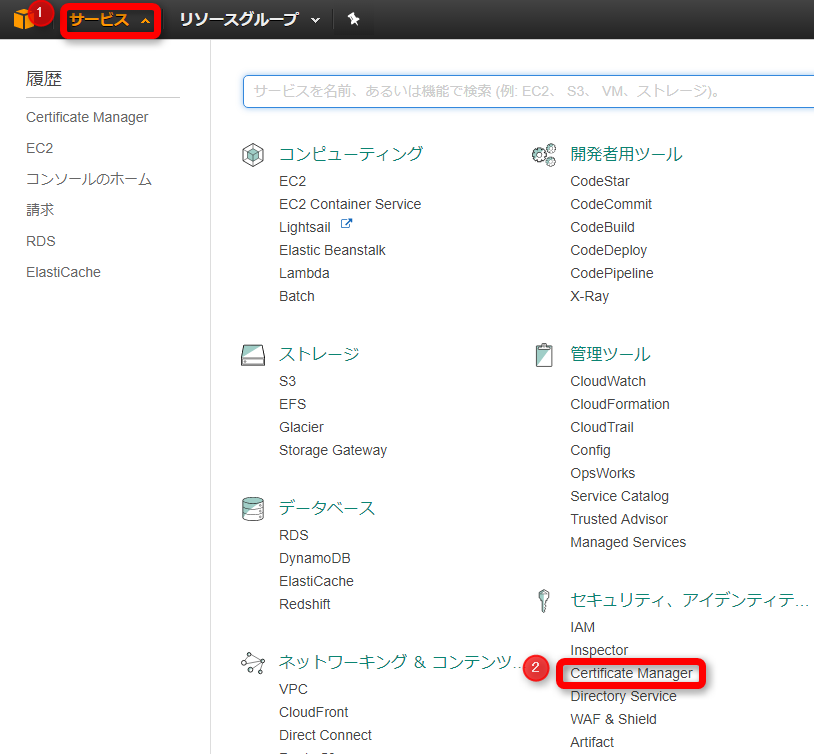
1. Select ACM from the console and then select "Import Certificate."
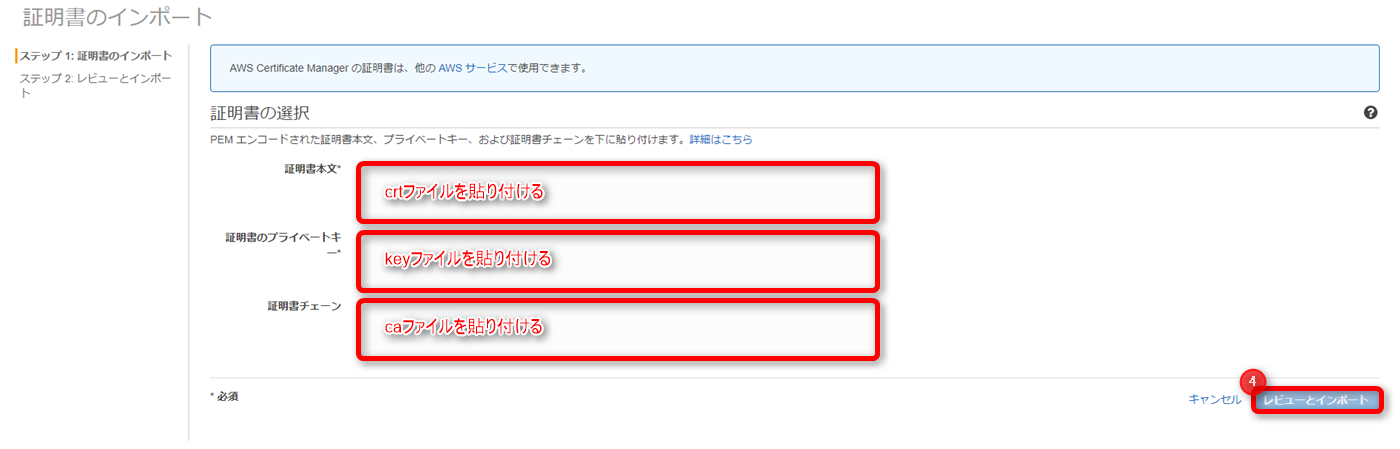
2. Open each certificate file in the program, paste it into the appropriate field, and click "Review Import."
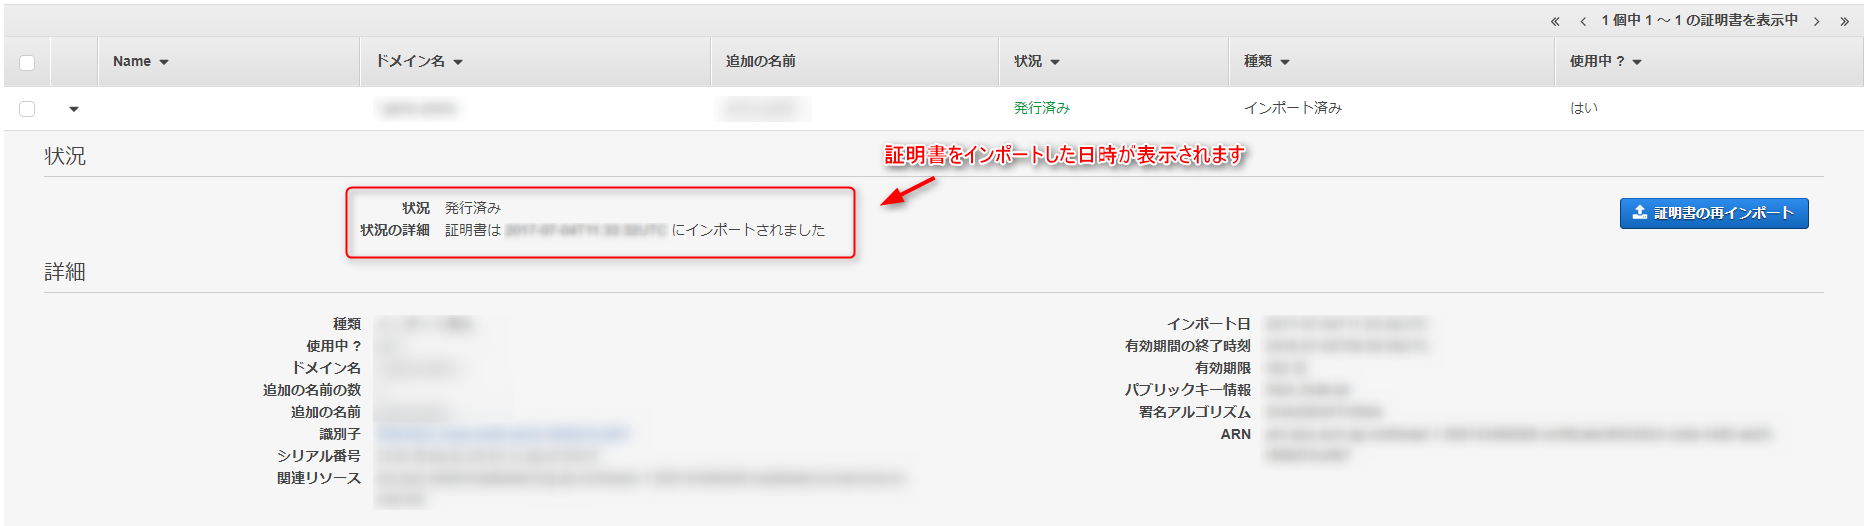
3. Check that the certificate information displayed on the review import screen is correct
If there are no problems, select "Import" and the import completion screen will be displayed.
Note down the identifier in the details field and install it on the ELB.
4. From EC2, select the ELB listener you want to set up and select "Edit"
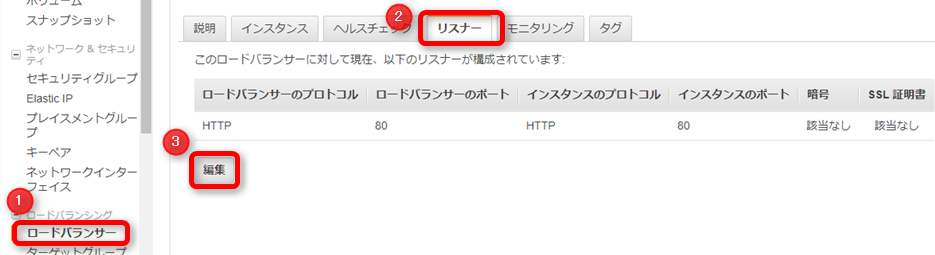
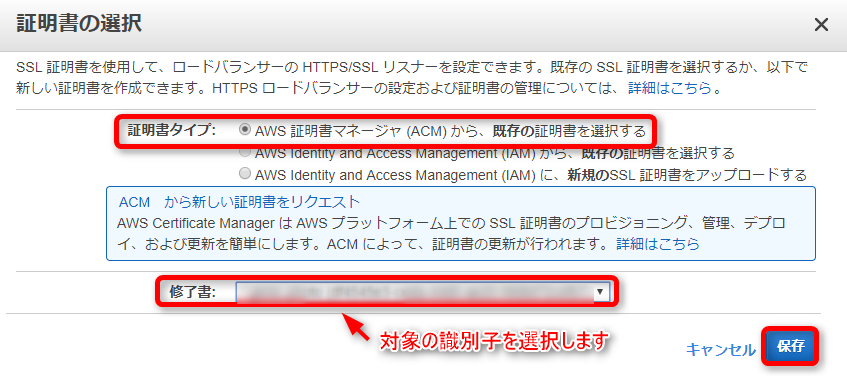
5. Select "Select an existing certificate from ACM."
Confirm that the identifier noted in step 3 is displayed on the certificate, then save it
6. After saving, check the ELB management screen
If no error message appears after saving, the certificate should have been installed!
This completes the process.
As the next assignment
I had checked the integrity of the certificate to be installed beforehand, so there should be no problem with the certificate itself, but I
haven't been able to identify the cause of the error using the usual method.
This time, I was able to install the certificate using a different procedure than before, so
next time I would like to investigate the original cause of the error and the mechanism of ACM and write an article about it.
00 The person who wrote this article
About the author


