I tried basic authentication using Apache

table of contents
Hello, this is Ken. This is my first time writing a blog, so I'm very nervous. Maybe... I love coffee, and I make coffee almost every day at work, and I tell other Beyond members to drink it!Push, we recommend it
What I used this time
virtualbox version 6.1
vagrant version 2.2.19
vagrant box: centos/7
Apache version 2.4.6
What is basic authentication?
First, let's take a look at Wikipedia's explanation
Basic authentication is one of the authentication methods defined in HTTP (HTTP authentication). It is also called basic authentication
In Basic authentication, the username and password pair is connected with a colon ":" and sent encoded in Base64. This has the drawback of making it easy to intercept or tamper with, but it is widely used because it is supported by almost all web servers and browsers
To prevent eavesdropping and tampering, a method called Digest authentication was later devised, in which the username and password were hashed using MD5 before being sent
Source: https://ja.wikipedia.org/wiki/Basic%E8%AA%8D%E8%A8%BC (as of August 12, 2022)
Huh??? What are you talking about??? Wikipedia!!
In short, it's about restricting access to websites, and it's easy to do with just a few lines of code: before logging in to the site, you have to enter your username and password, otherwise you can't log in
Let's set up a Virtualhost with Apache and enable basic authentication!
This time, the goal is to apply basic authentication to the public screen set up on the VirtualHost installed in vagrant
Change the Vagrantfile settings and log in to vagrant
Edit the vagrantfile to enable internet connection within the local environment
An example of a Vagrantfile has the following settings:
All you need to connect is
config.vm.network "private_network", ip: "192.168.43.20"
It is as follows
# -*- mode: ruby -*- # vi: set ft=ruby : # All Vagrant configuration is done below. The "2" in Vagrant.configure # configures the configuration version (we support older styles for # backwards compatibility). Please don't change it unless you know what # you're doing. Vagrant.configure("2") do |config| # Every Vagrant development environment requires a box. You can search for # boxes at https://vagrantcloud.com/search. config.vm.box = "centos/7" # Create a forwarded port mapping which allows access to a specific port # within the machine from a port on the host machine. In the example below, # accessing "localhost:8080" will access port 80 on the guest machine. # NOTE: This will enable public access to the opened port config.vm.network "forwarded_port", guest: 80, host: 8080 # Create a private network, which allows host-only access to the machine # using a specific IP. config.vm.network "private_network", ip: "192.168.43.20" end
Once you're done editing, run vagrant up
vagrant up
Once vagrant up is complete, connect with vagrant ssh,
vagrant ssh
The connection is completed
Install Apache and check the display
First, start by installing Apache
sudo yum install httpd
When "complete" is displayed, the installation is complete
systemctl status httpd
At this point, it has not yet started, so it will show as inactive (dead)
● httpd.service - The Apache HTTP Server Loaded: loaded (/usr/lib/systemd/system/httpd.service; disabled; vendor preset: disabled) Active: inactive (dead) Docs: man:httpd(8) man:apachectl(8)
Let's start Apache
sudo systemctl start httpd
Check the Apache status again to make sure it has started
systemctl status httpd ● httpd.service - The Apache HTTP Server Loaded: loaded (/usr/lib/systemd/system/httpd.service; disabled; vendor preset: disabled) Active: active (running) since Fri 2022-08-12 05:55:17 UTC; 4s ago Docs: man:httpd(8) man:apachectl(8) Main PID: 2443 (httpd) Status: "Processing requests..." CGroup: /system.slice/httpd.service tq2443 /usr/sbin/httpd -DFOREGROUND tq2444 /usr/sbin/httpd -DFOREGROUND tq2445 /usr/sbin/httpd -DFOREGROUND tq2446 /usr/sbin/httpd -DFOREGROUND tq2447 /usr/sbin/httpd -DFOREGROUND mq2448 /usr/sbin/httpd -DFOREGROUND
If you see that it says active (running), then Apache is running
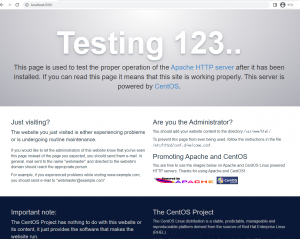
Furthermore, we will also confirm that the Apache test page is displayed
Enter http://localhost:8080 in your browser and if the Apache test screen appears, then it's OK
Let's set up a Virtualhost
First, create a document root for the Virtualhost
mkdir -p /var/www/vhosts/example.com/public_html
Once created, move it to public_html
cd /var/www/vhosts/example.com/public_html
Create a file to be displayed under public_html
vi index.html
The content can be anything you like. Since this is a test for Virtualhost, use the following text
This is a test for the basic document
Once you have written, save it with :wq and close the page
Next, create a conf file for the Virualhost you are creating this time
In order to load the conf file, it needs to be placed under /etc/httpd/conf.d, so move it to the file under conf
cd /etc/httpd/conf.d/
Once you have navigated to the conf directory, create a conf for the Virtualhost
vi vhost.conf
Enter the ServerName and DocumentRoot in the vhost.conf file
<VirtualHost *:80>ServerName example.com DocumentRoot /var/www/vhosts/example.com/public_html</VirtualHost>
Restart Apache for the settings to take effect
systemctl restart httpd
This alone will not reflect the changes, so you will need to configure it locally in Windows. To do this, edit the hosts file. The host file is located in the following directory:
C:\Windows\System32\drivers\etc\hosts
Enter this into Explorer, open the hosts file in Notepad with administrator privileges, and add the following:
192.168.43.20 example.com
Add this and save it
After that, if the settings are correct, when you enter http://example.com in your browser, the site specified in index.html will be displayed
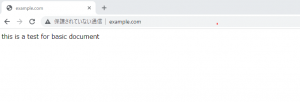
If you see this message, the VirtualHost has been successfully configured
Next, we will configure basic authentication for this VirtualHost
Let's set up basic authentication
The site that will be using basic authentication this time is:
/var/www/vhosts/example.com/public_html
Therefore, we will set it up so that basic authentication is only applied to sites in the above path
sudo htpasswd -c /var/www/vhosts/example.com/.htpasswd username
Set a username and password of your choice. After entering the above command, you will be asked to Enter password, so set a password. You will be asked for the password twice to confirm, so enter the password you want to set twice. Once that is complete, enter the cat command to check that the user and password have been set
cat /var/www/vhosts/example.com/.htpasswd
The output showed the username and hashed password, so I was able to confirm that the configuration was correct
vagrant:$apr1$5XrvFjtv$45oq4gzLiu708WtVYuOtq0
Now that we have changed the permission settings, we will configure basic authentication. This time, we will use .htaccess to perform basic authentication
Create an .htaccess file under the document root
sudo vi /var/www/vhosts/example.com/public_html/.htaccess
Then, enter the settings for basic authentication into .htaccess
AuthType Basic AuthName basic auth test AuthUserFile /var/www/vhosts/example.com/.htpasswd require valid-user
When you're done writing, press :wq to save
And since Apache does not allow .htaccess settings by default, we will configure it to allow it
Specifically, we will add the following settings to vhost.conf so that we can configure basic authentication for /var/www/vhosts/example.com/public_html. The settings to be added are as follows:
<VirtualHost *:80>ServerName example.com DocumentRoot /var/www/vhosts/example.com/public_html<Directory /var/www/vhosts/example.com/public_html> AllowOverride AuthConfig</Directory></VirtualHost>
First, to decide which Directory to reflect the settings in,<Directory /var/www/vhosts/example.com/public_html></Directory> By setting AllowOverride to AuthConfig, you can reflect settings such as basic authentication. After making this change, restart the system to reflect the previous settings
sudo systemctl restart httpd
The settings should now be reflected, so search for http://example.com again to check the display
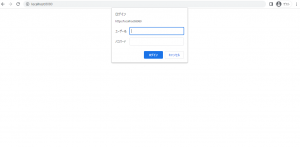
The basic authentication image was displayed!!! Just to be sure, I entered the username and password I had set, and the image in index.html was displayed correctly!!!
summary
When setting up basic authentication, you might get frustrated if it doesn't show up even after you've set it up, but I learned the importance of not panicking and just googling and researching. Up until now, I've mainly been studying Apache, but from now on I'd like to write about how to set up basic authentication for nginx on my blog
I have just previewed the theme of my next blog, so thank you for reading. Have a great summer!
 99
99 The person who wrote this article
About the author


