I tried basic authentication using Nginx
table of contents
Hello, I'm Ken
Last time, we used Apache to set up basic authentication. In my last blog post, I mentioned that I would also use basic authentication with nginx, so in this article I would like to write about how to set up basic authentication with nginx. As always, I will use vagrant to show you everything from installing nginx to setting up a Virtualhost and setting up basic authentication. I hope you will scroll down to the end
Environment and version used this time
virtualbox version 6.1
vagrant version 2.2.19
centos/7
nginx version nginx/1.23.1
The goals and procedures for this blog
This goal
The goal of this blog is to apply basic authentication to the pages of a virtual host configured in nginx
Setup Procedure
- Edit the vagrantfile and launch vagrant
- Enter the server with vagrant ssh
- Installing nginx
- Setting up a Virtual Host
- Apply basic authentication
I will roughly explain the steps above, so feel free to skip the steps you already know!!
Let's log in to the virtual server started with Vagrant via SSH
In order to use vagrant ssh, we will also implement the settings we made for Apache basic authentication here
Edit the vagrantfile to enable internet connection within the local environment
An example of a Vagrantfile has the following settings:
All you need to connect is
config.vm.network "private_network", ip: "192.168.43.20"
It is as follows
# -*- mode: ruby -*- # vi: set ft=ruby : # All Vagrant configuration is done below. The "2" in Vagrant.configure # configures the configuration version (we support older styles for # backwards compatibility). Please don't change it unless you know what # you're doing. Vagrant.configure("2") do |config| # Every Vagrant development environment requires a box. You can search for # boxes at https://vagrantcloud.com/search. config.vm.box = "centos/7" # Create a forwarded port mapping which allows access to a specific port # within the machine from a port on the host machine. In the example below, # accessing "localhost:8080" will access port 80 on the guest machine. # NOTE: This will enable public access to the opened port config.vm.network "forwarded_port", guest: 80, host: 8080 # Create a private network, which allows host-only access to the machine # using a specific IP. config.vm.network "private_network", ip: "192.168.43.20" end
Once you're done editing, run vagrant up
vagrant up
Once vagrant up is complete, connect with vagrant ssh,
vagrant ssh
As you can guess, this is exactly the same as the previous article on using basic authentication with Apache
I'm sorry, but I thought it might be a good idea to include this, so I'd be very grateful if kind people would just ignore it and say thank you on the surface...
If you can log in, this step is a success. Next, let's install nginx.
Let's install nginx
Last time, when I installed Apache, I was able to just go ahead and install httpd without thinking about it, but nginx is not that kind of guy. If you try to install it out of nowhere, it will tell you that there is no such thing. So, before we start installing it, let's go through the trouble
- Please note that I will write this article assuming that you have performed a yum update
First, let's create a repository for nginx
sudo vi /etc/yum.repos.d/nginx.repo
Now that you have opened nginx.repo, enter the following settings in the editor
[nginx] name=nginx repo baseurl=http://nginx.org/packages/centos/7/$basearch/ gpgcheck=0 enabled=1
Once you have written the above, save it with :wq
Now let's install nginx
sudo yum install nginx
This completes the installation. If there are no problems, start nginx
sudo systemctl start nginx
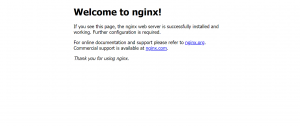
Finally, enter http://localhost:8080 and if the usual nginx page appears, the installation and startup of nginx is complete
Next, let's create a Virtualhost
Let's create a Virtual Host (*a bit tedious)
First, create a document root for the Virtualhost. (Virtualhost is sometimes written as vhost.)
*Since we are using centoOS this time, sites-available and sites-enabled do not exist by default, so we need to create them. However, if you are using a Debian-based OS, they exist according to Apache conventions, so there is no need to create sites-available and sites-enabled
mkdir -p /var/www/vhosts/example.com/public_html
Once the creation is complete, go to public_html and create index.html
sudo vi index.html
Enter the contents as desired and press :wq to save
In nginx, to set up a vhost, you need to create directories called sites-available and sites-enabled and set up the vhost under them. These two directories will be symbolically linked later. First, create the above two directories
mkdir /etc/nginx/sites-available
Create another one
mkdir /etc/nginx/sites-enabled
Once you have created the two directories, create the conf file for the Virtualhost
In this case, the domain is example.com, so the file name will be example.com.conf
The description will be written as follows:
server { listen 80; servername example.com; location / { root/var/www/vhosts/example.com/public_html; index index.html index.php; } }
Once you've written it, save it with :wq. Then, create a symbolic link to the sites-available directory and the sites-enabled directory
sudo ln -s /etc/nginx/sites-available/example.com.conf /etc/nginx/sites-enabled/example.com.conf
In order for nginx to read the settings above, we will write them in nginx.conf
Here's what to write
include /etc/nginx/sites-enabled/*;
Write this at the bottom of your nginx.conf
user nginx; worker_processes 1; error_log /var/log/nginx/error.log warn; pid /var/run/nginx.pid; events { worker_connections 1024; } http { include /etc/nginx/mime.types; default_type application/octet-stream; log_format main '$remote_addr - $remote_user [$time_local] "$request" ' '$status $body_bytes_sent "$http_referer" ' '"$http_user_agent" "$http_x_forwarded_for"'; access_log /var/log/nginx/access.log main; sendfile on; #tcp_nopush on; keepalive_timeout 65; #gzip on; include /etc/nginx/sites-enabled/*; #Added section include /etc/nginx/conf.d/*.conf; }
Now that the configuration is complete, we can perform a syntax check
nginx -t
If you see the messages "syntax okay" and "configuration file is successful," you can be sure there are no problems. Finally, restart nginx to reflect the settings
sudo systemctl restart nginx
And don't forget to edit the hosts file
Any IP address example.com
Add this to the hosts file and save it
*The settings will not be reflected unless you run it with administrator privileges. Therefore, run Notepad or similar with administrator privileges before opening the hosts file
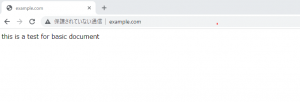
Now, if you search for http://example.com in your browser and the information you entered during setup is displayed, then the setup is complete
Now that the virtualhost is set up, the final step is to set up basic authentication
Let's apply basic authentication to the Vhost we set up
When using Apache, the ht tools are installed, so there is no problem. However, in the case of nginx, the ht tools are not installed, so the htpasswd command cannot be used. Therefore, we will start by installing them
sudo yum install httpd-tools
Once the installation is complete, use the htpasswd command to prepare for basic authentication
htpasswd -c /var/www/vhosts/example.com/.htpasswd username
Register any username and password you like
Just to be sure, make sure you have created the correct username and password
cat /var/www/vhosts/example.com/.htpasswd
If the username and hash value you set are displayed, you can see that the settings have been completed correctly
Finally, to enable basic authentication, add auth_basic and auth_basic_user_file to example.com.conf
server { listen 80; servername example.com; location / { root /var/www/vhosts/example.com/public_html; index index.html index.php; auth_basic auth_nginx_test; auth_basic_user_file /var/www/vhosts/example.com/.htpasswd; } }
After writing this, restart nginx. If basic authentication is enabled, you will be prompted for a username and password
This completes the configuration of basic authentication in nginx
 77
77 The person who wrote this article
About the author


