I want to control cache using Cache-Control on Cloud CDN (Google Cloud)

table of contents
Introduction
My name is Sumi and I work in the System Solutions Department, where I am involved in a little bit of infrastructure
Today, we will show you how to configure Cloud CDN to cache only specified files on a server using an Application Load Balancer.
Cloud CDN itself caches content on edge servers, which helps reduce server load and tune response times.
This article introduces an example of how to configure cache control using HTTP headers to prevent specific static content from being cached.
also refer to the Google Cloud recommended settings, "Cache static content," or the official documentation, " Invalidating cached content
*We strongly recommend that you conduct verification before making any adjustments
Cloud CDN cache control parameters
Cache Mode
Cloud CDN offers three caching modes that control how content is cached. For more detailed information, please refer to the official documentation
- CACHE_ALL_STATIC: Cache all static content (HTML, CSS, JavaScript, images, etc.).
- USE_ORIGIN_HEADERS: Cache only static content with the extension specified in
the Content-Type - FORCE_CACHE_ALL: Cache content based on
Cache-Control
Cloud CDN official documentation
Cache duration
The cache duration specifies how long the cached content remains valid
- CACHE_ALL_STATIC /USE_ORIGIN_HEADERS mode:
- Client TTL: Specifies the length of time that the browser or client should retain the cache.
- Default TTL: Specifies the cache duration that applies when the origin server
a Cache-Control - Maximum TTL: Specifies the maximum time that cached content can remain.
- DYNAMIC_CACHE mode:
- The cache period is specified by the
max-agethe Cache-Controlheader included in the response from the origin server
- The cache period is specified by the
Example: Cache-Control: max-age=3600 (1 hour)Cache Key
Cloud CDN uses the entire URL as the cache key,
identifying requests by protocol (HTTP/HTTPS), hostname, query string, HTTP headers, and cookies.
protocol
Identifies whether the request is HTTP or HTTPS.
Default : Enabled
| setting | behavior | Use Cases |
|---|---|---|
| Enable | Separate caching of HTTP and HTTPS requests | When serving different content via HTTP and HTTPS |
| Disable | Does not distinguish between HTTP and HTTPS requests | Serving the same content over HTTP and HTTPS |
When using Cloud CDN, it is common to deliver HTTP and HTTPS content using the same hostname, but
there are use cases where different deliveries are allowed because certain browsers require TLS. For more information, see
Using the Same Hostname for HTTP/HTTPS
host
Used when delivering different content via multiple host names.
Default: Enabled
Query string
Identifies parameters that follow after "?" in the URL.
Default: Enabled, Include all except selected items, No value
| setting | behavior | Use Cases |
|---|---|---|
| Include only selected items | Include the specified parameters in the cache key | When content changes based on specific parameters, such as search results or product detail pages |
| Include all but selected | Exclude certain parameters from the cache key and include others | When there are multiple parameters and you want to use only some of them as the cache key |
| invalid | Do not use parameters to identify | Providing identical content regardless of query |
Custom query string settings, if enabled, allow you to specify parameters in the form of a whitelist or an exclusion list
HTTP header
Identifies additional information to include in the request.
Default: Disabled
| setting | Use Cases |
|---|---|
| include | Optimizing content with HTTP headers such as User-Agent |
| exclude | Serve the same content regardless of headers |
Named Cookies
Uses cookies to identify specific users.
Default: Disabled
| setting | Use Cases |
|---|---|
| valid | When content changes depending on login status or user |
| invalid | To provide the same content regardless of cookies |
Use cases for each parameter
| Use Cases | protocol | host | Query string | HTTP header | Named Cookies |
|---|---|---|---|---|---|
| When delivering the same content over HTTP/HTTPS | exclusion | include | exclusion | exclusion | exclusion |
| Serving the same content under multiple hostnames | include | exclusion | exclusion | exclusion | exclusion |
| When the content doesn't change depending on the query string | include | include | exclusion | exclusion | exclusion |
| Optimizing content for different user agents | include | include | include | User-Agent | exclusion |
| When content changes depending on login status | include | include | include | exclusion | session_id |
How to use DYNAMIC_CACHE mode
To use the DYNAMIC_CACHE mode, you can set Cache-Control on the server side.
The Cache-Control header is an HTTP response header used to instruct browsers and cache servers how to cache content.
The following directives can be specified in this header:
max-age: cache expiration time in seconds.
s-maxage: cache expiration time in seconds for shared caches (such as CDNs).
public: allows the object to be stored in public caches.
private: allows the object to be stored only in private caches.
no-cache: prevents the object from being stored in the cache.
no-store: prevents the object from being stored in either the cache or the browser.
How to set it up
Environment (Rocky Linux 9 + Nginx)
This time, we will use Rocky Linux 9 + Nginx as a simple test environment. *The server construction part has been omitted. Since this is a test only for cache hit conditions, we will not use a CMS such as WordPress.
Preparation on the server side
Cache control is performed for each directory
Create a directory to place your test files
mkdir -p /(document root path)/cache mkdir -p /(document root path)/nocache
Place a test file in each directory
touch /(document root path)/cache/test.html touch /(document root path)/nocache.html touch /(document root path)/nocache/nocache.html
Add the following settings to Nginx Conf
server { listen 80; # Listen on HTTP port (80) server_name example.com www.example.com; # Domain name to use () root /var/www/example.com/public_html/; # Document root (where website files are located) index index.html index.htm; # File to display by default location / { try_files $uri $uri/ =404; # Return a 404 error if the file does not exist } location / { add_header Cache-Control "private"; # Other requests are private } location /cache/ { add_header Cache-Control "public, max-age=3600"; # Cache for 1 hour #add_header X-Cache-Status $upstream_cache_status; By removing #, a header will be displayed to indicate whether the cache was hit. #The same header can be returned on the CDN side, so we will set it on the CDN side this time. } location /nocache/ { add_header Cache-Control "no-cache"; # Disables caching #add_header X-Cache-Status $upstream_cache_status; By removing #, the header will indicate whether the cache was hit. #The same header can be returned on the CDN side, so this time we will set it on the CDN side. } }
After completing the configuration, run a syntax check and restart Nginx
nginx -t
If you see something like the following, there are no syntax errors
nginx: the configuration file /etc/nginx/nginx.conf syntax is ok nginx: configuration file /etc/nginx/nginx.conf test is successful
If there are no problems, restart Nginx
systemctl restart nginx
Header Check
After the settings are updated, check the test site and confirm that the Cache-Control header has been added to each directory.
If it is not registered in DNS, register the server's IP in Hosts and check the header using a debug tool (F12) such as Chrome browser.
The Cache-Control for each path should look like this:
/cache/test.html
⇒Cache-Control public, max-age=3600 Cached and retained for 1 hour
/nocache/nocache.html
⇒Cache-Control no-cache Not cached and always retrieved from the origin server
/nocache.html
⇒Cache-Control private Treated as private, allowing only browser caching
Cloud CDN settings
Cache Mode
⇒Use the sender's settings based on the Cache-Control header
Cache Key
⇒If
you want to change the default path or make more detailed settings, you can edit it by changing the cache key to custom.
Custom Response Headers
⇒ Header name: cdn_cache_status
⇒ Header value 1: {cdn_cache_status}
Cache hits and misses will be added to the header, allowing you to check the cache status using debugging tools, etc.
That's all for now,
just click Finish and it will be saved immediately.
Check the cache status
Open an incognito window in your browser and check each path again.
*The response header may not be visible due to browser cache, etc. In some cases, try accessing from a different browser.
/cache/test.html
⇒Cache-Control public, max-age=3600 #Cached and retained for 1 hour ⇒cdn_cache_status : hit #If it's the first access, there will be no cache, so it will be a miss. If you open the same site again in a separate window, it will be a hit
/nocache/nocache.html
⇒Cache-Control no-cache #Not cached, always retrieved from the origin server. ⇒cdn_cache_status : miss #Not cached, so it will be a miss
/nocache.html
⇒Cache-Control private #Treats as private and only browser caching is allowed. ⇒cdn_cache_status : miss #Since it is not cached on the CDN side, it will be miss
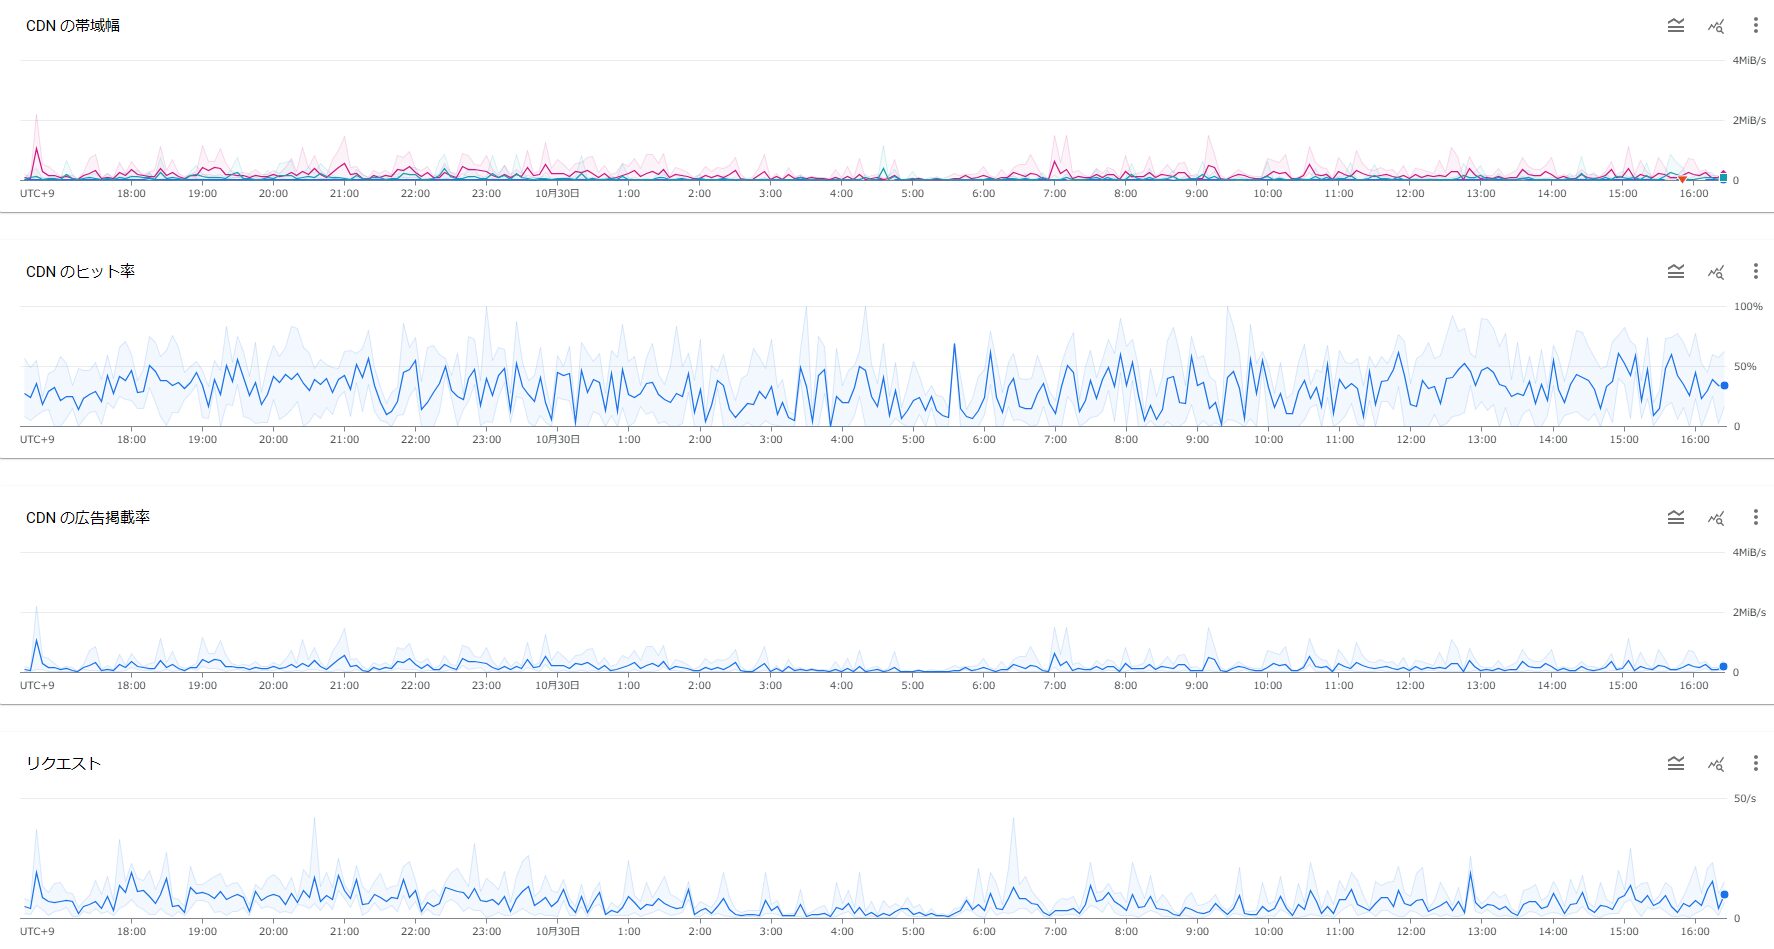
After checking the cache hits several times, you can check the hit rate on the console by going to CLB > CDN > click on the name of your origin > Monitoring > Cloud CDN in GCP.
By configuring the cache in more detail while looking at the hit rate and bandwidth, you can roughly determine the extent of the cache's impact, so adjust the cache range according to your conditions.
summary
Using Cache-Control headers and Cloud CDN gives you granular control over your static content
, speeding up content delivery and reducing load on your origin servers.
We hope this blog post helps you take advantage of caching with Cloud CDN.
Beyond provides services ranging from CDN construction to operation and maintenance, so
please feel free to contact us with any CDN-related inquiries!
https://beyondjapan.com/service/cdn/
 55
55 The person who wrote this article
About the author


