A powerful tool for rewriting hosts! "Hosts File Manager"
2016.01.12
 0
0 
table of contents
I'm Ito, an infrastructure engineer.
When migrating a server you're currently using, the IP address of the new server and the domain name aren't linked, so
when you access the domain name, you'll see the "currently used server."
In such cases, the hosts file is used to link the domain name and IP address to the destination server, at least on your own PC.
The hosts file is located in the following directory, and editing it can be a bit of a hassle
%systemroot%system32driversetchosts
We'd like to introduce you to "Hosts File Manager," a piece of software that allows you to conveniently manage hosts files, which can be a bit of a hassle to edit!
Settings and usage
Host File Manager can be downloaded from the following page
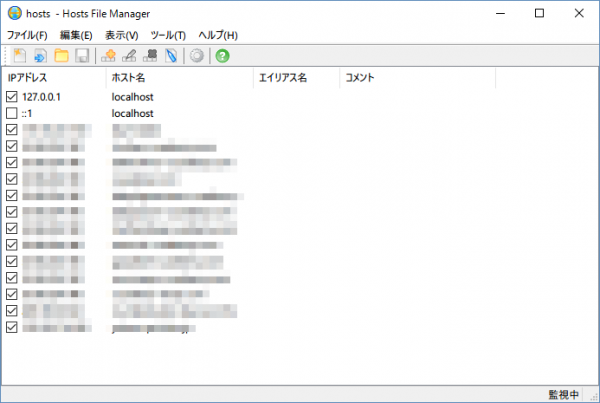
After installation, launching the application will display a screen similar to the one shown below.
(This may differ slightly for new users, as the settings are already configured.)
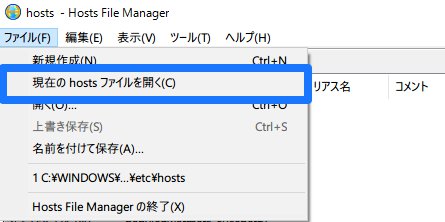
First, open your current hosts file
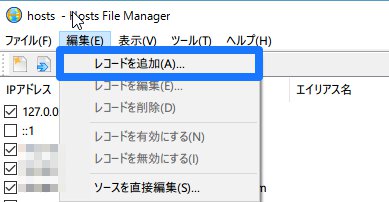
Add a record
Enter the domain name in the IP address and hostname fields for the new server.
(Of course, the IP address and domain name shown below are fictitious.)
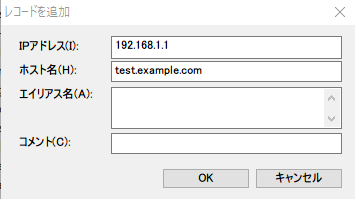
Click OK and you will see that the record has been added
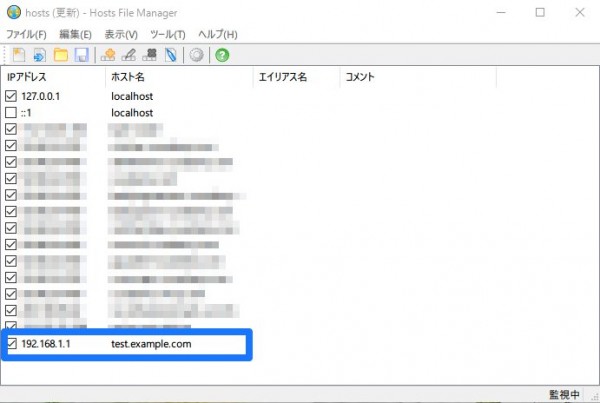
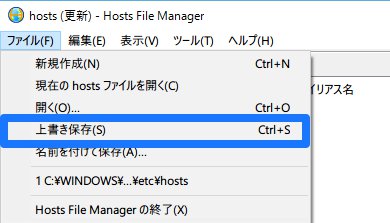
The changes won't be reflected yet, so please "Save" them.
If administrator privileges are required, you will be notified, so please click "OK".
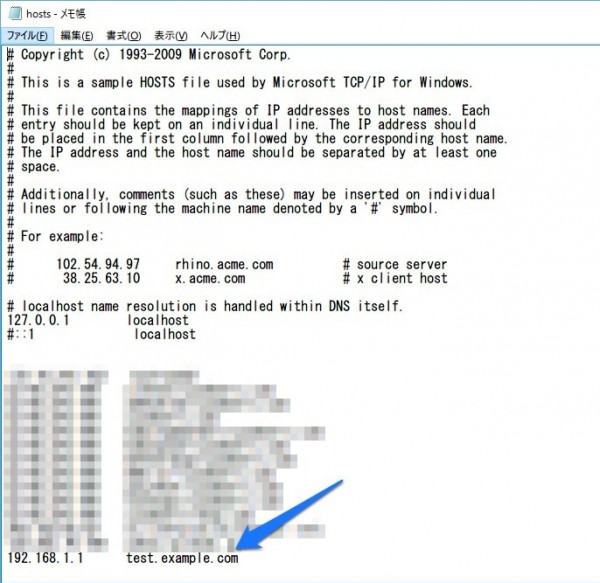
If you actually look at the hosts file, you can see that the settings have been reflected!
Convenient location
The method I described makes it easy to manage settings in the Hosts file, but
there are still other convenient features.
These are the checkboxes to the left of each Hosts setting.
The presence or absence of these checkboxes enables or disables the settings in the hosts file.
*Note: After making changes to the checkboxes, you must save the file for the changes to take effect.*
With the above setup, it will look like this:
| Checkbox | Domain name | Connection destination |
|---|---|---|
| can be | test.example.com | 192.168.1.1 |
| none | test.example.com | Original Server |
The changes will be reflected or not depending on whether the checkbox is checked or not, making editing much easier
summary
When migrating servers, the hosts file is used quite frequently.
Editing the hosts file every time in such situations is time-consuming.
Using these handy tools should help you work a little more efficiently, so
please give them a try!
The download page for Hosts File Manager is below.
If you are having trouble transferring your server
Furthermore, since our founding, Beyond has leveraged the technical expertise we have cultivated as a Managed Service Provider (MSP)
to design, build, and migrate systems using a variety of cloud and server platforms.
We provide optimized cloud/server environments tailored to the specifications and functions of the systems and applications our customers require . Please feel free to contact us if you are interested
00 The person who wrote this article
About the author


