LAMP environment configured with Docker containers - Beginner's Edition
table of contents
Hello,
I'm Mandai, the Wild Team member of the development team.
Docker containers are not meant to run in isolation within a single container, but rather
multiple containers working together to run a single service.
First, I would like to create a web system in which two Docker containers on one server work together
This article is the fourth in the Docker introductory series, which will help you understand the basics of Docker.
If you would like to read previous articles in the Docker introductory series, please follow the links below.
- A thorough and thorough introduction to Docker that you can copy and paste
- A thorough and thorough introduction to Docker that you can copy and paste - Dockerfile and Docker build edition
- Try out various PHP execution environments! Docker is the way to go in 2016!
This goal
This time, I will be working towards the goal of creating a primitive LAMP configuration using Docker. To explain
what a primitive LAMP configuration is, I will explain the configuration I have in mind.
- One Docker container running Apache+PHP
- One Docker container running MySQL
- Connect separate containers and they function as if they were installed locally
- From outside the VM, it looks like a normal web system
I imagine the situation like this
This will
- You can see how to launch multiple containers (not that it's much of a trick)
- Learn how to connect containers together
- This makes me wonder if it would be okay to put the containers on separate servers
I hope I can understand things like this
I'm hoping to install WordPress and see if it works.
Just like last time, I'll be working on Ubuntu on VirtualBox.
Prepare the necessary Docker images
The docker image required this time is
- MySQL docker image
- Apache + PHP Docker image
The former uses the official MySQL Docker image , and the latter uses the official WordPress Docker image
Now, pull the MySQL Docker image from Docker Hub and start the Docker container
vagrant@vagrant:~$ docker run --name mymysql -e MYSQL_ROOT_PASSWORD=[mysql password] -d mysql:latest Unable to find image 'mysql:latest' locally latest: Pulling from library/mysql 86e6c3163927: Pull complete 68f4b3625ea4: Pull complete 04f7e78a2c8a: Pull complete 1bade56c3b6b: Pull complete dd6387e14c18: Pull complete ca30c0626c9b: Pull complete 0dc5e226a795: Pull complete 6c164b0f04cb: Pull complete 5c74d058f7b5: Pull complete 0fd3b6e12567: Pull complete e8126a9d061e: Pull complete d17cffff8039: Pull complete 1924f4186d05: Pull complete 14961e5db73a: Pull complete Digest: sha256:16de02081c408c41361126aaa718f91693688d39a216a74ac8dab841db050228 Status: Downloaded newer image for mysql:latest 12cb7271b424e8043d7bb36484061f49331a87be25bcd415e4a9a481a6b33c53
Let's check the startup of the Docker container
vagrant@vagrant:~$ docker ps CONTAINER ID IMAGE COMMAND CREATED STATUS PORTS NAMES 12cb7271b424 mysql:latest "/entrypoint.sh mysql" 3 seconds ago Up 3 seconds 3306/tcp mymysql
It has started up successfully.
Next, pull the Docker image containing WordPress and start the Docker container.
vagrant@vagrant:~$ docker run --name mywordpress --link mymysql:mysql -p 8080:80 -d wordpress Unable to find image 'wordpress:latest' locally latest: Pulling from library/wordpress 9482852a6953: Pull complete 81de90fd7f09: Pull complete 57ae0639bf23: Pull complete c4f7968ac19e: Pull complete d06608e0df69: Pull complete 7ab219b6a3ea: Pull complete 049be7b00a71: Pull complete 1ac57811ebb0: Pull complete 5f7f35d35a61: Pull complete e7ff06ab86e9: Pull complete 50cbe3cba4bd: Pull complete ef9f3544f906: Pull complete 0544870563ee: Pull complete 6b7e8b5d0ef6: Pull complete 4fb33229649f: Pull complete d0cabc0feb31: Pull complete 6fb545ed9179: Pull complete 9e9f602b9253: Pull complete 8d3522c82327: Pull complete 26c9007116c8: Pull complete 19faf318b397: Pull complete 04c297e0e874: Pull complete 0b9e66c139d3: Pull complete 52cddd72d1ca: Pull complete 19d7bfb3a2a7: Pull complete 15031c83aa88: Pull complete 9c3238040649: Pull complete 492d7fea8944: Pull complete 676505bb515e: Pull complete eea959e50c85: Pull complete 1029747e7634: Pull complete 155de5677313: Pull complete Digest: sha256:bfd7e102741d73cce4ec58b2d937586c670f31df1c80aeaf4d5c525eb3c6ac06 Status: Downloaded newer image for wordpress:latest 8606df07f39f2a22dbdefd916b42c1747ca1df86f4a012620862c039d110887f
Once that's done, check to see if the Docker container is running
vagrant@vagrant:~$ docker ps CONTAINER ID IMAGE COMMAND CREATED STATUS PORTS NAMES 8606df07f39f wordpress "/entrypoint.sh apach" 3 seconds ago Up 3 seconds 0.0.0.0:8080->80/tcp mywordpress 12cb7271b424 mysql:latest "/entrypoint.sh mysql" 2 minutes ago Up 2 minutes 3306/tcp mymysql
This completes the installation of the necessary items.
The wordpress docker image does not include MySQL, but according to the instructions on docker hub
- If you add the option "--link mymysql:mysql" when installing, it will be set up as a MySQL container using a Docker container named mymysql
- The default value for WORDPRESS_DB_HOST is unspecified because it uses the linked mysql container
- WORDPRESS_DB_USER is not specified for now because we will be accessing the mymysql container as the root user (it is recommended to change it)
- If you do not specify WORDPRESS_DB_PASSWORD, the MYSQL_ROOT_PASSWORD variable set when the connected mysql container was started will be obtained from the mysql container, so there is no need to specify it again (although it is recommended to change it)
- The default value for WORDPRESS_DB_NAME is wordpress. If you want to use a different DB name, enter that name
If you keep these points in mind, it seems you can connect to the database across containers without any problems
Set up WordPress from your browser
Let's look at the WordPress installation screen again from the browser.
Since Docker is running on the Ubuntu VM, we write the following in the Vagrantfile to forward port 18080 on the host PC to port 8080 on the VM.
config.vm.network "forwarded_port", guest: 8080, host: 18080
Port 8080 on the VM is forwarded to port 80 on the WordPress Docker container, so port 18080 connects to port 80 on the Docker container
When I accessed http://localhost:18080/, the setup screen was displayed smoothly

Select Japanese as the language and click Continue

Enter the required login information

Done. Easy
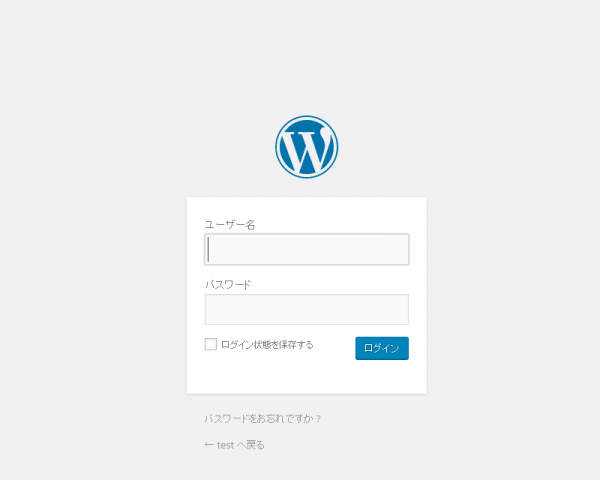
Next, a login form will appear, so enter the username and password you entered earlier

I got to the dashboard
It was all over in a flash, but it's amazing how if you have a web service that's been properly created using something like Rails, you can create a Docker image that includes git clone and rake commands in the Dockerfile, and then deploy it in the same way
You can also use AWS RDS for your database by simply specifying an IP address, and it's very easy to arrange things like deploying an nginx Docker container. It
all depends on how you link the Docker containers.
That's it.
 00
00 The person who wrote this article
About the author


