When developing with Vue.js, you should also use vue-devtools
![]()
table of contents
This is Kusakabe from the development team.
I would like to introduce vue-devtools, which is extremely useful when developing with Vue.
Roughly speaking, it's a tool that lets you see the contents of data without having to output it to the console every time!
vue-devtools is provided as a Google Chrome extension and is easy to install.
Once installed, all you have to do is open a page that has a Vue application, and vue-devtools will detect the Vue application
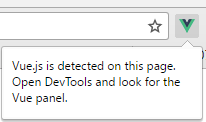
When detected, the Vue icon in the top right corner of your Chrome window will light up
Now, if you open Chrome's Developer Tools (F12), you will see a Vue tab added to the far right
In this article, I will give you a rough overview of what vue-devtools can do
Note
you are trying it with a local html file , you need to check "Allow access to file URLs" for vue-devtools in Chrome's Settings -> Extensions.

Also, devtools doesn't seem to respond to Vue applications in iframes .
(I actually wanted to provide something that you could test using JSFiddle, but I gave up on that.)
Main topic
vue-devtools has three main display categories:
Let's take a look at them one by one
Components
In this tab, you can check the parent-child relationships of each component and the data they hold.
The display name of a component uses the upper camel case of the child component name set in the components property of the parent component.
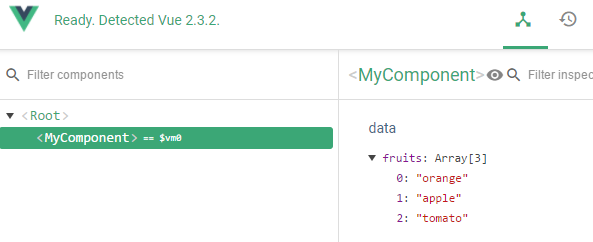
An example showing details of a child component passed as "my-component" to the root
If you're using a single-file component, the upper camel case of the file name will be used.
You can change how it appears in the devtools by setting the component's name property.
Vuex
When using Vuex, you can check the state of the store by selecting the [Vuex] tab
Specifically, it displays the state of each state in the store, the values obtained by the getter
, and the history of committed mutations in chronological order.
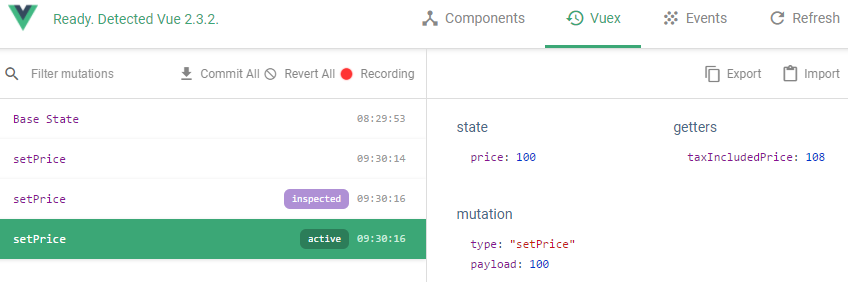
Clicking on each commit history will allow you to see the value (payload) passed to the mutation at that time, as well as the state and getter values after the commit.
By clicking [Time Travel] (clock icon) that appears when you select a commit, you can revert the state to the state immediately after the selected commit was made. (The values on the screen will actually change.)
The inspected label indicates the commit whose details you are currently viewing.
The active label indicates where you are in the timeline (i.e., if you move through time with [Time Travel], the destination becomes active).
Events
In this tab, you can see the history of when an event was triggered
The $emit history is displayed regardless of whether the event was listened for with $on or not
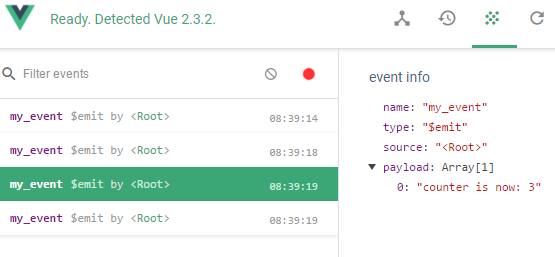
You can check the value (payload) passed to the event from the history
In the example image above, we are passing the string "counter is now: 3" to an event that simply displays the passed string
 11
11 The person who wrote this article
About the author


