Creating a Kubernetes cluster using GCP's GKE
2017.12.04
 0
0 
table of contents
- 1 Introduction
- 2 Check the region you are using
- 3 Set default values for gcloud
- 4 Setting environment variables
- 5 Create a Kubernetes cluster on GKE
- 6 Deploying nginx on Kubernetes
- 7 Verify that the pod is running
- 8 Exposing nginx to the outside world
- 9 Check the address of the network load balancer
- 10 Undeploy (delete) nginx
- 11 summary
This is Ohara from the Technical Sales Department
We will create a network load balanced cluster using GCP's container orchestration tool, Google Kubernetes Engine (GKE)
Introduction
Google Kubernetes Engine (GKE)
has a feature that manages network load balancing.
To use Network Load Balancing,
simply include
the type: LoadBalancer in your service configuration file GKE will set up your service and connect Network Load Balancing.
Reference: https://cloud.google.com/kubernetes-engine/
This time, we will launch and configure [Cloud Shell] on the GCP management machine
Check the region you are using
First, set the default values and environment variables for gcloud.
You need to set your Project ID and select your GCP Zone and Region.
You can check the list of available GCP regions for [Region] using the command below.
By the way, you cannot check the [Zone] using the command below, so
please select and assign any zone from [a-c].
*You can also check the [region] and [zone] on the official GCP website below.
Reference: https://cloud.google.com/compute/docs/regions-zones/regions-zones?hl=ja
gcloud compute regions list

This time, we will use the following as an example to set it up
[Project name]
ohara-test
[Zone name]
asia-northeast1-a * Enter any zone from [a to c]
[Region name]
asia-northeast1
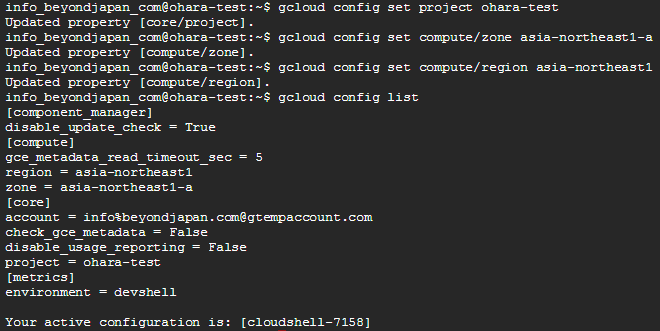
Set default values for gcloud
gcloud config set project [project name] gcloud config set compute/zone [zone name] gcloud config set compute/region [region name] gcloud config list
Setting environment variables
export CLUSTER_NAME="httploadbalancer" export ZONE="[Zone]" * The same zone as set with the default values above export REGION="[Region]" * The same region as set with the default values above

*Note: The values set in [gcloud default values] and [environment variables]
must be the same for the zone and region, otherwise an error will occur.
Create a Kubernetes cluster on GKE
In this example, we will start "3 nodes (3 instances)".
*Startup may take 3 to 5 minutes.
gcloud container clusters create networklb --num-nodes 3
![]()
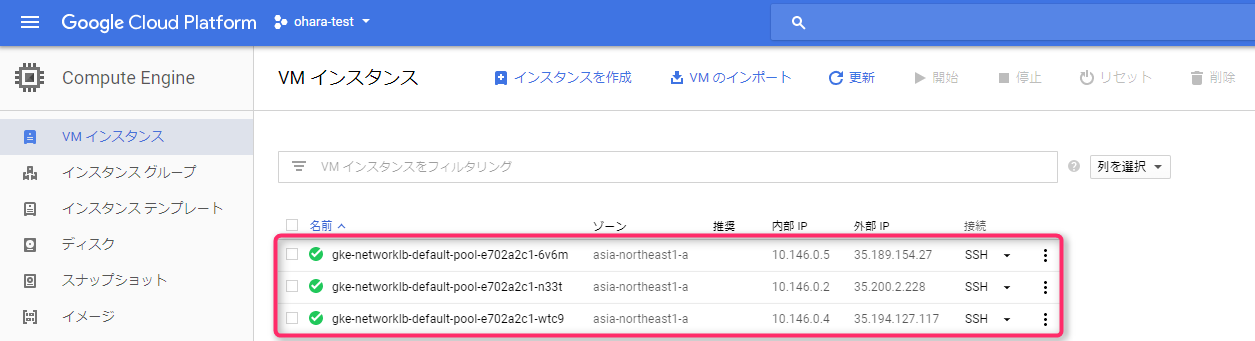
*Startup successful

If you check the Google Compute Engine (GCE) control panel, you
see that three nodes (instances) have been created and
each is configured as a Kubernetes node.
Deploying nginx on Kubernetes
kubectl run nginx --image=nginx --replicas=3
![]()
A replication controller is created that launches three pods,
each running an nginx container.
Verify that the pod is running
Check the status of the deployment and
you will see that the pods are running on different nodes.
Once all pods have a running status,
you can expose the nginx cluster as an external service.
kubectl get pods -owide

Exposing nginx to the outside world
You are creating a network load balancer that load balances traffic to three nginx instances
kubectl expose deployment nginx --port=80 --target-port=80 \ --type=LoadBalancer
![]()
Check the address of the network load balancer
Check the EXTERNAL-IP (global IP)
Please note that immediately after executing the command below, [pending] may be displayed.
In that case, please execute the command below until the IP address is displayed in EXTERNAL-IP.
* It may take a few minutes for the IP address to be displayed.
kubectl get service nginx

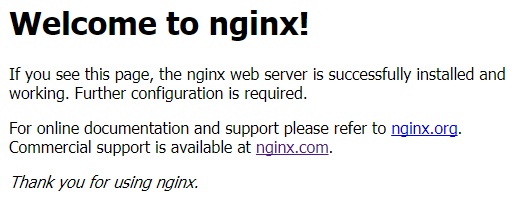
And you're done!
If you enter the IP address displayed in EXTERNAL-IP in your browser and see
the following display, then the connection was successful.
===============================================
Undeploy (delete) nginx
Now let's delete the Kubernetes cluster we just created.
While it's possible to delete it using the GCE/GKE control panel,
we'll try deleting it from Cloud Shell.
■ Deleting a service
kubectl delete service nginx
![]()
■ Removing a Replication Controller
kubectl delete deployment nginx
![]()
■ Deleting a cluster
gcloud container clusters delete networklb

Now all deletion is complete.
If you check the GCE control panel, the three instances should be deleted.
summary
■ I created three Kubernetes clusters using GKE from Cloud Shell
■ We deployed nginx on a Kubernetes cluster and made it publicly available
■ The Kubernetes cluster has been deleted
00 The person who wrote this article
About the author


