Talking about audio effects
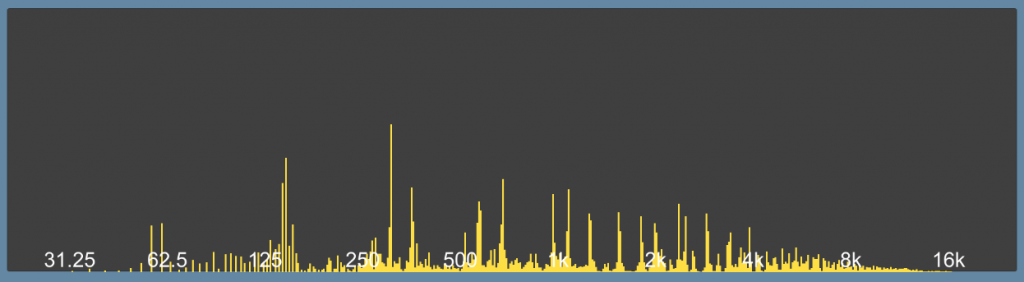
table of contents
- 1 Audio Filter
- 2 Requirements
- 3 Setting a filter on the Audio Listener
- 4 Each filter can be turned on/off with a checkbox
- 5 The Low Pass and High Pass filters have sliders to specify the frequency
- 6 Allows you to play BGM, SE, and Jingle separately
- 7 Displaying something like an audio spectrum
- 8 summary
- 9 lastly
Thank you for your hard work.
This is Matsuyama from the System Development Department.
I suddenly realized that there are audio filters, but I've only ever used reverb, so I decided
to check out other filters (effects).
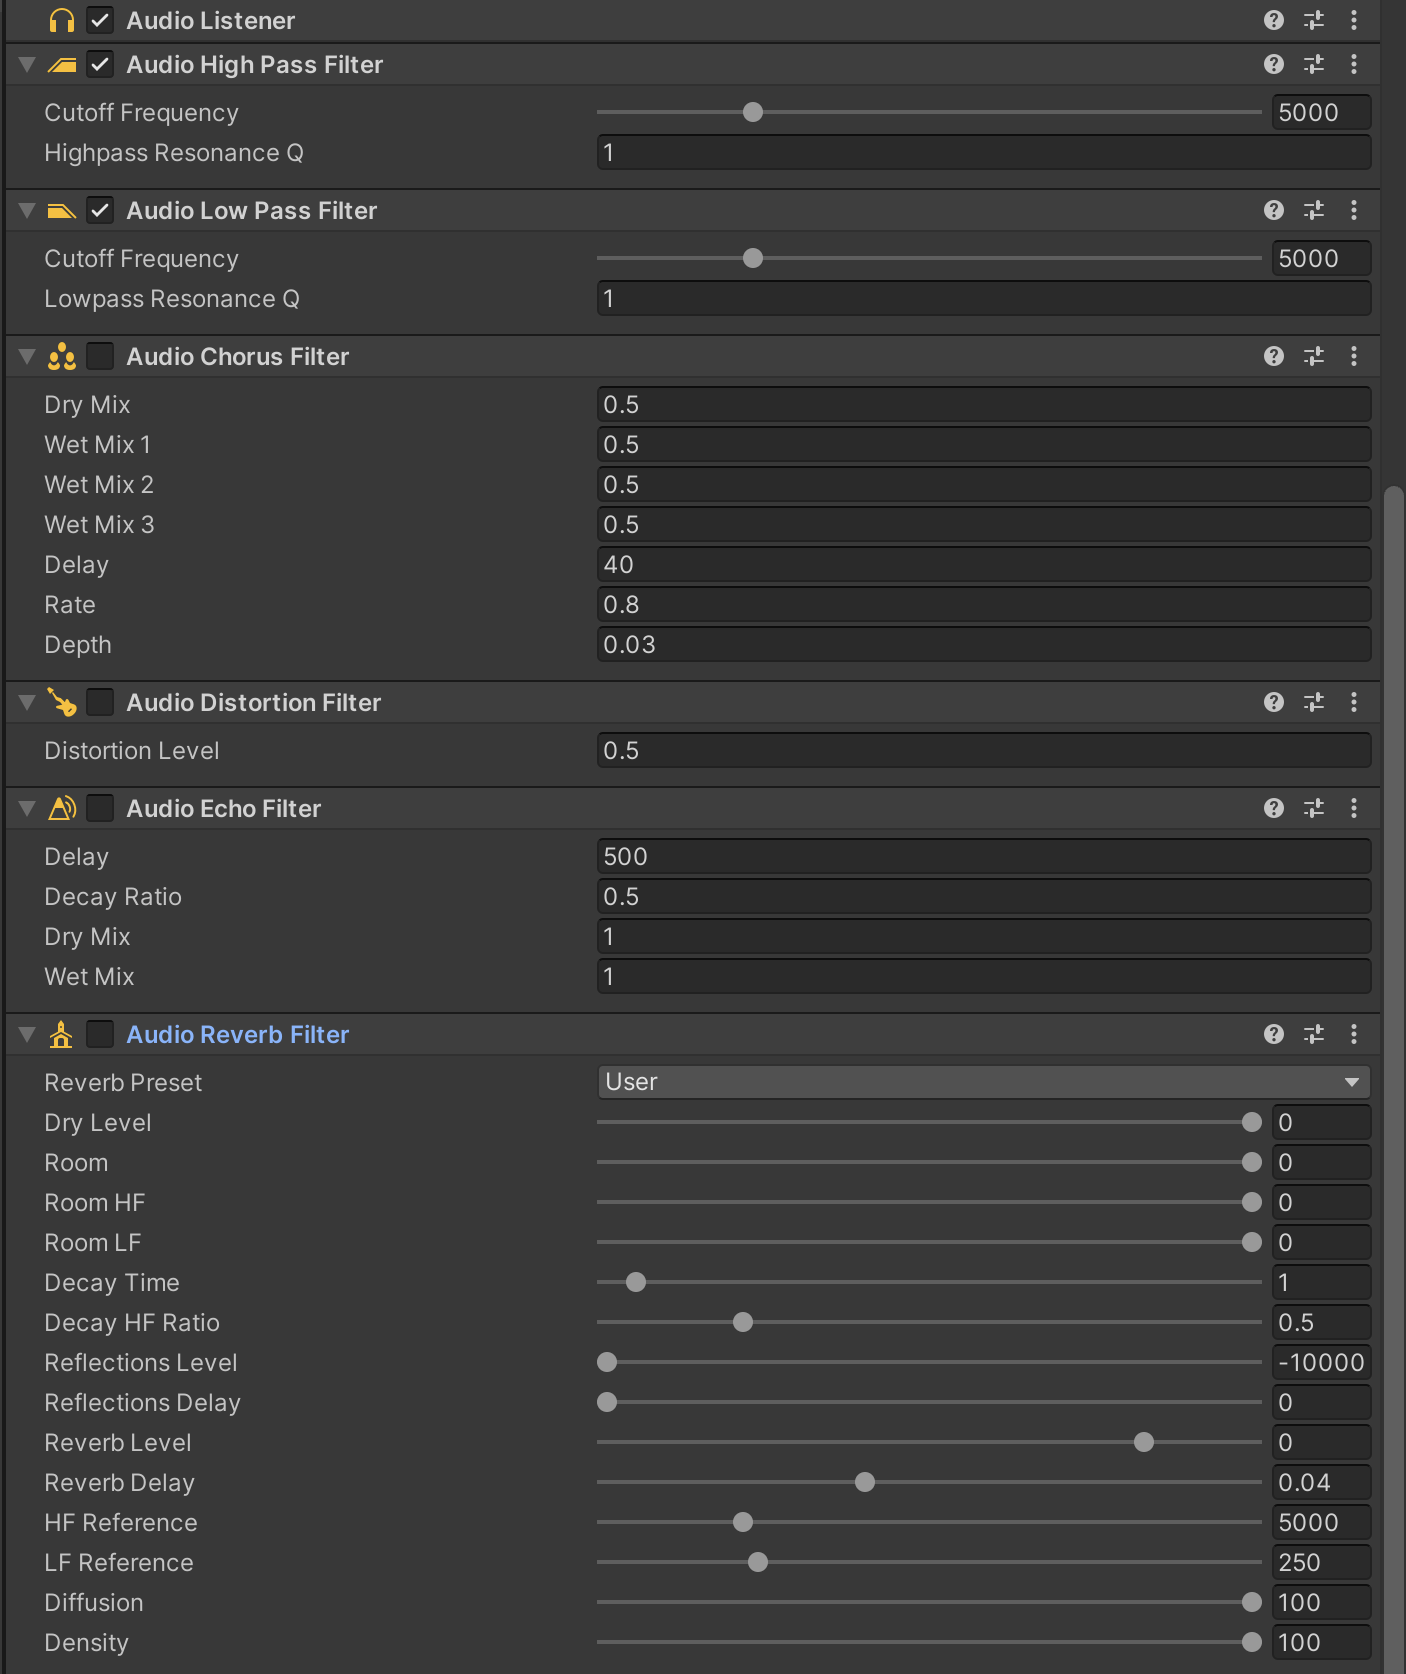
Audio Filter
First, let's check what filters are available.
Official documentation is here
Low Pass Filter
It is a low pass filter that cuts out high frequencies,
resulting in sounds that are attenuated when you are behind an obstruction such as a wall or the back of a speaker.
High Pass Filter
Contrary to Low Pass, this filter cuts low frequencies.
As a physical phenomenon, high frequencies should be attenuated first, so this is how it sounds when cheap earphones can't reproduce low frequencies. It
produces a crackling sound.
Echo Filter
It's an echo. It repeats the same sound while attenuating it.
It's like singing with echo in a karaoke booth.
If you increase the interval, it might sound like an echo.
Distortion Filter
It makes the sound louder regardless of the volume.
Because it is low quality, it distorts the sound like it's crackling.
Reverb Filter
Personally, this is the filter I use most often.
It gives the impression of reverberation in a closed space, such as a hall or underground passage.
It also gives the impression of a voice coming through a microphone. It
has the most configurable parameters, and as an amateur, I feel like I can't adjust them all.
Chorus Filter
This is a filter that plays modulated sounds together like a chorus.
I tried it with a sample, but it didn't work very well.
If anyone knows how, please let me know...
Requirements
As usual, we will create a sample in Unity and try it out.
① Set various filters to the Audio Listener
② Make each filter on/off with a checkbox
③ Specify the frequency of the Low Pass and High Pass filters with a slider
④ Make it possible to play background music, sound effects, and jingles
⑤ Display something like an audio spectrum
It looks like this.
The parameters of each filter are in their default state. All
we need to do is create a UI that plays some audio.
It's OK if the audio spectrum moves in a reasonable way.
Setting a filter on the Audio Listener
The MainCamera Component has an Audio Listener, so add each filter below it. All filters
except the Low/High Pass Filter can be switched using checkboxes, so leave them off by default.
Each filter can be turned on/off with a checkbox
Created using UI.Toggle. (Like this↓)

Prepare a trigger method,
// Toggle for Filter public void OnClickToggleFilter(int no) { switch ((FilterNo)no) { case FilterNo.Chorus: fltChorus.enabled = tglChorus.isOn; break; case FilterNo.Distortion: fltDistortion.enabled = tglDistotion.isOn; break; case FilterNo.Echo: fltEcho.enabled = tglEcho.isOn; break; case FilterNo.Reverv: fltReverb.enabled = tglReverv.isOn; break; } }
Just set it in OnValueChanged

The Low Pass and High Pass filters have sliders to specify the frequency
The Low Pass and High Pass filters can be set with sliders,
and volume and pitch can also be adjusted.
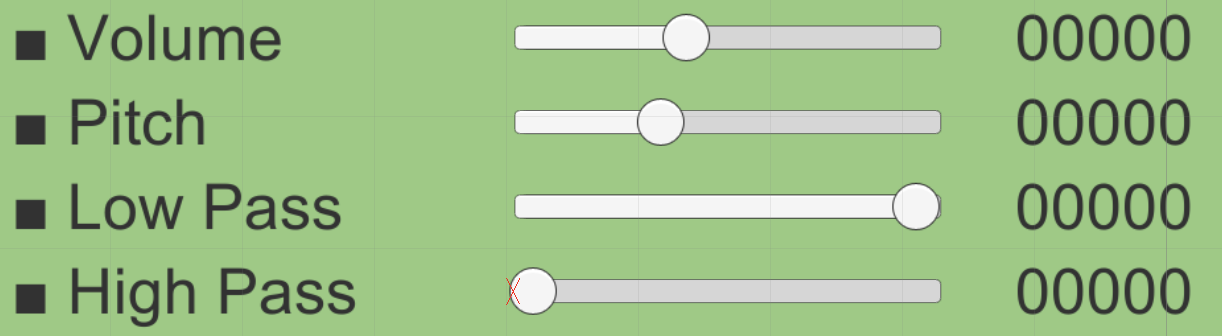
The slider's j reflection looks like this
① Set the event listener
// Bass pass sldLoPass.onValueChanged.AddListener((value) => { setLoPass(value); });
② Set a value for the filter
// Low-pass filter setting private void setLoPass(float val) { var loPassHz = ExpHz(val); fltLoPass.cutoffFrequency = loPassHz; txtLoPass.text = string.Format("{0:#}", loPassHz); }
* ExpHz values of 0.0 to 1.0 are converted to 10 to 22000 Hz
float ExpHz(float logHz) { var t = Mathf.Log(LowHz) - Mathf.Log(HighHz); return Mathf.Exp(logHz * t) * 10f; }
Allows you to play BGM, SE, and Jingle separately
Use a UI.Button to play a sound

Set an event listener to toggle play/stop.
Use AudioSource.Play(), Stop().
// BGM play/stop btnBgmPlay.onClick.AddListener(() => { if (!bgmSource.isPlaying) bgmSource.Play(); else bgmSource.Stop(); });
Displaying something like an audio spectrum
Finally, let's display the waveform data.
This is the one shown in the title image.
Use GetSpectrumData() in AudioListener
I used this as a reference for the implementation. (Thank you)
I want to see the spectrum analysis of sound on a real smartphone.
The audio samples obtained by GetSpectrumData() are divided into 512 frequency bands for UI display
AudioListener.GetSpectrumData(spectrumData, 0, FFTWindow.Hanning); var outputF = AudioSettings.outputSampleRate; // Initialize all bins for (int i=0; i <bins.Length; i++) { bins[i] = 0f; } var logMaxF = Mathf.Log(graphMaxFrequency); // 上のbinの周波数のlog var logMinF = Mathf.Log(graphMinFrequency); var logRange = logMaxF - logMinF; if (logRange <= 0f) { logRange = 8f; } // まず周波数分類 for (int i=0; i<spectrumData.Length; i++) { var f = outputF * 0.5f * (float)i / (float)spectrumData.Length; if (f == 0f) { f = float.Epsilon; } // 対数を取ってどのビンに入るか確定 float binValue = (float)bins.Length * (Mathf.Log(f) - logMinF) / logRange; int binIndex = Mathf.FloorToInt(binValue); if ((binIndex > = 0) && (binIndex < bins.Length)) { // Add data to that bin bins[binIndex] += spectrumData[i]; } }
Create a base Prefab to be displayed in each block.
It is a UI.Image with Width: 3, Height: 0.
Arrange these from the left of the screen and set the height according to the value.
// Reflected in the bar for(int i=0; i
Now, when you play the audio, the waveform data should appear similar
summary
I tried all the audio filters.
Chorus didn't work very well (tears)
. As expected, it seems difficult to know when to use the filters other than reverb and low pass.
Unity also Audio Mixer , so if you want more detailed settings, you might want to use that.
To be honest, I don't think this is something an amateur should get involved in...
Well, that's all for today.
I'll upload it to Git again this time.
I hope it will be helpful for some reason.
Unity Sample
In addition, we used audio data from the following sources:
OtoLogic and
Otonomori
lastly
I am a member of the system development service site "SEKARAKU Lab."
Beyond offers a one-stop service for everything from server design and construction to operation, so if you have any problems with server-side development, please feel free to contact us.
SEKARAKU Lab: [https://sekarakulab.beyondjapan.com/](https://sekarakulab.beyondjapan.com/)
thank you
 11
11 The person who wrote this article
About the author


