[JMeter] Obtaining a CSRF token and making a POST request

table of contents
Hello! This is Fukui from the System Development Department!
Recently, when creating a scenario using JMeter, I was receiving 403 errors several times when making POST requests from a CSRF-protected page, so I would like to introduce how to solve this problem!
In this article,
we will mainly introduce two things: obtaining a CSRF token
and making a POST request using the obtained token
*By the way, I have listed some important JMeter settings to remember at the end of this blog, which also serves as a personal memo. I hope that anyone who is planning to use JMeter will read it to the end
Obtaining a CSRF token
Let's start by explaining how to obtain the CSRF token.
To obtain the CSRF token, use the "Regular Expression Extraction"
■ Added "Regular Expression Extraction" function
go to
"Add" -> "Post-processing" -> "Regular Expression Extraction" for the HTTP request sampler that displays the screen that issues the CSRF token *For example, if there is a POST request for login processing and a CSRF token is required as a request parameter, you would add regular expression extraction to the previous GET request for "Login Screen Display."
Once the addition is complete, the following screen will appear, allowing you to configure each item
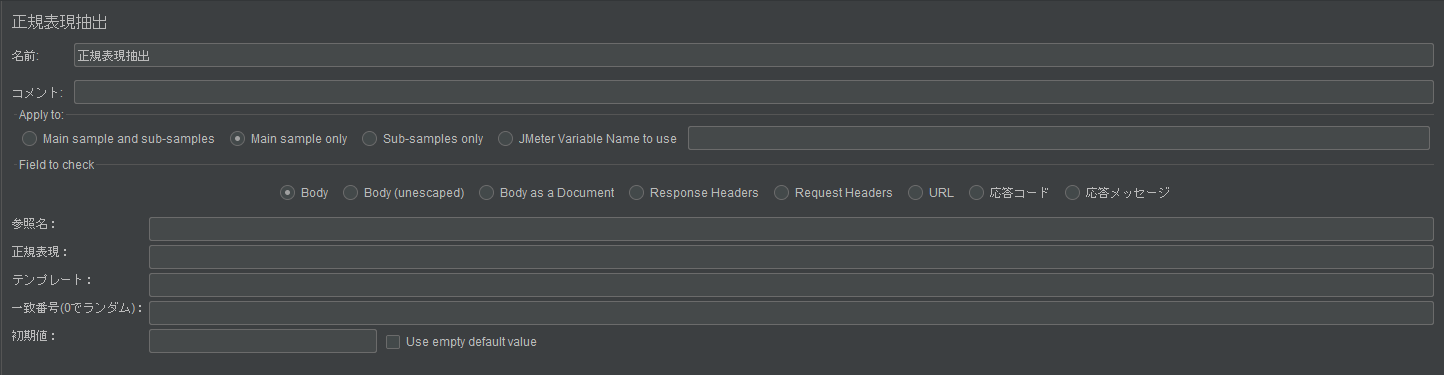
■ "Regular Expression Extraction" settings
As an example, we set up the following settings. We will explain the required settings
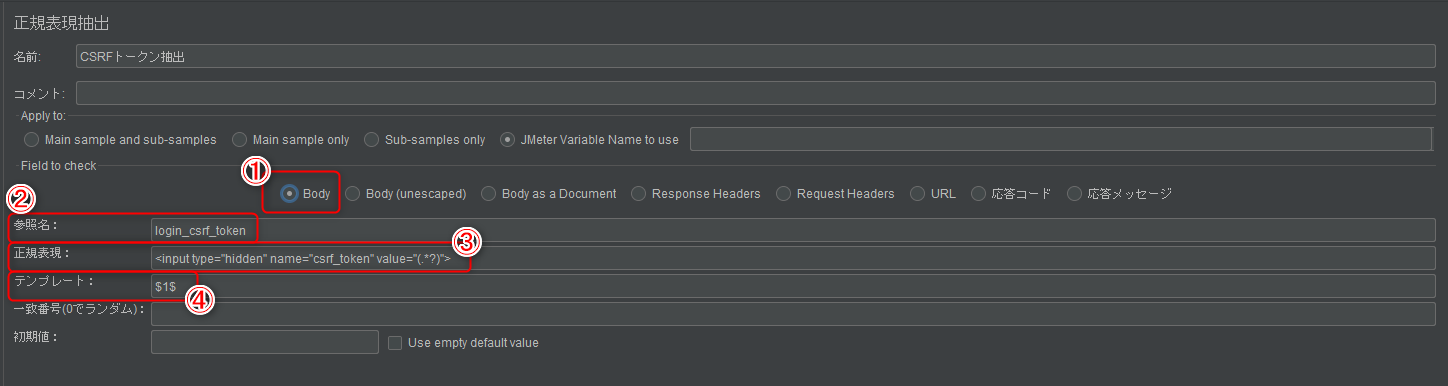
① Field to check
Select the value you want to extract. This time, select
"Body" *This is because we will use the response body of the GET request of the page from which we want to extract the CSRF token.
② Reference name
the variable that will contain the extracted value (in this case, the CSRF token) . This will be used later as the value of the CSRF parameter when sending a POST. Enter any string.
③ Regular expression
Enter the input tag that will contain the CSRF token You can obtain the CSRF token value by
writing the value of the value attribute using a regular expression *The input content in the image above is an example. Please modify it to match the input tag format that you can actually obtain in the response displayed on the screen. If the input tag format is different, the CSRF token value will not be obtained (presence or absence of an id attribute, input error in the name attribute, etc.). This is a particularly troubling point, so if possible, we recommend actually copying the input tag in the HTML using the developer tools and modifying the value attribute before using it.
④ Template
enter "$1$" to use the first value obtained
This completes the regular expression extraction settings
POST request using the acquired token
Next, we will show you how to include the obtained CSRF token in the request parameter and send it via POST
An example of request parameter settings is shown below.
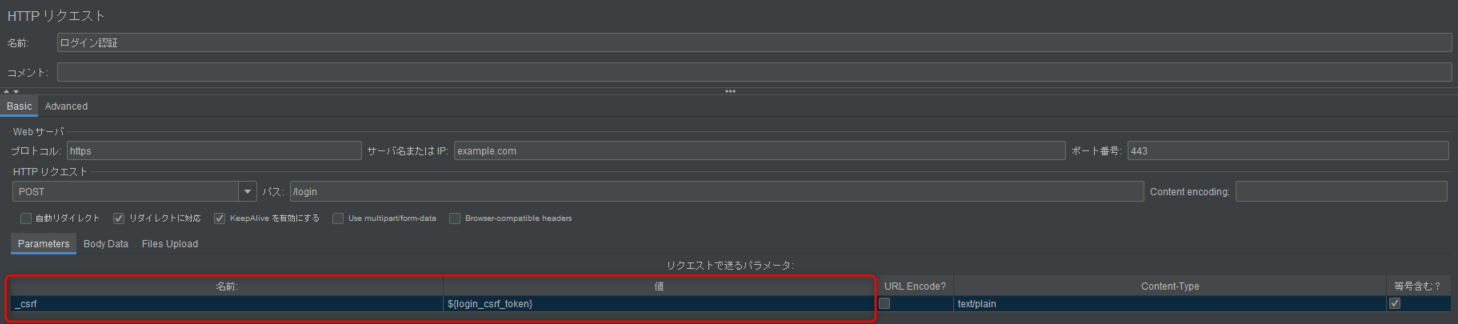
The setup is very simple; you can send the obtained CSRF token by setting a parameter in the format "${reference name set using regular expression extraction}"
All that's left to do is set the request headers and other necessary parameters depending on the situation
Bonus (JMeter settings to remember)
As mentioned at the beginning, I would like to introduce two JMeter settings that you should remember
■ Basic authentication
When performing a load test, if basic authentication is required, you can log in using the "HTTP Authentication Manager."
The HTTP Authentication Manager can be added to any of the "Thread Group," "Simple Controller," or "Initial HTTP Request Sampler" that requires basic authentication. It can be added
by going to

"Add" → "Configuration Element" → "HTTP Authentication Manager." Once the HTTP Authentication Manager has been added, the above screen will be displayed. Enter the "Base URL," "Username," and "Password" to complete the configuration.
■ HTTP Cookie Manager
Next, if your scenario requires cookie retention, you can use cookie information by configuring the "HTTP Cookie Manager." The
HTTP Cookie Manager can also be added to "Thread Group," "Simple Controller," or "Sampler" by selecting "Add" → "Configuration Element" → "HTTP Cookie Manager .

Once added, the above screen will be displayed. However, if you don't have any particular values you want to use in your test, you can use the HTTP Cookie Manager as is.
*The "Discard cookies after each iteration?" option can be checked to discard cookies after each loop.
*After adding the HTTP Cookie Manager, run the scenario and confirm that cookie data is being sent in the request body. This completes the setup.
lastly
I am a member of the system development service site "SEKARAKU Lab."
Beyond offers a one-stop service for everything from server design and construction to operation, so if you have any problems with server-side development, please feel free to contact us.
SEKARAKU Lab: [https://sekarakulab.beyondjapan.com/](https://sekarakulab.beyondjapan.com/)
That's all for today!
Thank you for reading to the end!
 55
55 The person who wrote this article
About the author


