How to use your favorite fonts in Windows on your own website

table of contents
This is Yamada from the development team
CSS frameworks have become more and more popular in recent years, and even those with no design knowledge like me can now create websites that look like they belong.
However, if you don't know how to use them, your website design will likely end up looking similar to other websites.
This time, I'll show you how to use your favorite fonts that you use in Windows on your own website to add a little personality!
*Please be sure to check the license of the font you use!*
What you need
First, install the free software called Woff Converter to convert Windows fonts to web fonts.
Download it from the following website and run "woffconv230.msi."
There aren't many options to select, so all you need to do is agree to the terms of use and select the installation location.
Windows Woff Converter (external link)
Finding font files on Windows
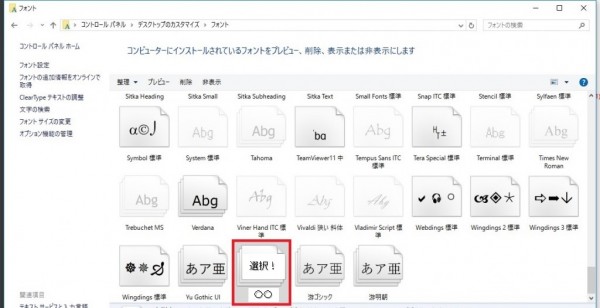
Find the free font you installed on Windows.
The font file is located in " Control Panel > Desktop > Personalization > Fonts ." (For Windows 10)
Just type it into the address bar in File Explorer!
You can navigate to the font file location by entering the above path in the address bar of Explorer, so
this time let's select the desired font from this.

Convert fonts with Woff Converter
Once you've found the font file, it's time to convert it to a "woff" font file for the web.
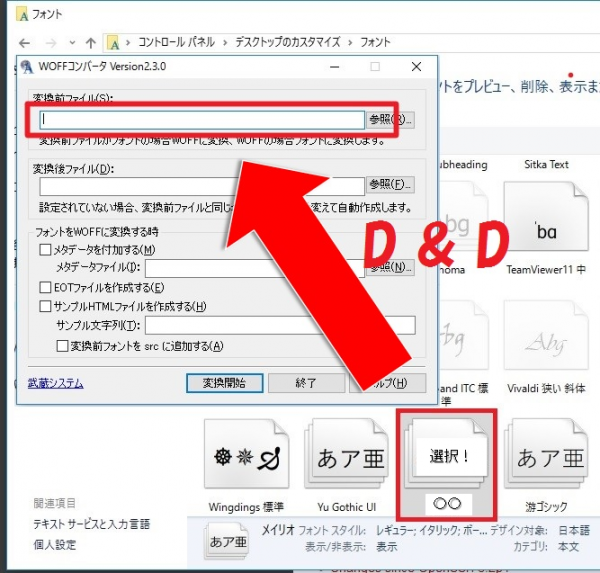
Launch the "woff converter" you just installed
and drag and drop the font file you selected earlier into the "File to convert from" text box.

The converted file will be automatically named based on the original file, so you don't need to enter anything.
You can also just set the output folder.
All you need to do is check "Create EOT file."
Select the other check boxes as appropriate for your purpose.
Once you've done this, click "Start Conversion"!
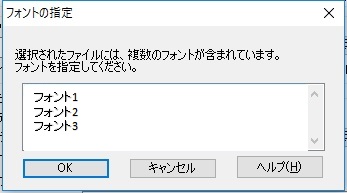
A dialog box titled "Specify Font" will appear, so select the font that best suits your needs
 If the file is created successfully, the message " Conversion successful " will be displayed!
Load the created font with CSS
Finally, let's load the font file we created using CSS and actually reflect it on the website
First, upload the three files you created earlier, "XX.woff," "XX.eot," and "XX.ttf," to the server.
*"XX" is the name you specified when creating the font, or the original font name if it was automatically generated.
Once uploaded, load the font file using the CSS below
@font-face { font-family: "myFont";w src: url("[Upload path]/〇〇.woff") format('woff'), url("[Upload path]/〇〇.eot") format('eot'), url("[Upload path]/〇〇.ttf") format('truetype'); } .myFont{font-family: "myFont";}
*Please change the "〇〇" part of the file name as appropriate
Now you're ready to use the font file you created! All
you have to do is load the font file in your HTML.
<div class="myFont">Text for which you want to change the font</div>
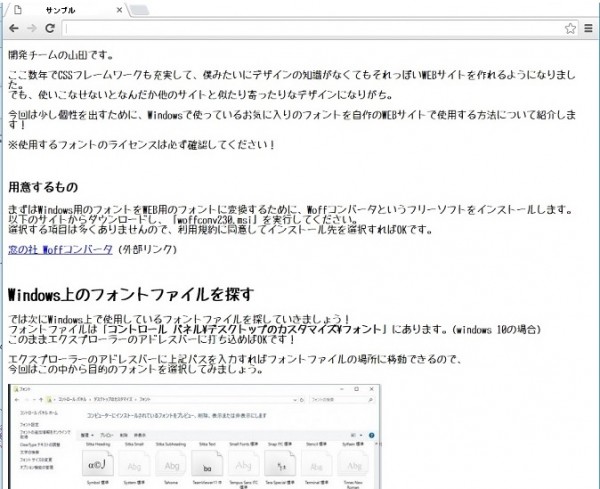
When actually applied to this blog it looks like this!

summary
How was it?
Using this method, you can differentiate your website with just a little effort!
Also, if you apply it, you can load non-standard characters for names created on your PC as non-standard fonts, so
it's perfect for those times when you absolutely need to use non-standard characters on your system!
See you next time!
If you want to consult with a development professional
At Beyond, we combine our extensive track record, technology, and know-how in system development with OSS technology and cloud technologies such as AWS to provide contracted development of web systems with reliable quality and excellent cost performance
We also handle server-side/back-end development and proprietary API collaboration development, making full use of our technology and know-how in building and operating web system/application infrastructure for large-scale, high-load games, applications, and digital content
If you have any problems with your development project, please visit the following website
● Web system development
● Server-side development (API/DB)

 0
0


