[Ansible 2.12] Build an Ansible execution environment for CentOS 6 using Docker in WSL2
table of contents
Hello everyone.
This is Naka from the Systems Solutions Department. Lately, I've been suffering from such severe stomach pain and chills that I haven't been able to sleep, and I've lost all my energy.
This article explains how to "build an Ansible execution environment for operating a CentOS 6 environment using Docker within WSL2."
Although it is strongly recommended to migrate older environments such as CentOS 6 environments, they may remain in place for various reasons
In those environments, the current version of Ansible is basically incompatible.
Therefore, we have prepared a procedure for setting up an older version environment using Docker, which is easy to use.
I will explain the prerequisites and then explain the steps step by step
Introduction
- We do not recommend using CentOS 6. This is merely a temporary workaround for situations where you are forced to use CentOS 6 .
- is an unsupported version.
Thisintended as a temporary workaroundand is not recommended.
Execution environment
■ Linux environment
OS: AlmaLinux release 8.5 (WSL2 environment)
Shell: Bash
Docker: 26.1.0, build 9714adc■ Windows Environment
OS: Windows 11 Pro (Version: 23H2)
Language setting: Changed to Japanese■ CentOS 6 environment (Vagrant + VirtualBox)
OS: CentOS 6.9 (bento / centos-6.9)
Vagrant: 2.4.1
VirtualBox: 7.0.18 r162988 (Qt5.15.2)
IP: 192.168.33.15
Prerequisites
Q.Why do I need a separate Ansible environment for the CentOS 6 environment?
A. The new version of Ansible (2.13 and later) no longer supports Python 2.6, which is the standard for CentOS 6, so you can no longer run playbooks
Q. Why Docker in WSL2?
A. The main Ansible environment I use is AlmaLinux 8 (WSL2), and it's easier to run it in that environment, including managing the playbooks
Q.Docker instead of pyenv?
A. Summary: Docker is more convenient and easier from the author's perspective
- (Because it is not used frequently) If you use Python version control, it will be troublesome to reconstruct it when moving to another PC
- Dockerfiles are more reusable and can be used by others to create the same environment
- Working with Docker is more like an infrastructure engineer than working with Python version control
funTo become knowledgeable- (From my perspective) Even if I forget what I put in, it's very easy to just look at the Dockerfile and figure it out
Q.Why Ansible-core 2.12?
A. 2.12 is the latest minor version of Python on managed nodes that is compatible with 2.6
* If you absolutely need to run Python 2.7 or 3.7 on the control node, please use 2.11
Construction procedure
1. WSL2 preparation
This is not the main topic of this article, so I will explain it briefly

Enable "Virtual Machine Platform" in "Windows Features"
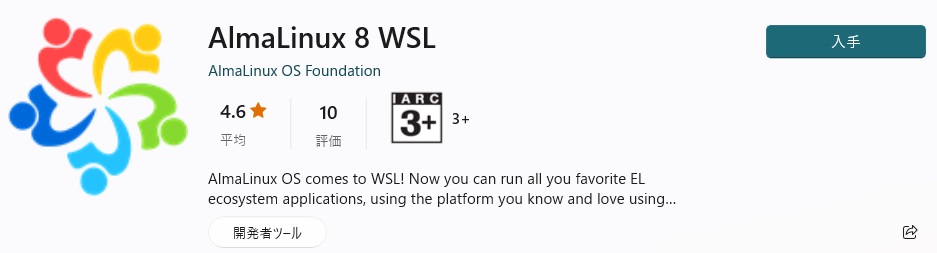
Then, download "Windows Subsystem for Linux" and "AlmaLinux 8 WSL" from the Microsoft Store
You can use it by starting "AlmaLinux 8 WSL" and setting the username and password for the first time
2. Docker preparation
First, install Docker
#dnf config-manager --add-repo https://download.docker.com/linux/centos/docker-ce.repo #dnf install docker-ce #systemctl start docker #systemctl enabled docker #docker --version Docker version 26.1.0, build 9714adc *In the author's environment
3. Create a Dockefile
Choose a directory to work in and create a Dockerfile there
I am working in the location /home/AlmaLinux/docker-study/, but please feel free to configure it as you wish
# Specify image FROM almalinux:8.9 # Change the time scale to Japan time RUN ln -sf /usr/share/zoneinfo/Asia/Tokyo /etc/localtime # Install required packages RUN dnf -y install \ python38 \ python38-devel \ sshpass \ openssh-clients \ && rm -rf /var/cache/dnf/* \ && dnf clean all # Install Ansible2.12 RUN pip3 --no-cache-dir install ansible-core==2.12.10 # Specify bind mount destination & automatically create # & Default destination when accessing container WORKDIR /work
FROM almalinux:8.9
It matches the distribution major version used in WSL2
RUN ln -sf /usr/share/zoneinfo/Asia/Tokyo /etc/localtime
It is set to Japan time
If I leave it in UTC, it will be out of sync and it will be a hassle when I want to keep logs, so I would like to align the time for now
RUN dnf -y install \
AlmaLinux 8 Appstream repository, python3.8 (3.9 is also fine)
And, since ssh-related sshpass and openssh-client are sometimes not included in the image, install them
&& rm -rf /var/cache/dnf/* \
Delete the dnf (≒yum) cache to reduce the size of the Docker image
It seems that the dnf clean all command described below may not remove the files, so first try removing them manually
&& dnf clean all
Delete the dnf (≒yum) cache to reduce the size of the Docker image
Why "&&" and not "RUN"?
To reduce the size of the Docker image
Each RUN operation adds a new layer to the Docker image, increasing its size.
Therefore, we consolidate parts that can be handled in a single RUN to reduce the size.
RUN pip3 --no-cache-dir install ansible-core==2.12.10
Since Ansible 2.10 and later versions have a different format than versions 2.9 and earlier, we specify the lightweight core "ansible-core".
Within that, we specify 2.12.10, the latest release of 2.12.
If you want to reuse a Playbook you've been using for a long time, it's best to specify "ansible==2.9.27 (or the version you used before)" for compatibility reasons.
*If the version is too old, it will likely require Python 2 or 3.8 or earlier, so adjustments will be necessary.
Supplement: About Collection
Since "ansible-core" is the minimum configuration, only the basic collection (ansible.builtin) can be used
If you want to use "ansible-core 2.12.10" while using many modules, it is recommended to specify "ansible==5.10.0", a community package that includes "ansible-core 2.12.10" and related modules
However, this will increase the image size.
Also, if your Playbook is written in a way that installs the necessary Collections, then using only "ansible-core" should be fine.
Since the collection relationships and version compatibility are complicated, this article will only use the basic "ansible-core"
WORKDIR /work
This specifies the working directory within the Dockerfile.
In this case, it specifies the directory where the object will be placed when performing a bind mount.
Specifying a directory with WORKDIR eliminates the need to use mkdir (a Linux command), as it is created automatically, reducing the amount of code to write.
Furthermore, the settings persist even when entering a container, allowing you to start working directly from the bind mount point.
4. docker build
Create an image from the Dockerfile
#docker build -t ansible2.12:v1 -f Dockerfile . #docker images REPOSITORY TAG IMAGE ID CREATED SIZE ansible2.12 v1 58f4663b655b 14 seconds ago 286MB
I was able to successfully create an image with the repository name "ansible2.12" and tag name "v1"
5. docker run (bind mount)
I use WSL2 and VScode in conjunction to write playbooks and other things
Therefore, we will create a directory called work for working with Ansible 2.12 and bind-mount it as a shared directory
#cd /home/username/docker-study *Verification directory where the author's work is placed #docker run -it --name Ansible2.12 --mount type=bind,src=./work,dst=/work ansible2.12:v1
I wrote the code using a relative path, `src=./work`, for blog publication purposes, so please run the above commands in a location where the "work" directory exists.
Using an absolute path is also fine, so it's up to your preference.
6. Launch the execution environment
Now let's run it
#docker run -it --name Ansible2.12 --mount type=bind,src=./work,dst=/work ansible2.12:v1 [root@cf3c2fa0c4d8 work]#
The container was connected to simultaneously with execution using the "-it" option.
WORKDIR is also working, and it appears we've moved to "/work".
7. Ping Test
As a quick test to see if your Ansible is OK, try using the ping module from the standard collection in ansible-core (ansible.builtin)
[root@cf3c2fa0c4d8 work]# ansible -m ping -i hosts targetnode [DEPRECATION WARNING]: ansible-core 2.13 will require Python 2.7 or newer on the target. Current version: 2.6.6 (r266:84292, Aug 18 2016, 15:13:37) [GCC 4.4.7 20120313 (Red Hat 4.4.7-17)]. This feature will be removed in version 2.13. Deprecation warnings can be disabled by setting deprecation_warnings=False in ansible.cfg. targetnode | SUCCESS => { "ansible_facts": { "discovered_interpreter_python": "/usr/bin/python" }, "changed": false, "ping": "pong" }
There is a warning, but since the target (managed node) is CentOS 6 (Python 2.6), it
is simply notifying you that "ansible-core 2.13 and later can only use Python 2.7 or later (warning)," so you can ignore it.
The ping is successfully received in the CentOS 6 environment used for verification
Completion
This completes the process
All that's left to do is place the playbook and inventory and you're ready to go
In my next article, I will write about Ansible for CentOS 6
lastly
I tried to quickly do it with Ansible in a CentOS 6 environment, but it wouldn't work with the current version.
This article was written to avoid the frustrating situation of having to manually set up a dedicated environment and perform the necessary verifications, which is a hassle. I prepared in advance to avoid this.
I chose Docker because it seemed like the quickest solution, and it really is easy and convenient. (I'll overlook the operational aspects for now.)
I think I'll be able to use it even more in my infrastructure engineering work going forward.
I hope this article provides some useful knowledge and information to those who read it.
Thank you for reading this far.
Reference materials
Releases and maintenance | Ansible official documentation
: https://docs.ansible.com/ansible/latest/reference_appendices/release_and_maintenance.html
Dockerfile Reference — Docker-docs-ja 24.0
https://docs.docker.jp/engine/reference/builder.htmlDocumentation
Using Bind Mounts | Docker Documentation
https://docs.docker.jp/storage/bind-mounts.html
Layers — Docker-docs-ja 24.0 Documentation | Docker Documentation
https://docs.docker.jp/build/guide/layers.html
For cloud/server design and construction
(service page here)
 33
33 The person who wrote this article
About the author


