Use CentOS 7 on a VM for desktop purposes
table of contents
Hello.
I'm Mandai, the Wild team member in charge of development.
I finally updated the virtual environment I use with Vagrant to CentOS 7.
I want to stop cramming my development environment into a VM, but I'm still stuck with it because I'm used to it.
It took a bit of effort to get everything together, so I put together some work notes
2018/03/05 Some of the links in the rpm files retrieved by wget were broken, so we changed them to the URL of an alternative server
Try starting the VM via vagrant
If you use vagrant, just run the following command and it will start automatically
vagrant init centos/7; vagrant up
The above command will download the VM image on Atlas and automatically start it up
After that, you can reach the console either via SSH or by enabling gui.on = true in the Vagrantfile
Start with the default vagrant user (login as vagrant / vagrant)
Once you have successfully logged in, you can proceed to change your settings
Changing keyboard settings
On a US keyboard, it's difficult to find the colon, so the first thing I do is change the keymap
sudo localectl set-keymap jp106 sudo localectl set-keymap jp-OADG109A
Language settings
Since we are building it for desktop use, we will also set the language. It seems that the convention is to change LANG via localectl
sudo localectl set-locale LANG=ja_JP.utf8
Desktop Installation
I also want a GUI, so I'll install the package:
sudo yum -y groupinstall "GNOME Desktop"
Changing the runlevel
Starting with CentOS 7, initd was replaced by systemd.
Be aware that with systemd, the concept of runlevels is already outdated.
Instead, it's replaced by the concept of targets.
To change the target at startup, you need to modify the following symbolic link accordingly.
The link destination is located in /lib/systemd/system.
/etc/systemd/system/default.target
However, since this is a transition period, targets corresponding to each runlevel are provided in /lib/systemd/system.
It's a user-friendly design, even for older users.
The following is a list of targets corresponding to each runlevel.
| runlevel0.target -> poweroff.target |
| runlevel1.target -> rescue.target |
| runlevel2.target -> multi-user.target |
| runlevel3.target -> multi-user.target |
| runlevel4.target -> multi-user.target |
| runlevel5.target -> graphical.target |
| runlevel6.target -> reboot.target |
You can tell what the runlevel has changed by looking at the destination of the symbolic link.
systemd doesn't just control the runlevel; it replaces initd, so there's a lot of new knowledge you need to acquire, but I guess that's just how it is.
Incidentally, the introduction of systemd caused quite a stir in the Linux industry, with a lot of fuss and trouble.
Our very own Linus Torvald was apparently very upset, and I vividly remember him hurling a lot of foul language at the systemd developers.
So, in fact, we're saying goodbye to chkconfig.
From now on, let's use the systemctl command instead of the chkconfig command!
Install git
Without git, you won't be able to get the source from the repository, so you'll need to install it
sudo yum -y install git
Install mozc
Now that I've talked about some pretty fundamental aspects of servers, like runlevels, I'll suddenly get a bit more casual, but when I type in Linux, I use mozc
Setting up Mozc requires multiple RPMs, and in CentOS 6, I used to create a batch file to install them all at once. However, I couldn't install them using the same RPMs, so I searched everywhere for new RPMs and arrived at this method.
The RPMs needed to use Mozc via IBus are scattered in various locations and are difficult to find, so to make installation quick, run the following command.
wget ftp://mirror.switch.ch/pool/4/mirror/centos/7.4.1708/os/x86_64/Packages/protobuf-2.5.0-8.el7.x86_64.rpm wget ftp://ftp.pbone.net/mirror/archive.fedoraproject.org/fedora/linux/releases/19/Everything/x86_64/os/Packages/z/zinnia-0.06-16.fc19.x86_64.rpm wget ftp://ftp.pbone.net/mirror/archive.fedoraproject.org/fedora/linux/releases/19/Everything/x86_64/os/Packages/z/zinnia-tomoe-0.06-16.fc19.x86_64.rpm wget ftp://ftp.pbone.net/mirror/archive.fedoraproject.org/fedora/linux/releases/19/Everything/x86_64/os/Packages/i/ibus-mozc-1.10.1390.102-1.fc19.x86_64.rpm wget ftp://ftp.pbone.net/mirror/archive.fedoraproject.org/fedora/linux/releases/19/Everything/x86_64/os/Packages/m/mozc-1.10.1390.102-1.fc19.x86_64.rpm sudo yum localinstall -y ibus-mozc-1.10.1390.102-1.fc19.x86_64.rpm mozc-1.10.1390.102-1.fc19.x86_64.rpm protobuf-2.5.0-8.el7.x86_64.rpm zinnia-0.06-16.fc19.x86_64.rpm zinnia-tomoe-0.06-16.fc19.x86_64.rpm
The basic approach is to use RPMs for Fedora 19. While there's plenty of information available if you search for the reasons, essentially, CentOS 7 is built on the code of Fedora 19 and Fedora 20.
The main reason for using Fedora 19 RPMs is that the ibus version installed in CentOS 7 is similar to that of Fedora 19.
If you are replacing ibus, it may be possible to use the latest mozc (unconfirmed)
March 5, 2018 Update:
Since I've left this for a long time, it seems some RPMs are no longer downloadable, so I've slightly changed the download source for the wget command above.
Basically, it searches from rpm.pb.net, but since searching every time is troublesome, I've also included the URL of the page listing the RPM links.
Additional notes end here
Installing Google Chrome
Firefox is installed by default, but if your goal is web development, I think using Chrome's Development Tools would be more convenient.
Chromium is also an option, but I'd like to try Chrome, which is much easier to install than it was in CentOS 6.
Back when I was using CentOS 6, installing Chrome was quite a chore because the glibc version was too old.
Automatic updates weren't supported either.
From now on, just like Windows, you will be able to use the latest version automatically
The method is simple:
this download pageand click the "Download Chrome" button.
The page will automatically read your operating system and provide you with the correct link to the RPM package.
Select the RPM file you want to download and wait for the download to complete.
Once complete, double-click the rpm file in the file manager to launch the application installer. Press the Install button and once administrator privileges are authenticated, you're done!
So, do you do this every time?
This leads to the question.
If you're going to do this seriously, there are provisioning tools like Chef and Ansible, but Vagrant also offers the option of shell scripts.
After all, you can do it with a text editor. It feels very convenient.
The following commands are a shell script that takes the work I have written down so far and turns it into a shell script
#! /bin/bash # install chrome function install_chrome { cat << CHROME > /etc/yum.repos.d/google-chrome.repo [google-chrome] name=google-chrome - \$basearch baseurl=http://dl.google.com/linux/chrome/rpm/stable/\$basearch enabled=1 gpgcheck=1 gpgkey=https://dl-ssl.google.com/linux/linux_signing_key.pub CHROME sudo yum -y install google-chrome-stable } # install mozc function install_mozc { cd ~ cat << MOZC > mozc_required_rpms.txt ftp://mirror.switch.ch/pool/4/mirror/centos/7.4.1708/os/x86_64/Packages/protobuf-2.5.0-8.el7.x86_64.rpm ftp://ftp.pbone.net/mirror/archive.fedoraproject.org/fedora/linux/releases/19/Everything/x86_64/os/Packages/z/zinnia-0.06-16.fc19.x86_64.rpm ftp://ftp.pbone.net/mirror/archive.fedoraproject.org/fedora/linux/releases/19/Everything/x86_64/os/Packages/z/zinnia-tomoe-0.06-16.fc19.x86_64.rpm ftp://ftp.pbone.net/mirror/archive.fedoraproject.org/fedora/linux/releases/19/Everything/x86_64/os/Packages/i/ibus-mozc-1.10.1390.102-1.fc19.x86_64.rpm ftp://ftp.pbone.net/mirror/archive.fedoraproject.org/fedora/linux/releases/19/Everything/x86_64/os/Packages/m/mozc-1.10.1390.102-1.fc19.x86_64.rpm MOZC xargs -P 10 -n 1 wget -nv < mozc_required_rpms.txt sudo yum localinstall -y ibus-mozc-1.10.1390.102-1.fc19.x86_64.rpm mozc-1.10.1390.102-1.fc19.x86_64.rpm protobuf-2.5.0-8.el7.x86_64.rpm zinnia-0.06-16.fc19.x86_64.rpm zinnia-tomoe-0.06-16.fc19.x86_64.rpm && \ rm -f ibus-mozc-1.10.1390.102-1.fc19.x86_64.rpm mozc-1.10.1390.102-1.fc19.x86_64.rpm protobuf-2.5.0-8.el7.x86_64.rpm zinnia-0.06-16.fc19.x86_64.rpm zinnia-tomoe-0.06-16.fc19.x86_64.rpm mozc_required_rpms.txt } # change keyboard setting function change_keymap { sudo localectl set-keymap jp106 sudo localectl set-keymap jp-OADG109A # Change to keymap that supports Windows keys } # change localectl function change_locale { sudo localectl set-locale LANG=ja_JP.utf8 } # Install GNOME Desktop function install_gnome_desktop { sudo yum -y groupinstall "GNOME Desktop" } function change_default_target { cd /etc/systemd/system sudo ln -sf /lib/systemd/system/graphical.target default.target } change_locale change_keymap install_gnome_desktop && change_default_target install_chrome install_mozc
Thank you for your opinion that we should release it from the beginning!
The initial setup is mostly complete, but there are some issues
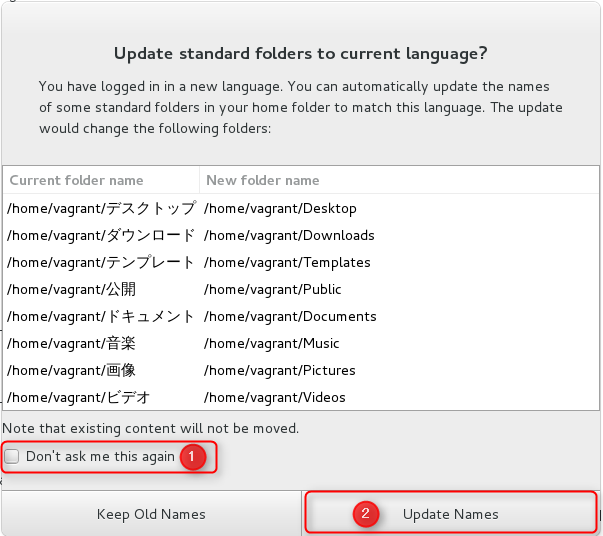
- This means that the folder names of system-related directories in the user area (Desktop/Documents/Downloads, etc.) will be in Japanese
- I can't input Japanese using the half-width/full-width key
To address the first issue, first run the following command to display the dialog:
LANG=C xdg-user-dirs-gtk-update
Just click on the images in order
To address the second issue, run the following command to display the dialog:
ibus-setup
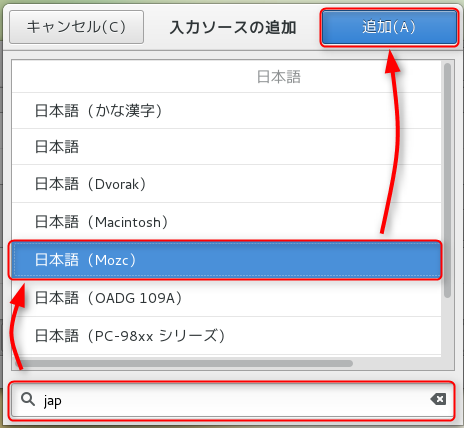
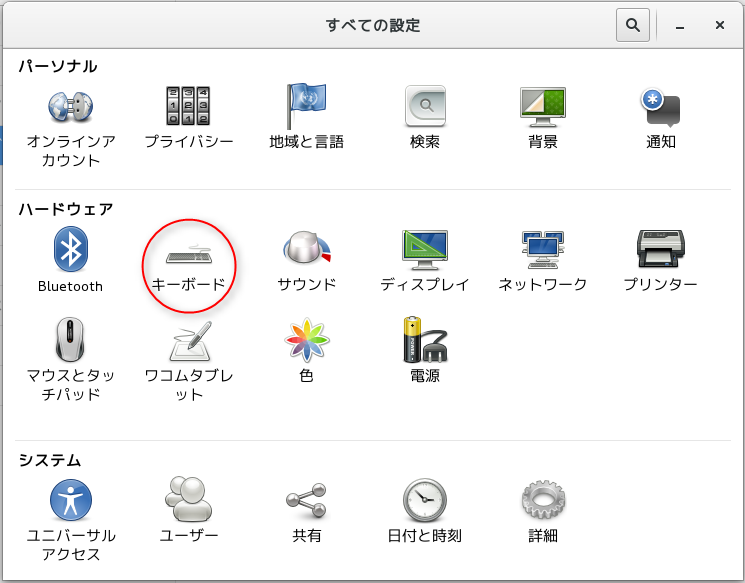
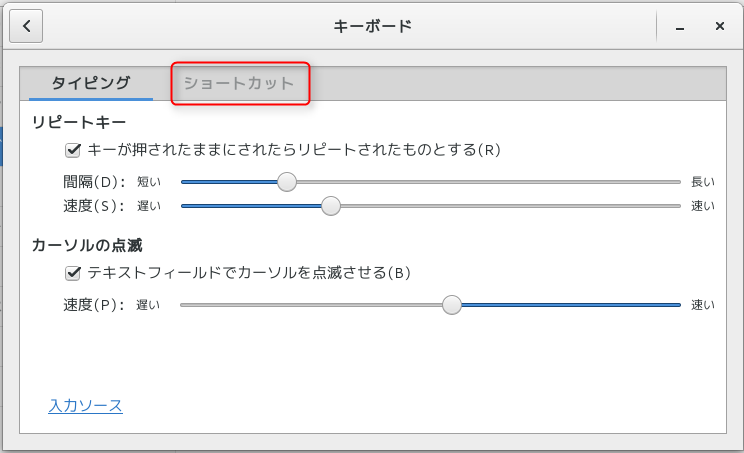
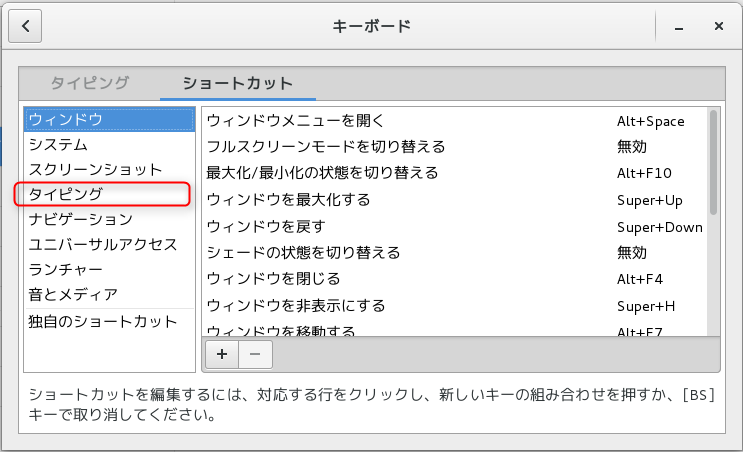
Next, proceed through the dialogue in the order shown in the image

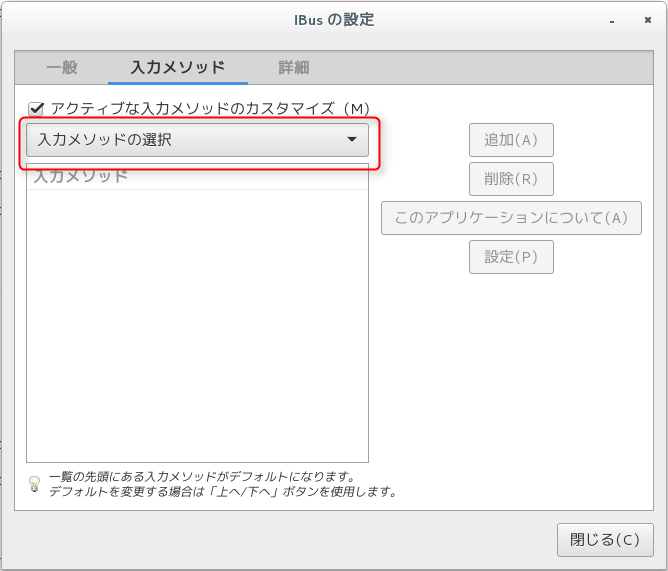

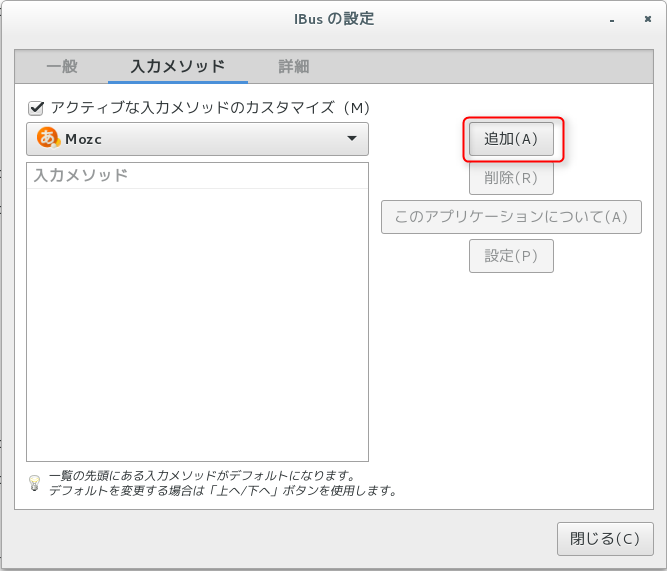
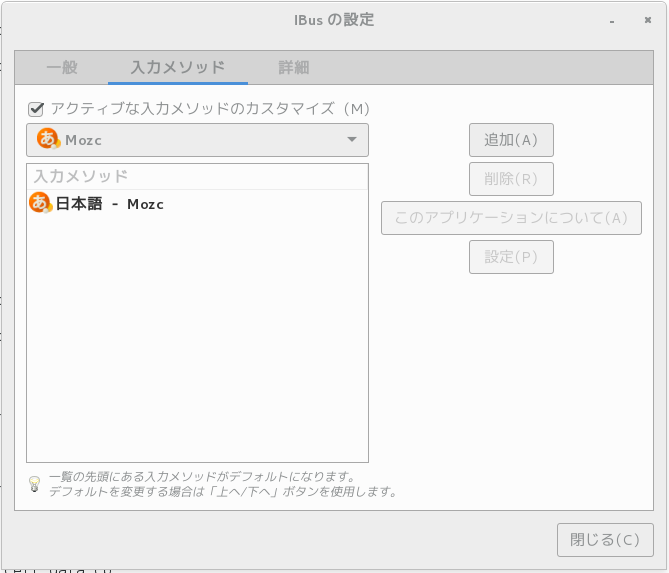
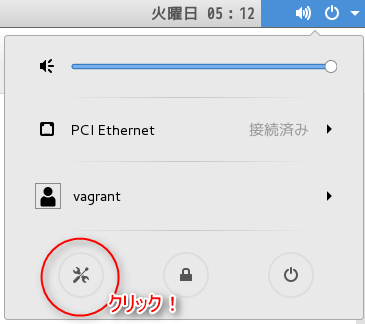
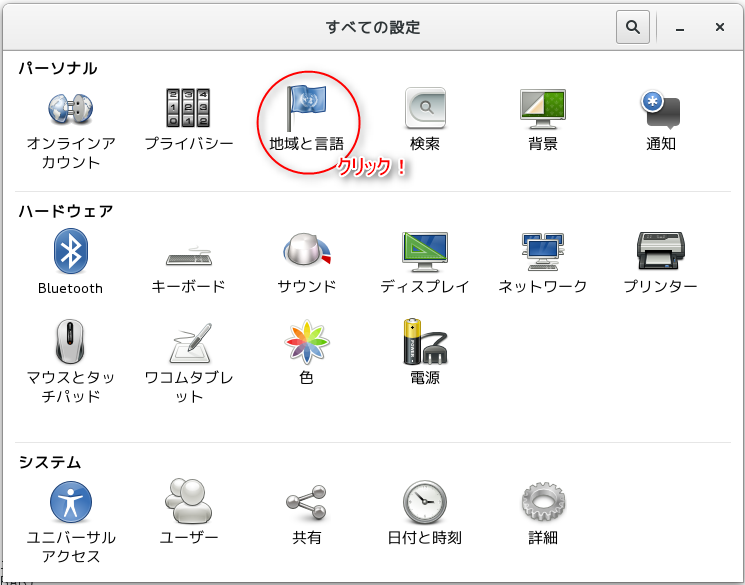
Add mozc to your input sources. You can access it from the system tray in the top left

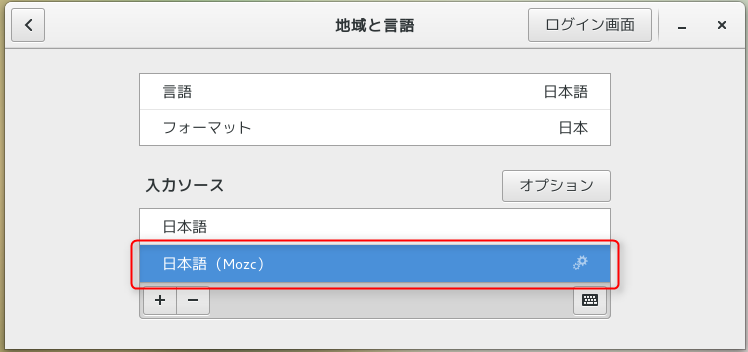
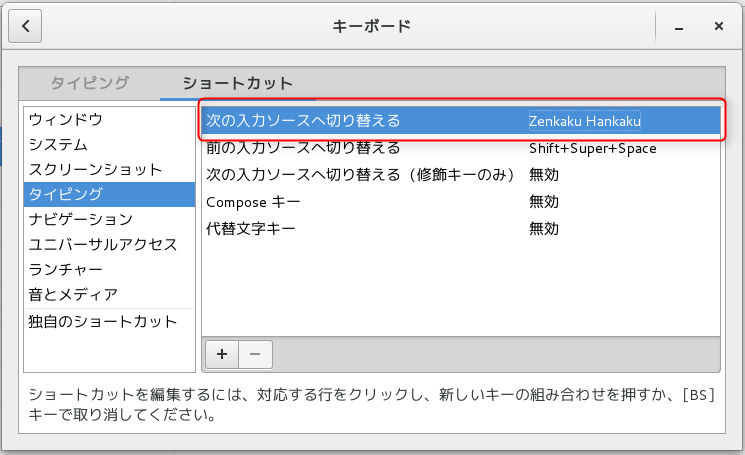
Change the shortcut settings
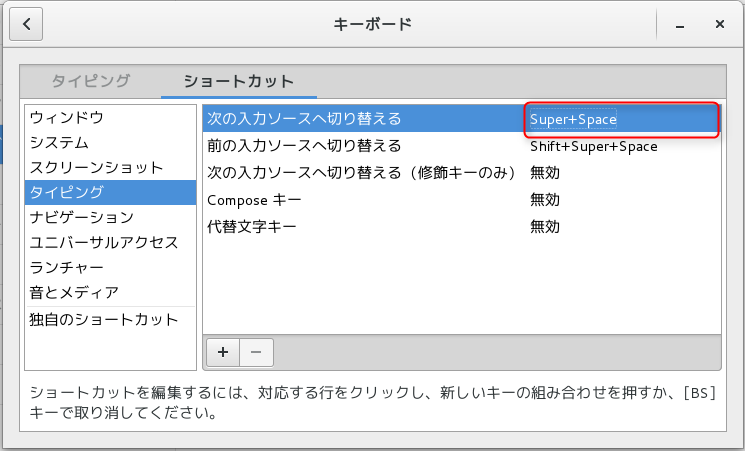
Click on the area circled in red and press the Half-width/Full-width key
It's simple, but it's surprisingly deep, so even if you know where it is, you can still get lost
(Bonus) Installing Visual Studio Code
The procedure is the same as for Chrome.
This editor is currently my favorite, so even if you don't use it, it's a must-have.
the Visual Studio Codewebsite, you'll find a link to an RPM package, so download the RPM and install it using the application installer.
On CentOS 6, it cannot be installed due to compatibility issues with the glibc version
That's all
 00
00 The person who wrote this article
About the author


